Instruction 7
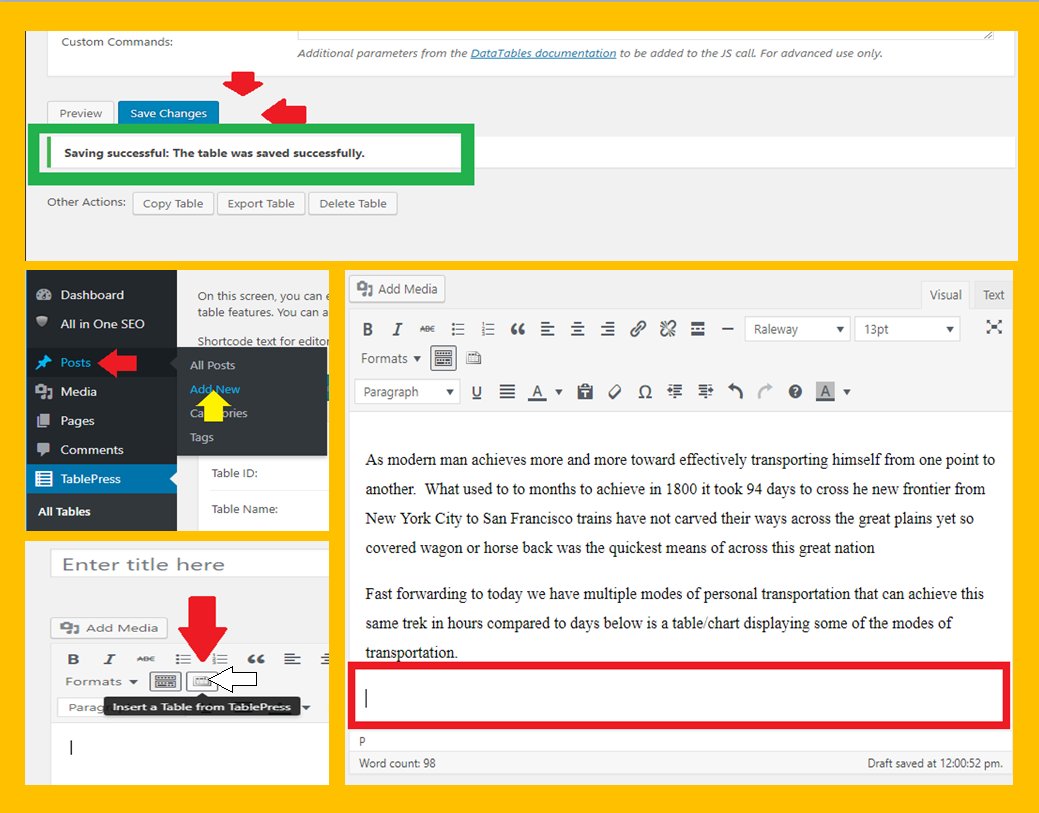
Alright now we are going to look at the top screen shot of image 7 where it shows the message that will be produced once the changes have been saved and applied to the table you are editing notice red arrows are pointing to where the spinning dot once was but since the saves have been completed it has since disappeared. Furthermore, once everything has been saved the message
“Saving successful: the table was saves successfully “ popping up under the two buttons.
Moving to the middle left screen shot which shows going to create a post to insert (the table we just created) into; first by hovering over the posts tab in the left menu (red arrow) then clicking on “and new” (the yellow arrow) just like we normally do when starting a new post.
Are you seeing the similarity to the table press procedures of starting a new table and staring a new post the same applies when editing you hit all tables then edit the table you want to edit just like with a post or a page they all follow the same general steps or procedures.
Now the lower left screen shot in image 7 is showing the new table insertion tool icon, pointed out by the red arrow, and the little pop up text when you hover on top of the icon with your curser or mouse. Then in the screen shot on the bottom right half of the image 7 I entered some text and picked a radium spot where I want my table to appear; within the red box area.

Image 7
Instruction 8
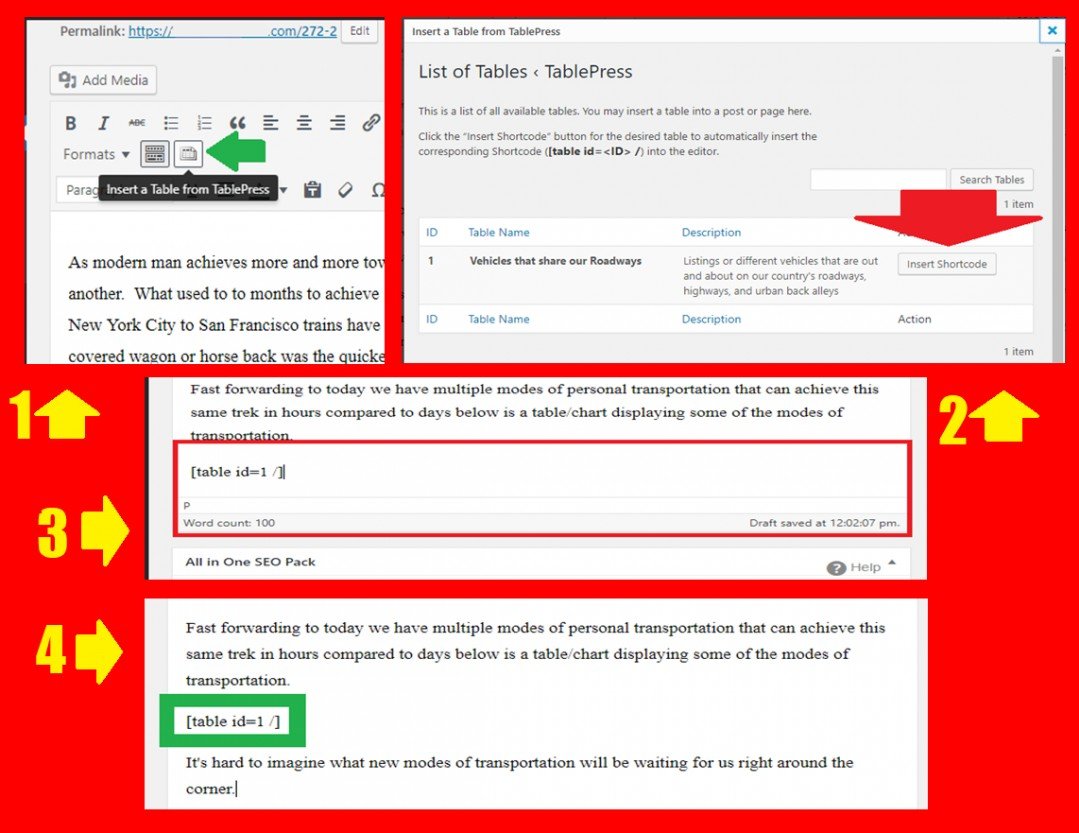
Okay we decided where we what the table so now let’s go through the process of inserting the table (its much like inserting a link or image the same basic operations will take place), first we click on the table insert tool icon indicated by the green arrow in screen shot 1 of image 8 (upper left hand corner).
Then when the table insert pop up window appears we locate the table we want to insert and click on the “Insert Shortcode” button shown by the red arrow in screen shot 2 of image 8.
Once we click on the insert shortcode button that window will close and we will be back to the post and the spot where we wanted to enter the table will now have the text code for the table indicated by the big red square area in screen shot 3 in image 8.
Then in screen shot 4 the table shortcode is inserted into the post incased in the green rectangle, and we simply can stop our content their or we can continue entering more text after the table it we want to, like shown in the demo example in image 8.

Image 8
Instruction 9
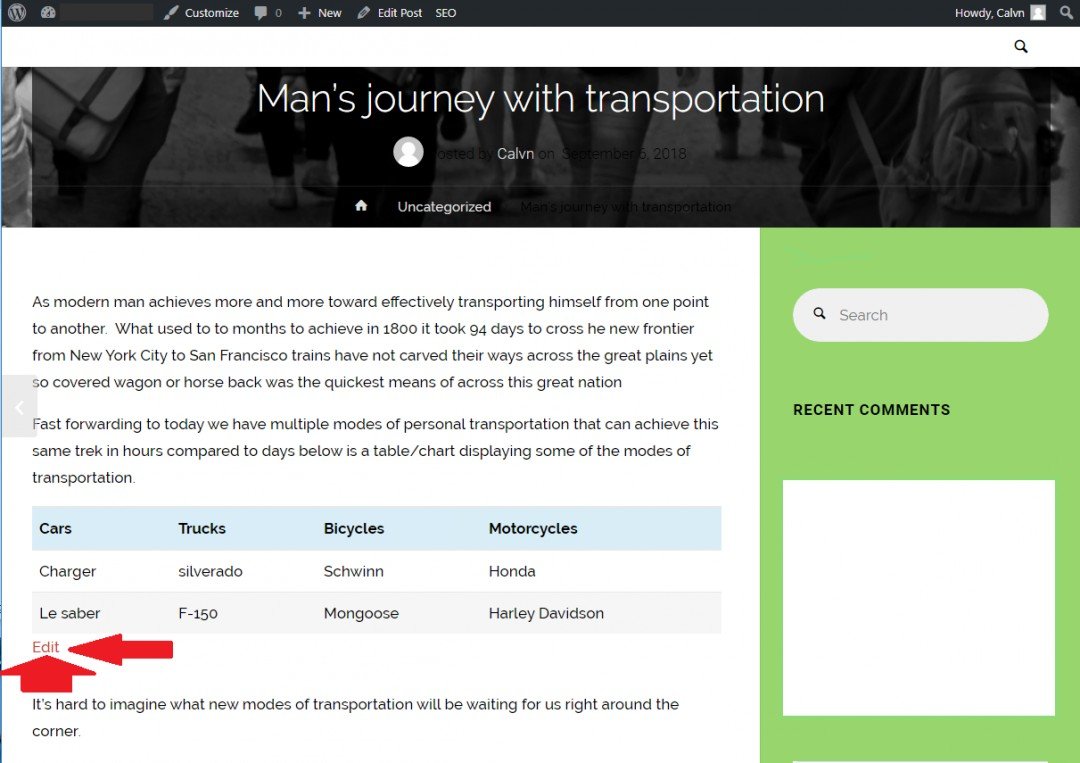
Finish creating the post as normal, publish the post just like normal, and then view the post. Image 9 displays this table and how it will look on the webpage, see how the text is above and below the table much like when inserting an image that is justified center in your post. The edit button pointed to by the red arrows only shows for us in our dashboard area, it does not show on the website that is their so we can quickly return back to the table and it will return us to the TablePress table editing mode with one button for this table.

Image 9
Alright now you should have the first table inserted in you web site so every one can see it, read it, if you installed links in it use it to navigate throughout your website while they visit.
Now that we have the table installed lets learn some ways to edit the table. Just in case you are using it to organize your affiliate links the prices might change colors of models change often. There are many things that could change that would require you to have to edit the information you have posted.
Janelle
Thanks for this training. This looks like an interesting plug in.
Tried and True
Elaine


