Instruction 10
Okay we made the table now after looking at it on the website we decided we don’t want the headers on it, since it is a small table we don’t want each line to be different colors, and we still don’t want the table title to show.
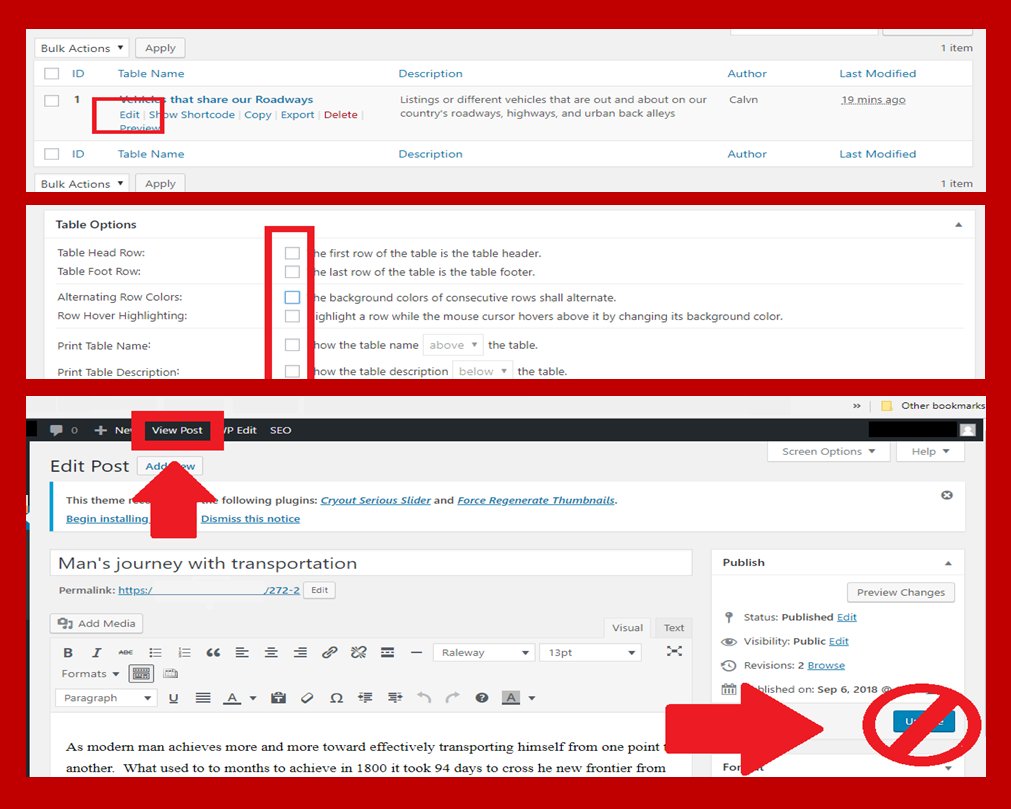
So we can click on the edit button shown in image 9 or we can go back to the website’s dash board, hover over the table tab in the left menu, then click on “all Tables” then as shown in image 10 the top screen shot wrapped in a red square, we can click on the “edit” button for the table we want to make the editing changes to (just like for a post or page).
Then the center screen shot of image 10, shows all the boxes in the table options section of the TablePress table edit page now empty (or off) also wrapped in red. We then click on the save changes at the bottom or top of the table edit page than I like to go back into the post the table is inserted in and view my changes to the table from the webpage and indicated in the bottom screen shot of image 10 viewing to see what the table looks like now on the website’s page.

Instruction 11
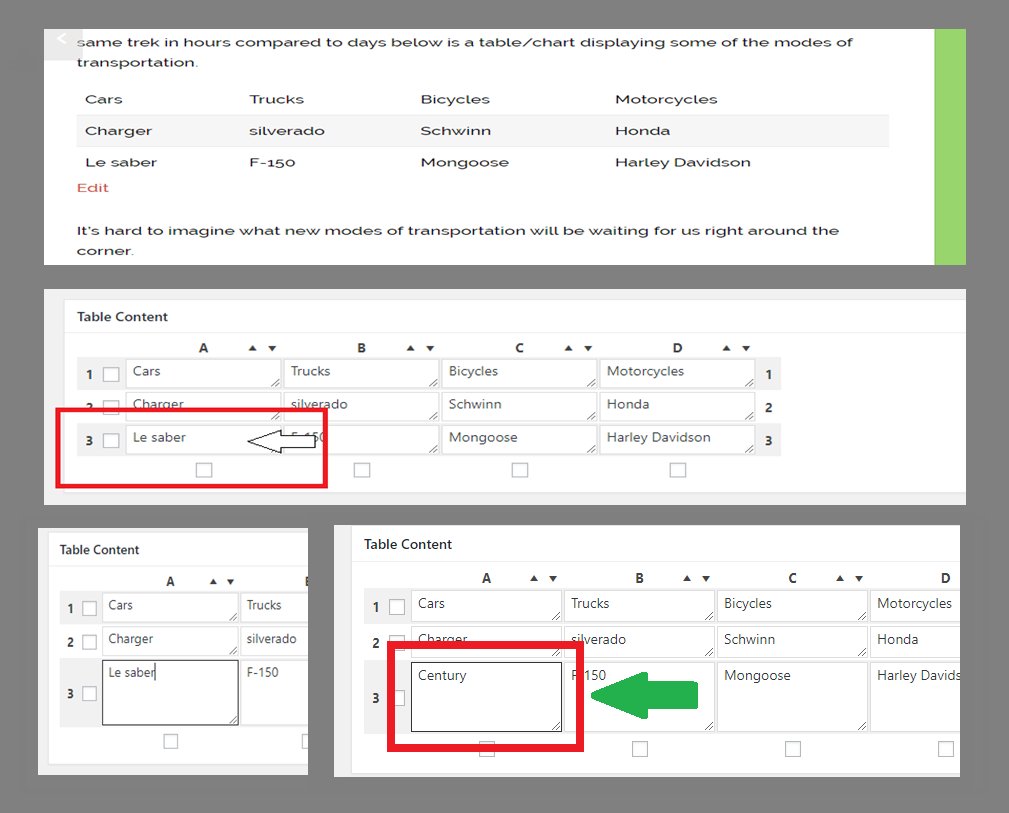
Looking at image 11 in the top screen shot we see how the table now looks without headers to each of the columns, I left the textual content of the header cells just so you could easily see the difference between having headers and not having headers over the columns.
So after the table has been installed and say we notice we made a mistake and want to change the text of one of the table’s cells we simply click on the edit button from the page view mode and then click on the cell we need to make the correction to, the center screen shot shows what the cell will look like, outlined in a red rectangle, in table edit mode prior to clicking on the cell.
Then the left bottom screen shot of image 11 shows how the cell expands and gets lightly outlined in black to indicate the cell is active for editing, then in the right bottom screen shot outlined in red and has a green arrow pointing to it, shows the table cell after we made the correction, so then we click on the save changed button, at the top or bottom of the TablePress table editing page.

That was just some basic editing I wanted to show that to you prior to inserting link and Images because i basic understanding of the editing within the plug ins editing page is beneficial when inserting images and links in case something doesn't go right you will know how to remove anything that messes up your table then get help prior to proceeding. Speaking of proceeding onward to the next page.
Janelle
Thanks for this training. This looks like an interesting plug in.
Tried and True
Elaine


