Other TablePress plug in users’ comments about editing tables
The easiest way to create a table of contents with the TablePress plug in is to make a spread sheet in Excel for Windows Office users or Google Sheets for all others including Macs.
From what other TablePress plug in users say it is easier to import the table as a pre-made file from your computer, then export the table to do any large amounts of editing, then import the table back into the TablePress plug in, than it is to use the TablePress plug in’s table editor mode’s advanced editor tool especial any large tables (more the 2,000 lines long or 8 columns wide).
Instruction 16
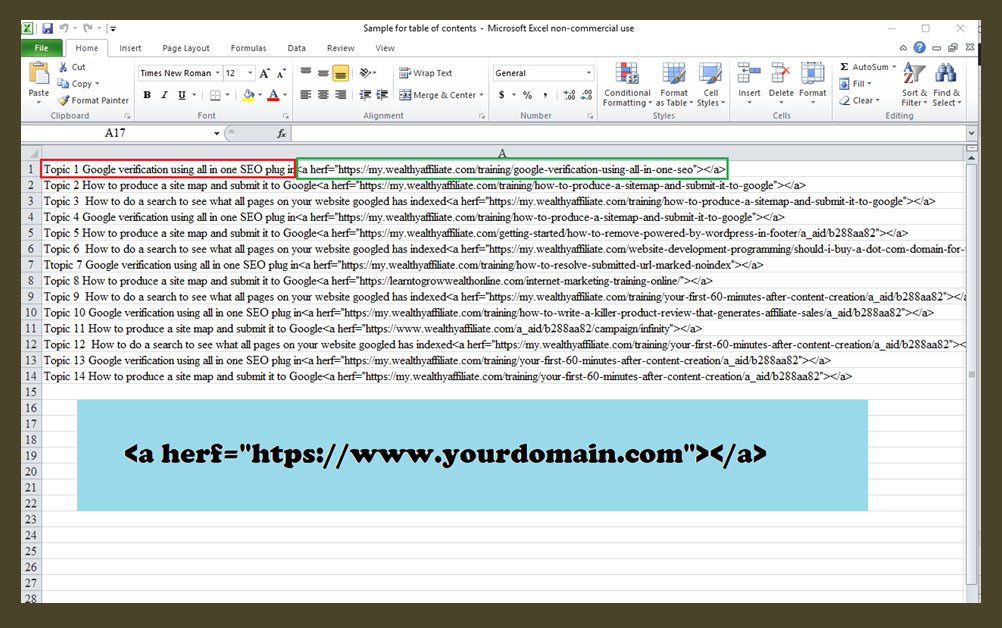
The screen shot in Image 16 shows a Windows Excel spread sheet since I use Windows I will show and explain the different importing and exporting procedures that way a little later.
Also I added the code to use for adding links in your spreadsheets in the light blue box at the bottom of image 16. If you look at the top spread sheet line the visible text is in the red box (while the invisible to the website visitor) code and link is in the green box.

Instruction 17
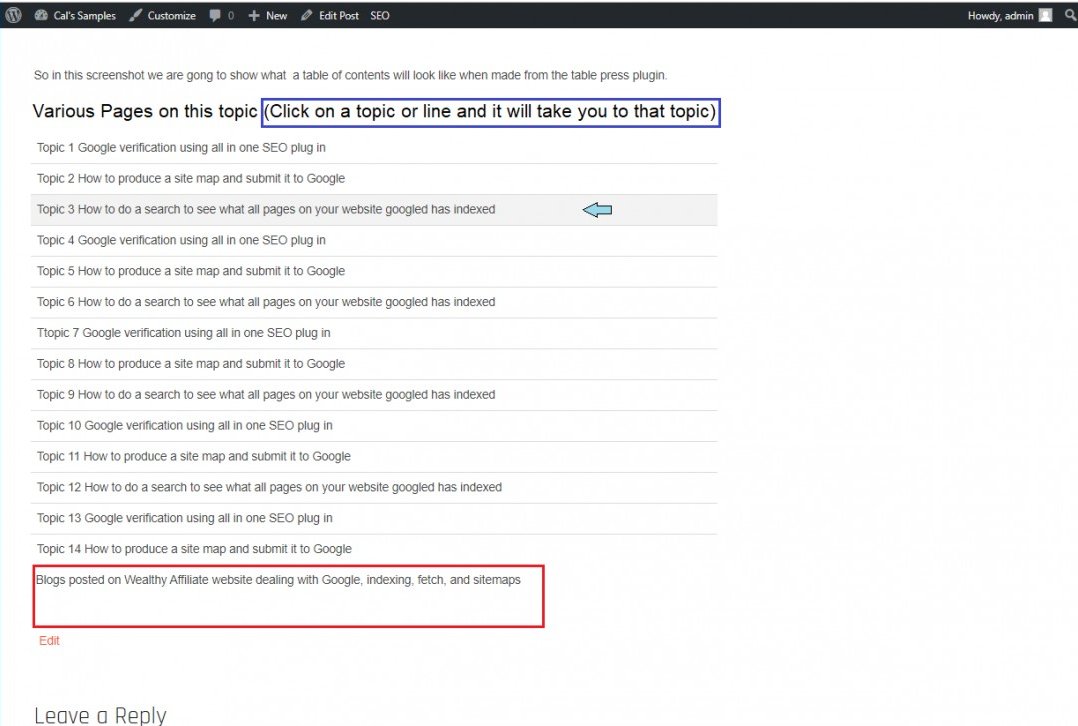
I did not care for the way this table appeared on the web page in image 17 for fear people would not actually realize that each line, as indicated by the blue mouse arrow is highlighting the line it is hovering on, and is an actual link to a new web page of mine on that topic (the example shows WA blog links).
In the blue box I thought the Title and link notification did not look good like it was, so I took the description boxed in red and moved it to see if I could make the table of contents look more professional. So I made some changes

Instruction 18
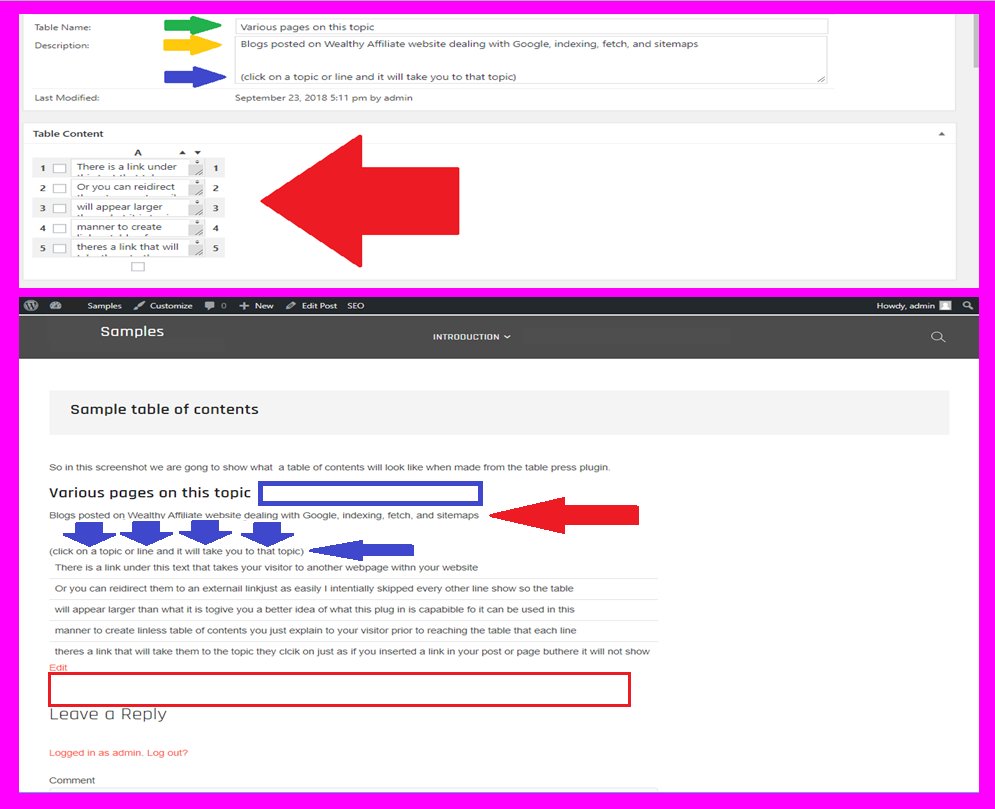
So I made some adjustments to the settings since the title can only be one line I removed the statement “(click on a topic or line and it will take you to that topic)” moved it form the title box where the green arrow is pointing down to where the blue arrow is pointing which is the bottom line of the description box.
I made sure to hit enter to move the “(click on a topic or line and it will take you to that topic)” from the top of the description box where the yellow arrow is pointing to the bottom of the description box, again where the blue arrow is pointing to in the top screen shot of image 18.
The red arrow in the top screen shot of image 18 is pointing to the table when uploading/importing files the row numbers and columns number are set but what is in the file you are submitting to the TablePress plug in.
In the bottom screen shot of image 18 shows the changes we just did and how they now look much more neater and professional done. Note how moving the link notification which was located where the blue box is, to right above the table of contents listing, where the blue arrows are pointing to. This should let our visitors know this is indeed a list of links to other pages of our website
Was achieved by inserting the link notification into the description box and moving the description box from below the table indicated by the red box, to above the table indicated by the red arrow; this is done simply by switching the table description location control box from below to the above settings in the Table Options section where the bottom green arrow is pointing to in the middle screen shot of IMAGE 15 NOT THIS IMAGE here.

Instruction 19
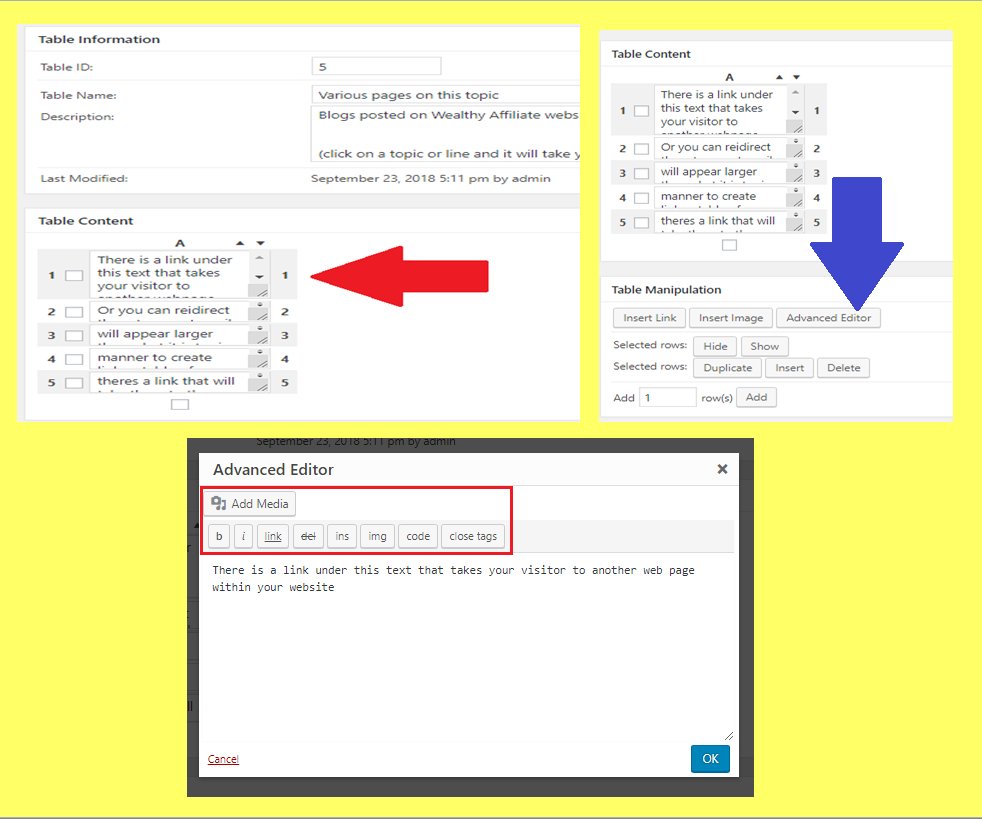
When using the TablePress plug in to create a table of contents when editing you will notice it is hard to do it in the tables cell (red arrow pointing to it) as shown in the upper left corner screen shot of image 19.
So the creator designed an easier way to edit table cells with large amounts of data in them and that is the “advanced editor” the button shown by the blue arrow in the upper right hand screen shot of image 19, is located right next to the insert image button in the table manipulation section of the TablePress table editor mode.
Click on the cell then click on “Advanced Editor” and a new window will appear shown in the bottom screen shot of image 19 here you can actually edit many more things other than just the text.
Look across the top of the advanced editor window and you will see the advanced editor tool bar, with many buttons for many different features on the top add media (for images, videos, or audio recordings) then below that are bold face, text underline, text, strike through, and a couple other control buttons outlined in the red box.

See that made editing easier didn't it? I think it does okay only one more page left and for those of you that want to use TablePress to create great looking table of contents without all the blue hyperlink lines everywhere, this is the page that is going to make your life oh so much easier. Carry on. . .
Janelle
Thanks for this training. This looks like an interesting plug in.
Tried and True
Elaine


