Getting Setup with MailChimp
MailChimp was one of the first email marketing platforms I used. Mainly, because of the price. It's free for the Newsletter function, but their Autoresponder function (now known as Automation) requires an upgrade.
Additionally, within the Automation toolset, you have to setup they they call Workflows. An Automation workflow allows you to create a series of emails that send to your subscribers based on the trigger criteria and schedule you set.
How to Create a Workflow in MailChimpAutomation workflows are built in a series of steps, just like regular campaigns. If you haven’t started building an Automation workflow before, start at the beginning. If you’ve started and saved your progress, skip to the step in the process you want to work on.
To create a new workflow in the Automation Builder, follow this step-by-step procedure:
Step 1: Navigate to the Automation page.
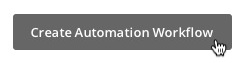
Step 2: Click Create Automation Workflow.
Step 3: Choose your List
Click the Select a Listdrop-down menu, and choose the list you want to send your Automation workflow to.
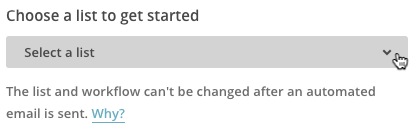
You can choose a segment of subscribers to send to when you add emails to your workflow on the Emails step.
Step 4: Choose a Workflow Type
If you want, use the checkboxes next to the workflow types to filter what workflows display in the Select a workflow pane. To use one of the grayed-out workflows, your list needs to meet the indicated requirements.
Workflow Options
There are several preset workflow options based on different types of events that can be used to trigger an Automation workflow.
List Activity workflows send when a subscriber joins a list in your account, or when they join or leave a group.
API workflows send an email series based on API calls.
Campaign Activity workflows send a custom workflow based on a combination of trigger events if the preset options don't offer exactly what you're looking for.
Integration workflows send based on activity from your integrations with Goal or Mandrill.
Date Based workflows send based on a date, such as a birthday, anniversary, or date subscribed.
E-commerce workflows send when a subscriber makes a purchase from your website.
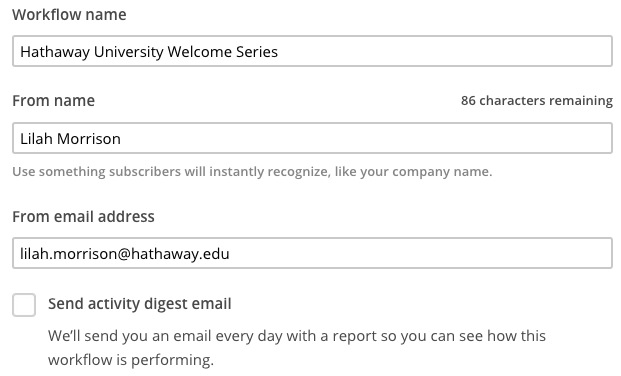
Step 5: Basic Setup
Input the Workflow name, From name, and From email address.
You'll configure settings for the workflow as a whole on the Setup step. Each email's individual settings will be configured on the Email Setup.
Step 6: Setting the Trigger
On the Trigger step, you’ll confirm or customize your trigger. Some triggers appear by default based on the workflow type you chose, but others require additional information from you.
After your Automation workflow is started, you can add email subscriberswho don't meet the trigger condition.
Note
Signup-based workflows, like Welcome message or Educate subscribers, display theTrigger workflow when subscribers are imported option. Check the box to add subscribers to the queue who are imported via a list import.
Step 7: Emails Step
You'll add, design, and organize your emails in your Automation workflow on the Emails step. This is also where you'll provide scheduling and segmenting options for each email in your workflow.
A. Click Add Email.
Some workflow types provide a recommended number of emails to add with one click.
B. Click Design Email to open the Email Designer.

On the Setup step, type in the Email subject, From name, and From email address. These fields only refer to the specific email you are editing and not the entire workflow.
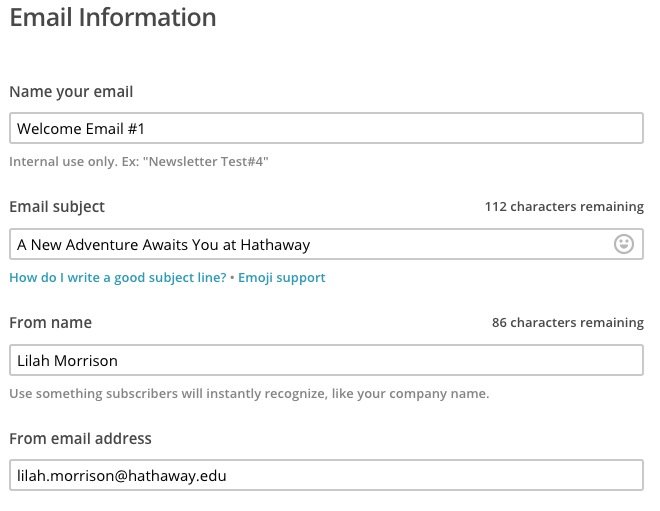
You can use Automation merge tags in your subject line to automatically display the numbered position of the email within the workflow.
C: Click Next.
- Select the layout you want to use on the Template step of the Email Designer.
- On the Designstep of the Email Designer, design your campaign. Click Next.
- Set your scheduling and segmentation options on the Scheduling/Segmentationstep. You'll see different options based on the workflow you chose.
- On what days should emails be sent?
Choose the days your automated emails can be sent out. - What time should emails be sent?
Allows you to choose the time of day on your chosen days that your automated emails will go out. Click the drop-down menu to choose As soon as possible, Send at, or Only send between. - Send with Timewarp
Only available for accounts with MailChimp Pro. Use Timewarp to send your email at a time that's based on the recipient's time zone. - Choose segmentation conditions
Send to an existing or new segment of your list. - Choose post-sending list action
Use the drop-down menus to choose an action that will occur for each subscriber after the email is sent to them. Actions that aren't available for the list will be grayed out.
- On what days should emails be sent?
- Click Save and Continueto return to your workflow timeline.
Repeat this process to add up to 100 automated emails to your Automation workflow. If you need more than 100 emails in your workflow, you'll need to create multiple workflows.
Note
- After the workflow is started, you can pause any email in your workflow to edit it, change segmentation and delivery settings, or add emails to the end of your workflow.
- When you limit sending times by day or time, subscribers may not receive the scheduled emails when you expect them to. If you use a date-based workflow, we strongly recommend sending all days of the week, because subscribers can miss an email completely if it falls on a day that you’ve chosen not to send on.
Step 8: Set Workflow Timeline
You'll create your workflow timeline with a series of delay settings. Delays work differently for activity- or date-based workflows.
To set the delay from the Emails step of the Automation Builder, follow these steps
A. Click Change delay next to the email you want to work with.

B. Type a whole number in the first field, and choose immediately, hour(s), day(s), or week(s) from the drop-down menu. To ensure the delay works properly, choose a number between 1 and 999, and don't use decimals.

Automated emails after the first have an additional drop-down menu that allows you to set a delay based on an action in the previous email. Choose from sent, opened, clicked,api request, not opened, or not clicked.
Note After the workflow is started, you can pause any email in your workflow to change the delay.
Reorder Emails
Activity-Based Workflows
You can drag and drop emails in an activity-based workflow to reorder them. After a workflow is started, emails can’t be reordered.
Delay times in a workflow are independent from the emails. When you move emails in the workflow from the Emails step, the delay times remain in their same positions in the workflow, so it's important to review your delay times after you organize your emails.
1. Click and hold the three dots next to the email you want to move.

2. Drag the email into the correct place on the workflow.
Date-Based Workflows
Date-based workflows can’t be reordered this way, but you can change the delay to reorder them in the sequence.
Step 9: Confirmation
The Confirmstep is where you’ll review your workflow.
- Review the Pre-delivery Checklist, andtest each of your emails if you haven’t already.
- Click Resolve or Edit to make changes to any section of the workflow.
- When you’re finished reviewing, click Start Workflow.
 Annnnddd, you're done!
Now that you have your follow-up email series (autoresponder) setup with MailChimp, I will next show you how to connect to it from SumoMe and MailMunch to get it all working together!


Thank you,
Robin