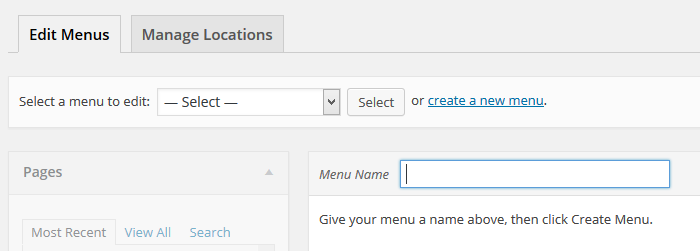
Create the Bottom Menu
8/ From the same page we were on, at the top of the page, click on the blue 'Create A New Menu' link to the right of the 'Select' button

9/ In the box to the right of 'Menu Name', type in a name for the menu. For the purpose of the tutorial we'll call it Bottom Menu. After you have typed in Bottom Menu, press the Enter button.
10/ Now you are ready to add the pages you want to be shown on the Bottom Menu.On the left hand side there is a section entitled Pages. Here you will see a list of the pages you have created in your website and they can be categorized in three different features, Most Recent, All, Search.
11/ In the 'Most Recent' tab, click in the boxes next to the Pages you want to be in your Bottom Menu.
12/ Once you have selected your pages, click on the 'Add To Menu' button further down below the scroll bar on the right side of the Pages section.
13/ Your selection will appear on the right side under the heading, Menu Structure. Here you can arrange the pages in the order you want them to appear in a horizontal line across the top of your website page. Just click on the page you want to rearrange and drag it to the place you want it to be, and so you can rearrange the order of pages.
14/ Once you are happy with the structure of your menu, click on the blue 'Save Menu' button at the bottom right of the 'Menu Structure' section.
Your Top Menu should look something like the one below:


