How to Optimize Images for WordPress
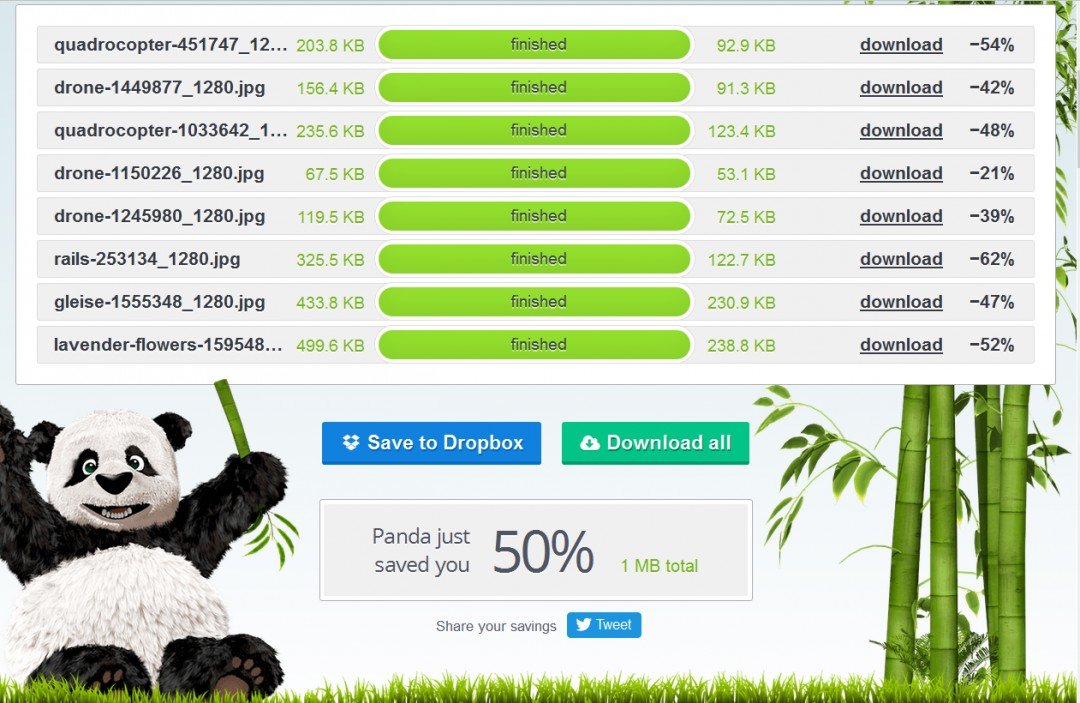
We all know the importance of a fast loading website. One of the major contributors to a slow load time are your images. So today let's look at:
How to Optimize Images for WordPress
When an image is optimized it is basically compressed. We can get technical and examine lossy and lossless compression but that information is superfluous. All we need to know is that an optimized image appears the same on our websites there is no discernible difference. Depending on the image the file size can be reduced by 50% or more.
There is a difference between optimized, resized, and cropped images.
You can resize or crop an optimized image. Conversely you can optimize a resized or cropped image.
An optimized image retains the exact same size and appearance.
A resized image retains the same appearance but the size is different.
A cropped image retains neither size or appearance.
Resizing and cropping will decrease the file size due to the smaller image size. While this is a good practice it is not enough the image needs to be optimized also.
This is how I optimize images.
As I am doing research for my post I have images come to mind that could enhance my visitors understanding of the information I am presenting. Then the hunt is on.
The first thing I do is create a new download file in my browser for this specific post using my keyword.
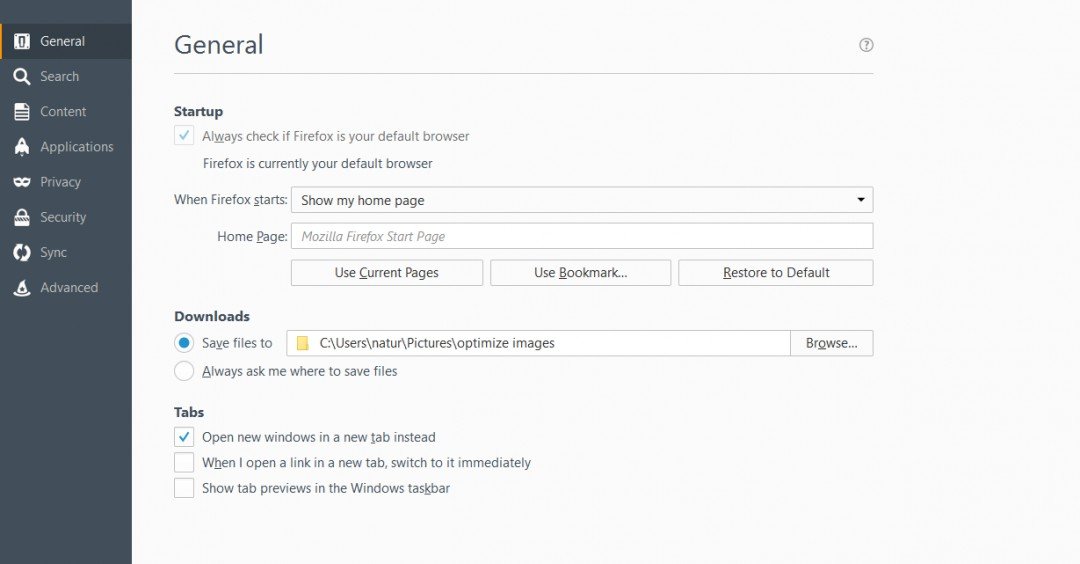
Now you all may be, and probably are better organized than me but this keeps things simple and easy to find. There is another advantage to this method. If for any reason your image files get deleted from your media library they are easy to find and replace.
Find and download your desired images.
Let's look at this a bit. In most cases there is an option to choose the size of image to download. There is no sense in choosing the largest size unless you are wanting a new wallpaper for a screen saver.
Most theme developers consider a full page as 1024 x 768 px. If your website has a sidebar the largest image you could use is about 800 px wide. There is no need in taking up space on your hard drive and your website with larger than necessary files. Remember each image in your media library has to load. It is best not store unused files in your media library.
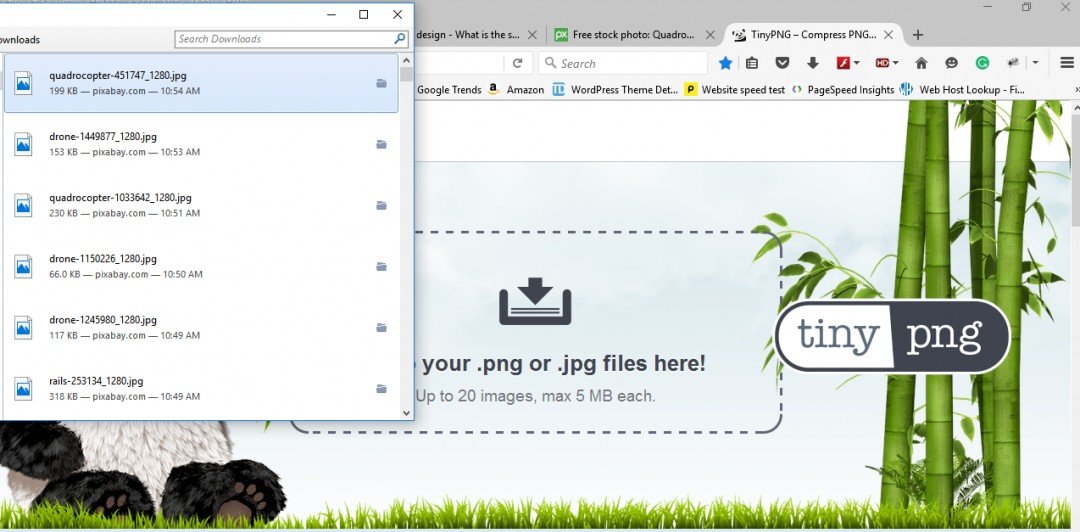
No that you have your images downloaded open your image optimizing tool. I like to use Tiny Png Compression Tool There are several out there choose the one that works best for you.
I like this one due to the drag and drop feature. Simply open open the download tab on your browser and drag the files into to the tool.
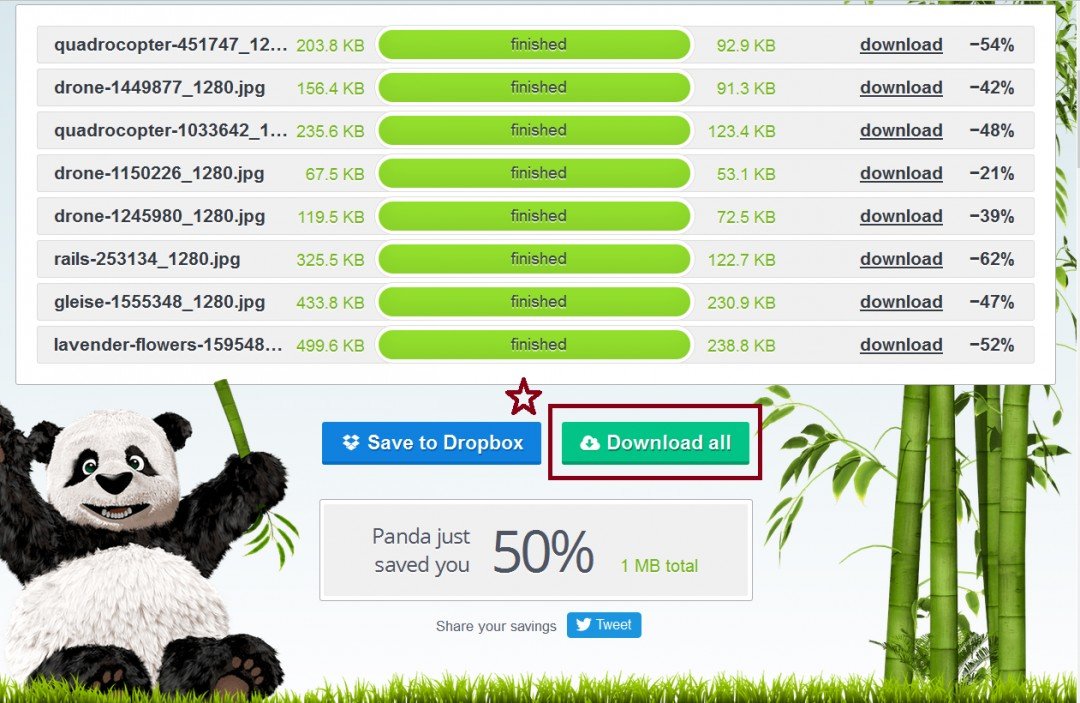
Click the the download all tab and a .zip file will be downloaded to the same file that you saved the images to.

Now extract and replace files and you have optimized images ready for your post. You can also rename the images at once. You can bulk rename them with your keywords and save time, no need to change the title once add them to your post, just add the alt tag.
Instead of this ugly non SEO title
test1test.siterubix. com/wp-content/uploads/2016/07/5059176446_41a1e88c67_b.png
You have this optimized image and title.
test1test.siterubix. com/wp-content/uploads/2016/08/how-to-optimize-images-for-worpress.png

That is how to optimize images for WordPress, or at least my way. Whatever way you choose is great just make sure to do it. it might make you a sale. At the very least it won't have visitors leave your site before it loads.

Until next time,
Join FREE & Launch Your Business!
Exclusive Bonus - Offer Ends at Midnight Today
00
Hours
:
00
Minutes
:
00
Seconds
2,000 AI Credits Worth $10 USD
Build a Logo + Website That Attracts Customers
400 Credits
Discover Hot Niches with AI Market Research
100 Credits
Create SEO Content That Ranks & Converts
800 Credits
Find Affiliate Offers Up to $500/Sale
10 Credits
Access a Community of 2.9M+ Members
Recent Comments
72
Wow, Tim, I 've just compressed three images I've been wanting to use for the longest time......
Thank you!!!
Hi Tim, when I decide to use the plugin they offer, will that plugin compress all the pictures I have already on my website too?
Yes it will Loes. I think I would use the plugin and delete it and optimize images before uploading from that point forward.
It is important Mike. If you already have a lot of images There are 2 plugins I know that will optin\mize your images on your site. Use it then delete it and do them before hand moving forward.
See more comments
Join FREE & Launch Your Business!
Exclusive Bonus - Offer Ends at Midnight Today
00
Hours
:
00
Minutes
:
00
Seconds
2,000 AI Credits Worth $10 USD
Build a Logo + Website That Attracts Customers
400 Credits
Discover Hot Niches with AI Market Research
100 Credits
Create SEO Content That Ranks & Converts
800 Credits
Find Affiliate Offers Up to $500/Sale
10 Credits
Access a Community of 2.9M+ Members
Thanks for sharing this, Tim. Great post! :)
~ Mike
You're welcome mike. Thanks for your time.