How To Install Plug Ins
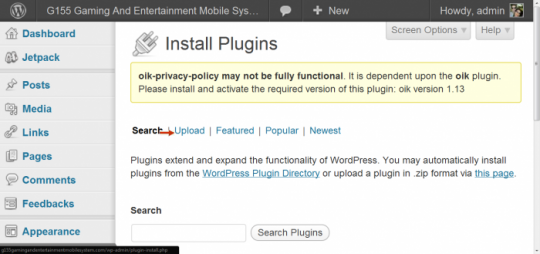
To add a plug in to your site, simply go to the plug ins area in your WordPress dashboard and click on Add New.![]()
Then enter the name of the plug in that you would like to add in the search box (or you can search by keywords if you don't have a specific plug in in mind.

Let's say you are looking for WordPress Ping Optimizer. You would type in, "WordPress Ping Optimizer," and hit Search. It will be the first one you come to. Click "install Now," a pop up window will ask if you are sure; click Yes on that.

Next, you will see a screen asking if you want to Activate Now or come back to it later. I always click Activate Now but, if you prefer, you can always activate this later in the installed plug ins area and activate it from there.

This will bring you to the Installed Plug Ins area of your dashboard. Many plug ins will require configuring, which can often be accessed from this page, but also, look under Settings for the plug ins as well.
You will also notice that ZillaShare is under the Settings area. Different plug ins show up in different places in your dashboard, Jetpack, for instance, is at the top under Dashboard.
![]()
Uploading A Plug In
Not all plug ins can be found by searching for them in the Add New Plug In area. Some plug ins, like ZillaShare, have to first be downloaded from the Plug Ins website, then uploaded to WordPress.
Once you have the plug in downloaded, it can be uploaded by going to the Add New area and clicking the upload button at the top of that screen. From there, just choose the file and click Install Now.

Recommended Plug ins
This is a list of plug ins I use on all of my sites. I often times use other plug ins on a site-by-site basis but, these are what I consider core plug ins.- Akismet
- All in One SEO Pack
- Google Analytics for WordPress
- Google XML Sitemaps
- Jetpack by WordPress.com
- Robots Meta
- WordPress Ping Optimizer


