Now that we have our categories set up and our posts tagged, we can use them in our menu.
Step By Step Process
1.) Go to Appearance > Menu

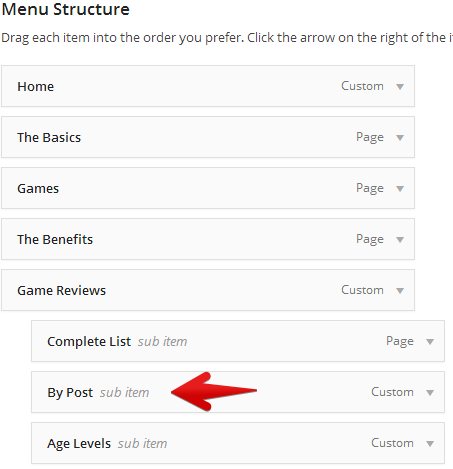
2.) Next you will want to add your category link into the menu that you want to. Select the Links option on the left and then you can type or paste the category link into the URL box. You can then type whatever text you want in the Link Text box and that is how it will show on the menu. So in my example I used: By Post.

3.) Once you have everything in the boxes click Add to Menu and that will add it to the menu tree on the right. From there you can use it as a main menu or a sub menu.

As you can see here, I chose to have it as a sub menu to my main menu title: Game Reviews. Now whenever someone on my site clicks on that menu item, they will be directed to a blog roll of every post that has been tagged in the category of Game Reviews.
Category Box In The Menu Area
You can also easily tag the category or categories that you want to include on your menu bar using the Category Box in the menu area.


Either of these two methods will help you to achieve your desired results.
I use the categories part of the menu to do this. But I like the way you did it - by just creating it as a link. I will probably start using that. Thanks!


