Let's Write A Blog in OneNote

Write A Blog In OneNote
- using the Insert Pictures
First, Let's Learn How To Create A Blog Page
Once you have created your tab for your blogs with a heading, click on the title Blogs.

You will see on the right-hand side under the Search Bar, a facility to + Add Page.

1/ Click on the + Add Page and give it a title. I have called mine New Blogging Tools!

2/ Once you have typed in your title, press enter and the cursor will automatically move to the body of the page so you can start creating and writing your blog.
Let's insert a picture from within OneNote so you can see how easily everything is intergrated.

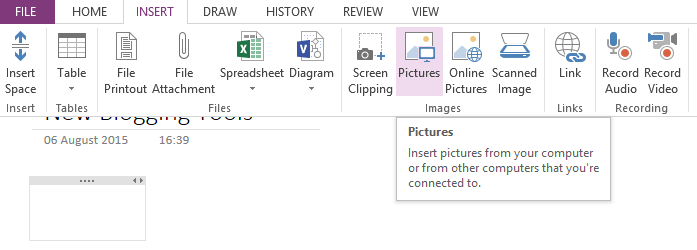
3/ Click on the heading Insert in the menu at the top of the page, and then click on Pictures as seen above in the screenshot.
The normal dialogue box will open into Windows Explorer so you can find and choose the picture you want to insert. Once you have clicked on the picture and then clicked on the Open button, the box will close automatically and your picture will appear in your blog.

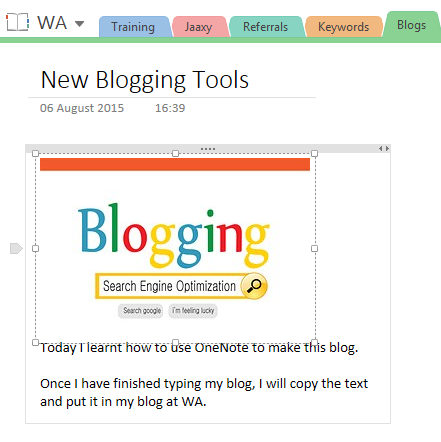
In the screenshot above, you can see the picture I've inserted into my Blog Page and I've also started writing in my blog under the picture. This was merely created as an example.
NOTE: The picture has 8 handles that you can pull in various directions to resize it, as well as move it if you just click and hold and drag the picture with the mouse to where you want to position it. This is also true for resizing the frame of the page.
Now that we've created our Blog, let's use the Tools to check and review it.
Have any questions or queries? Use the comment section below to send them.


