How To Publish A Post In WordPress


Published on January 30, 2015
Published on Wealthy Affiliate — a platform for building real online businesses with modern training and AI.
The very first time you arrive in your WordPress dashboard, it can all look a bit baffling but you will soon be able to familiarize yourself with it and swiftly add posts and pages to build out your website.
This tutorial is for you if you are completely new to WordPress, you want to create a new blog post and you want to know your way around the blog editor.
It's best if you open another tab (window) and access your WordPress dashboard now so that you can follow along with each step.
#1: Log in to your website dashboard
In the left hand menu click on Posts and Add New
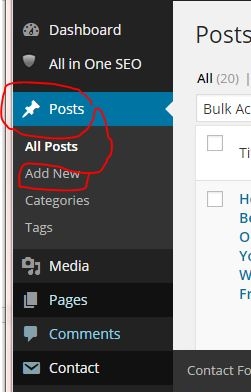
A new posts page will appear…
Note: There are some additions (plugins) to my dashboard (here) that you will not have in yours, that's okay!
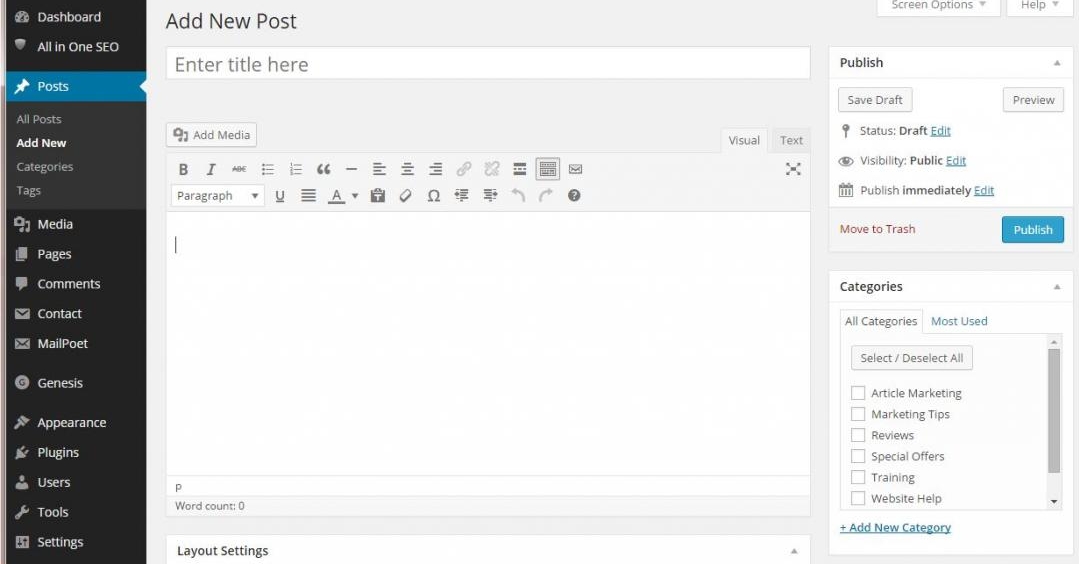
#2: Familiarize yourself with the page.
Enter Title Here
You will see at the top Enter title here – this where you put the title of your blog post. It needs to entice your reader to want to read it and will contain your keyword or keyword phrase.
Add Media
Below you have an Add Media button. This is where you click to add a picture to your post via the media library.
The Kitchen Sink
Underneath that are two rows of icons, this is called the kitchen sink! Some of these icons are the same as those in Microsoft word like the Bold, the italic and bullet points and so on. When you hover your mouse over them a highlight will tell you what they are.
The Paragraph box with the drop down arrow is what you will select to add “H” Tags to your post. Ideally you’ll have a title with an H1 Tag, that includes your keyword again (but not just repeated), and then further down your post you'll add a further heading, which will become an H2 Tag. Subsequent headings (again with keywords) would become H3 Tags.
Ready to put this into action?
Start your free journey today — no credit card required.
This is good SEO for your post!
The Main Body of Your Post
You then have the main body of your post in the white box below and this is where you add your post's content. I like to write my copy in a word document first and copy and paste it in.
PLEASE NOTE:** If you do copy and paste from word it should be plain text only, then add your headings, bullet points and bold, italics etc. afterwards within the WordPress editor.
The other way to ensure that you don't copy any unwanted code from word into your website is to paste all your text into a text editor first, such as notepad, and then it will be 'clean'. I will create a post explaining this further soon :)
**Since writing this post you'll find that WordPress will clean up text now 'behind the scenes.' After WordPress updated 3.9 the 'paste from word' button in the visual editor disappeared. WordPress now detects if the pasted text is coming from MS Word and makes the appropriate changes.
Next, go over to the right of the page and click Save Draft.
Buttons and boxes on the left hand side of the editor
Now that we are looking at the right of the dashboard’s blog post editor, to the right of the save draft button is a Preview button. Here you can preview the work you have done so far without having to publish first. This is very useful and it will open up a new tab in your browser to show you what the post will look like.
Underneath you see the Publish button, for when you are ready to publish.
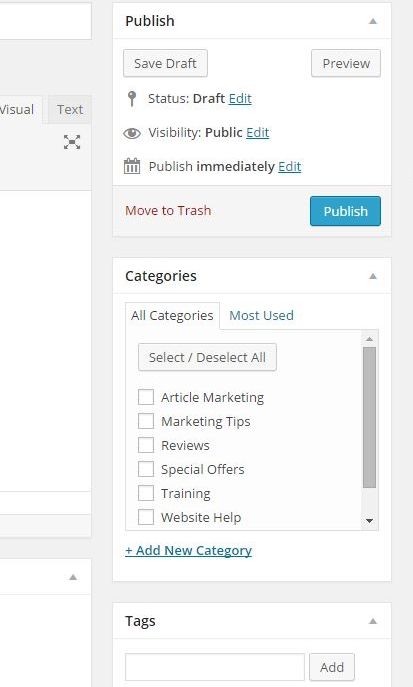
Categories
In the screenshot above you will see that some categories have already been added but when you create your first post this will only show as Uncategorised. You can get rid of this later. So add a category or two that relates to your blog post. Tick the box and your post will be listed under that category.
Tags
Below is the Tags box. This is where you add your keywords or keyword phrases. I usually add about 5 per blog post.
Featured Image
Below this you will see the Featured Image. Click on here and any media (pictures) that you have uploaded will appear in the media page and you can select a picture that represents your post.
Note: Whenever you share your blog post with Google+ or Facebook this featured image will show automatically, otherwise no image will show. People are more likely to be attracted to posts that have an image.
Disable Sociable
Just means that you disable the social icons on this post. Usually you just leave this unchecked as of course you want people to share your blog post.
Finishing off your blog post
Now going back to you main post and make the post attractive by adding a picture or two. Also make your post easy to read by separating into paragraphs and headings that break the post up.
Publish your post!
Finally remember to hit the PUBLISH button and check out your post!
If you have added any links check they are working - and there you have it!
You have created your first blog post! :)
Share this insight
This conversation is happening inside the community.
Join free to continue it.The Internet Changed. Now It Is Time to Build Differently.
If this article resonated, the next step is learning how to apply it. Inside Wealthy Affiliate, we break this down into practical steps you can use to build a real online business.
No credit card. Instant access.