How To Create A Gravatar Account? Here are 6 Simple Steps to Create Account
So many of my friends have been asking me about how to create a Gravatar account so that they can use it for their website. Are you like one of them? Feeling confused? Don't worry it is very simple and a Gravatar account can be created in just 6 steps. Interested? Then let's go and create your first Gravatar account....
1. What is a Gravatar?
An "avatar" is an image that represents you online, a small image that appears next to your name when you interact with in websites.
A Gravatar is an avatar recognized worldwide. You need to upload your photograph and details once to create your profile, then whenever you participate in a site compatible with Gravatar, your Gravatar image will follow you automatically.
Gravatar is essentially free of charge service for the site owners, developers and its users. It is included by default in every WordPress account and is supported by Automattic.
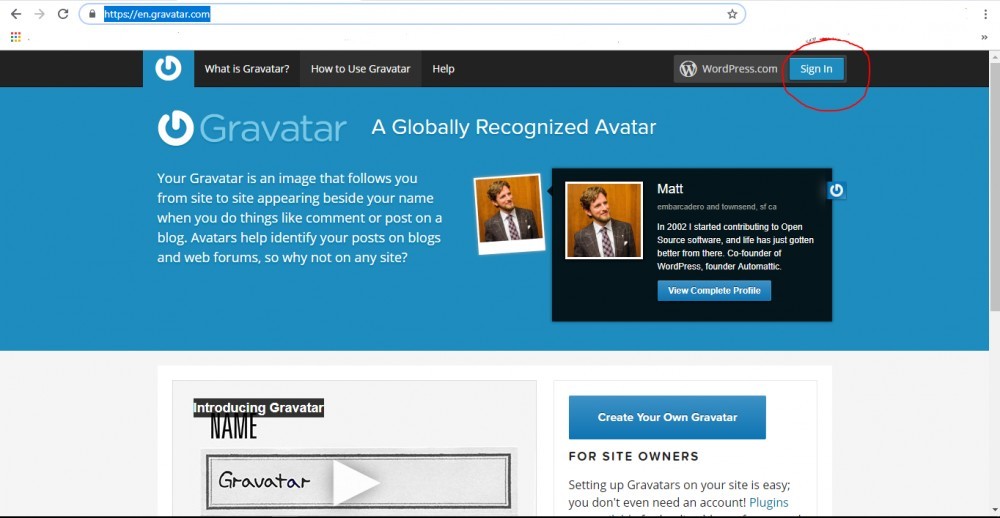
2. Go to Gravatar Home Page
Next step is to go to the URL https://en.gravatar.com/ to sign up. Refer the screenshot given below and press the Sign In button (the one circled with red color at the top right-hand side.

3. Gravatar Create Account Link
Next a new page will open where you need to press the Create account link. Ref screenshot given below (the link is highlighted in red color circle

4. Put Your Details To Create A New Account
Again a new page opens where you need to enter your email address (the one which you want to register with), then choose the username you want to be represented with whenever you interact on any website and enter the password and press the Continue button and BOOM your WordPress.com account is created!

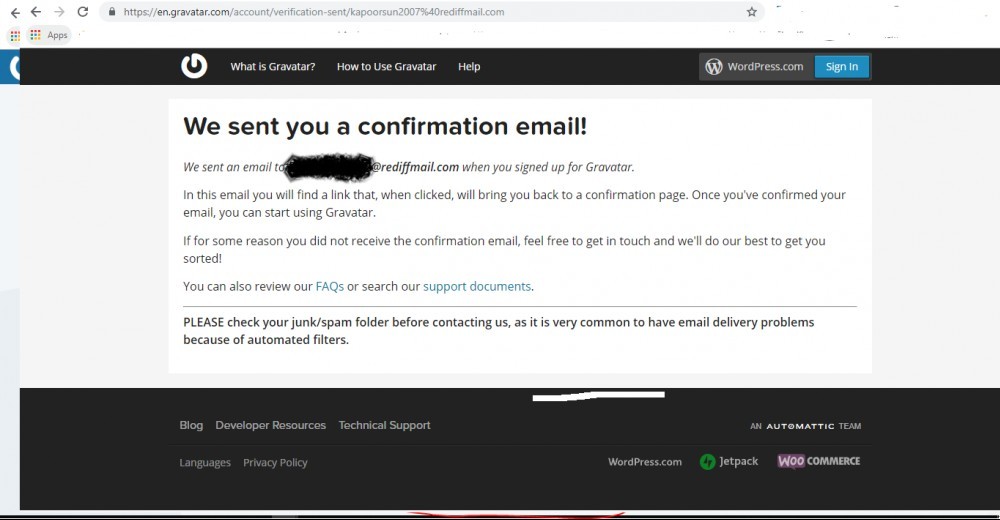
5. Email Confirmation Required To Proceed Further
Now in the next page which uploads, WordPress will ask you to confirm your email id. Hence, you need to login to your mail box and check for a mail from WordPress with subject starting with "Activate" (if you don't find it in the Inbox then please check your Spam folder.

Once you open the mail, please press the Activate button (the one circled with red color in the screenshot given below)

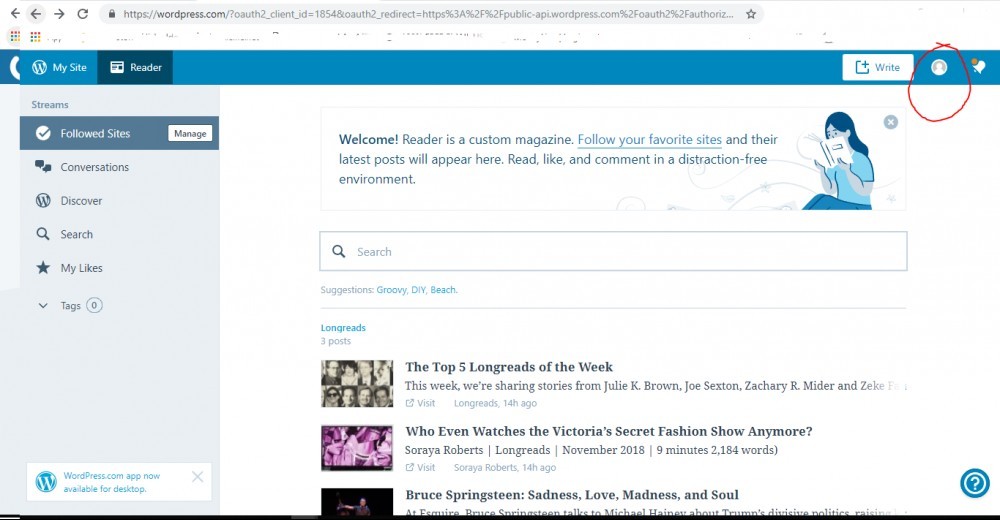
6. How To Update Your Profile
Now it will open another window where you need to click the small white and gray icon to upload your photo and enter other details for your profile (refer the red circle in the screenshot given below.

Next you can click the camera icon to upload your photo (the one circled with red color in the screenshot given below and fill other details like your First Name, Last Name, a little description of yourself in the About Me field etc.

BOOM!
Your Gravatar is now ready! Go ahead and interact with the World with your Gravatar.
In case, you need any further clarification or help on your Gravatar account creation etc. do not hesitate to comment below. I will be more than happy to be of any help.
Also if you need help on anything which is bugging you, please let me know by commenting below. I will revert at the earliest.
Join FREE & Launch Your Business!
Exclusive Bonus - Offer Ends at Midnight Today
00
Hours
:
00
Minutes
:
00
Seconds
2,000 AI Credits Worth $10 USD
Build a Logo + Website That Attracts Customers
400 Credits
Discover Hot Niches with AI Market Research
100 Credits
Create SEO Content That Ranks & Converts
800 Credits
Find Affiliate Offers Up to $500/Sale
10 Credits
Access a Community of 2.9M+ Members
Recent Comments
12
Hi,
Great one!
This is truly helpful.
Thanks and i just created my gravatar following these steps.
See more comments
Join FREE & Launch Your Business!
Exclusive Bonus - Offer Ends at Midnight Today
00
Hours
:
00
Minutes
:
00
Seconds
2,000 AI Credits Worth $10 USD
Build a Logo + Website That Attracts Customers
400 Credits
Discover Hot Niches with AI Market Research
100 Credits
Create SEO Content That Ranks & Converts
800 Credits
Find Affiliate Offers Up to $500/Sale
10 Credits
Access a Community of 2.9M+ Members

Thanks for sharing.
Happy to Help!