Learn how to instantly share content in different social media using Buffer


Published on March 18, 2016
Published on Wealthy Affiliate — a platform for building real online businesses with modern training and AI.
Hi, everyone! I would like to share with you a solution to a problem I have had recently. Whenever I would write a blog post and have the need to share it on my different social media, I would have to manually get into each one of them and write different snippets, copy and paste the link, and eventually resort to different resources to shorten them.
How can we automate the process and simplify sharing it in our different profiles?

Enter Buffer - a platform for easing the burden of sharing content in social media.
How do I install it? (It's free so far, so fear not!)
- It is really easy to sign up! Just head to http://buffer.com and choose between creating an account with your Twitter, Facebook or LinkedIn profiles - or yet none of these and simply using your e-mail.
- You will be taken through 4 steps.
- Add social profiles - At this point you can pick two between Twitter, Facebook and LinkenIn (only one if you have already signed up with one of these accounts).
- Confirm your time zone - No big issues here. This is necessary because Buffer allows you to schedule automated posts, so it will follow the selected time zone.
- Select a scheduling option - Choose between one of two options.
- Optimal - By selecting the number of times you want to post per day in a particular social media, it will calculate the ideal times based on engagement. Unless you have very specific necessities, this is the best option!
- Manual - You get to select how many times and when you want your schedule posts to happen.
4. Track sharing - highly recommend it as well. Gives you statistical analysis on the posts shared. You can also integrate it with Google Analytics for even more data and information.
Once you have setup your account, you will be taken to the Dashboard, which looks like this:
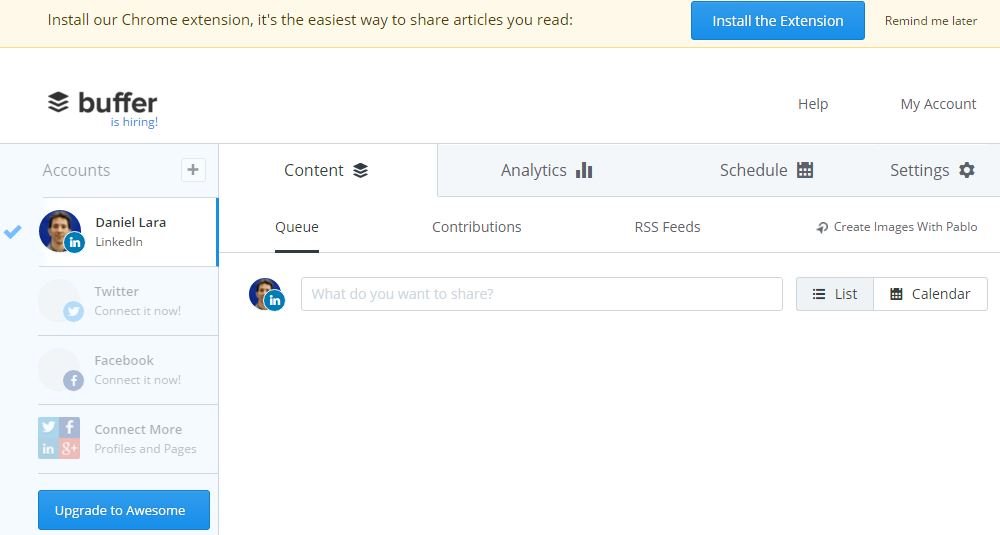
Even though there is a lot to explore on the dashboard, for now let's focus on the most interesting aspect of Buffer - its extension for Chrome. Unfortunately Buffer doesn't support other browsers yet. However, due to its integration with Google, I would recommend anybody creating and authoring content to use Chrome. I personally think it is a great browser anyway, so it shouldn't be such a hassle.
Click on "Install the Extension" to proceed.

You will see the following screen:
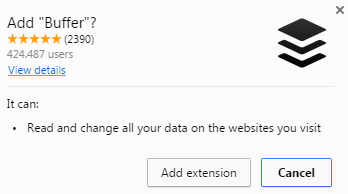
Don't be afraid - it's safe to "Add extension". You will begin to download a file. Once it's finished, run the applet and it will install the extension.
Ready to put this into action?
Start your free journey today — no credit card required.
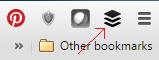
If it works out OK, you will see it as a clickable button within your extensions (to the right of the internet address bar). Just like this:
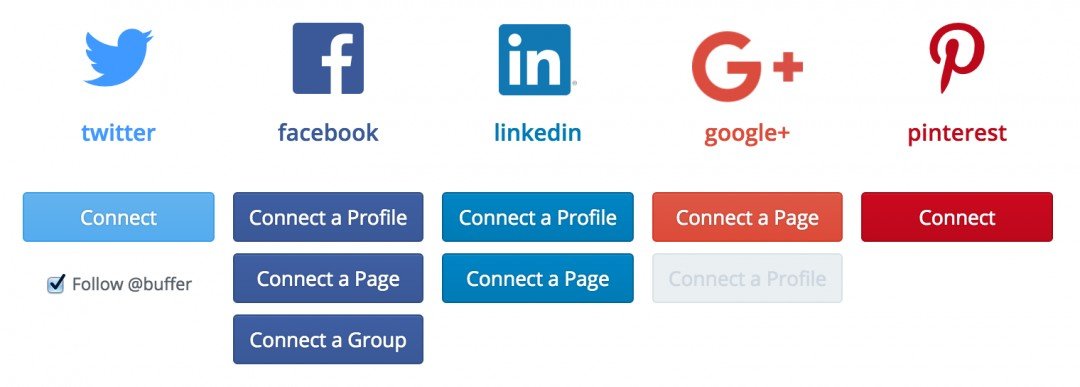
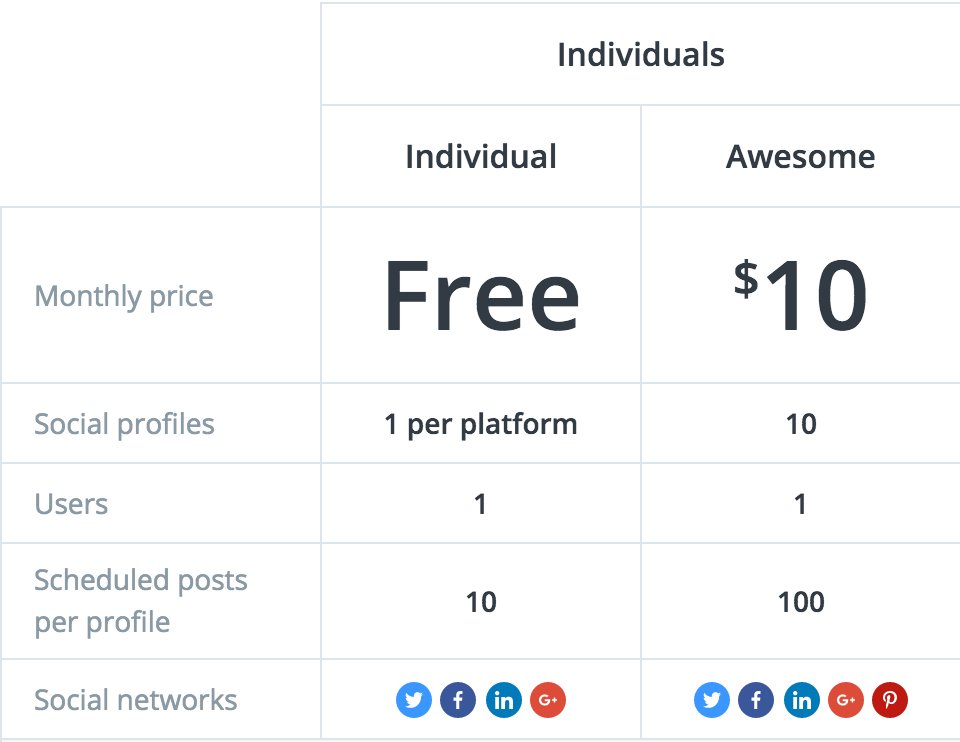
Is it REALLY free?
It depends on your needs. If you only run one website like me, the free version fits like a glove! It lets you select up to 10 different profiles in 5 different networks, as follows:

And how does it work? (Now the fun part part!)
Let's say I have just finished writing a fantastic blog post, with SEO in mind, and it is ready to show its greatness to the world. Publish it and access the link. Once you click on the Buffer button, this is what you are going to get:
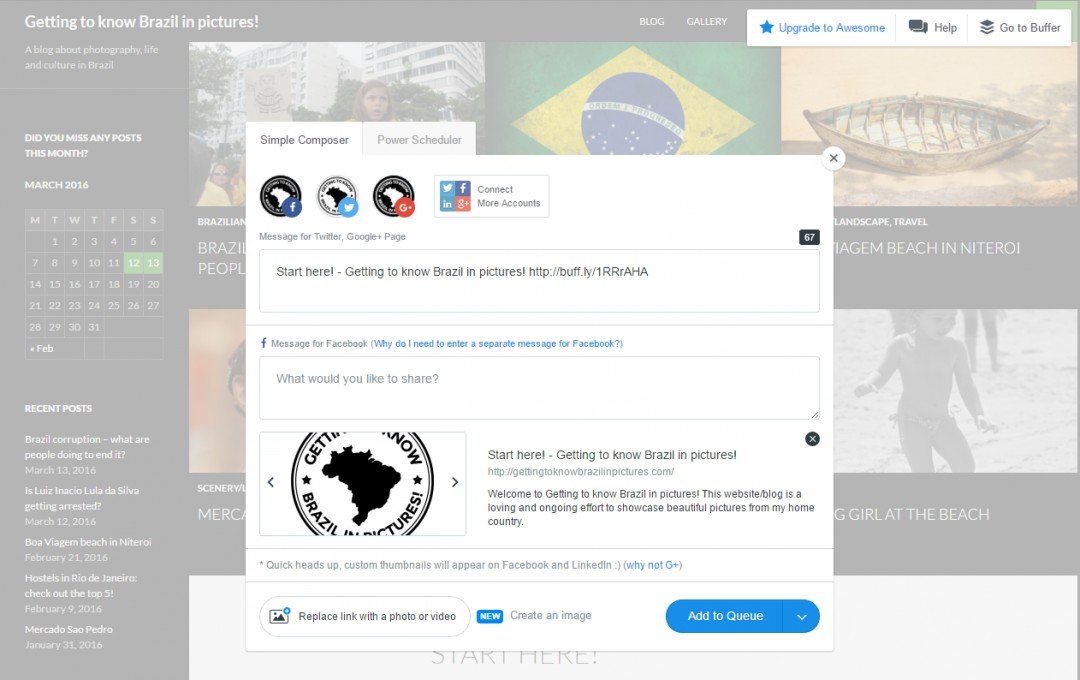
You can see that in this particular example for my personal webpage I had chosen only 3 different social media to be featured: Facebook, Twitter and Google+. You have two tabs the present the following options: Single Composer and Power Scheduler.
Single Composer - I want it now!
If you just need to share the content once and would not like to schedule it, stay on the Single Composer tab. Bear in mind that you will have to write two different snippets for Twitter, Google+ and Pinterest and for Facebook. You can see the reasons for that here - https://open.buffer.com/changes-to-buffer-for-face...
Once you have written your message, when you click on "Add to Queue" you will see three options:
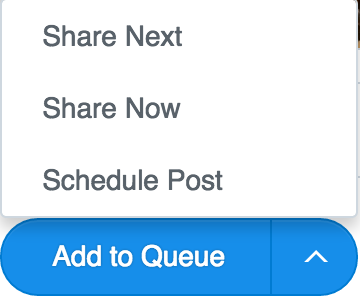
- Share Next - You will place it in your schedule in order for it to be posted according to the times you have set-up. Don't worry - you can alter these as you wish on your Dashboard (more on this later).
- Share Now - Does exactly this! Shares the content right now in the social media you have selected.
- Schedule Post - Lets you select a date and hour in which you want the post to take place.
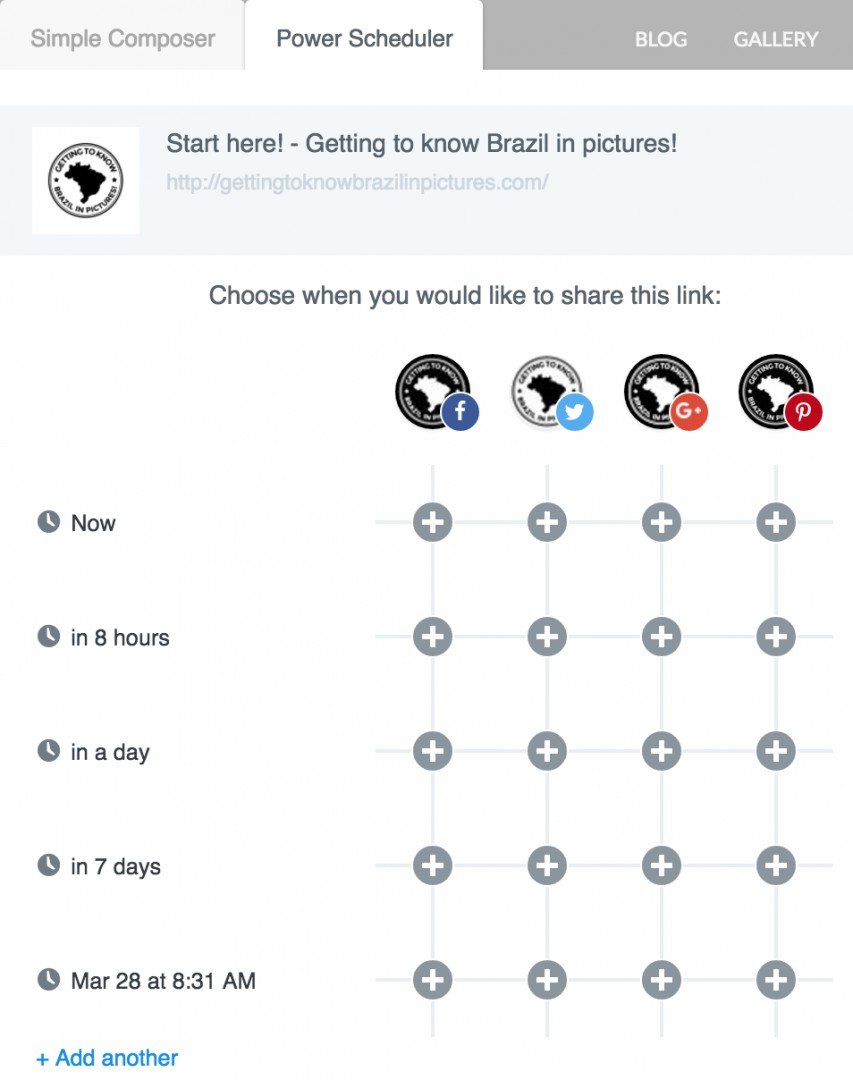
Power Scheduler - What is life without options?
If you do not want do add this particular share to your schedule, but would like to have it posted repeatedly during a more restricted time frame, Power Scheduler is your go to option. See below the options it gives you:
And what else can I do?
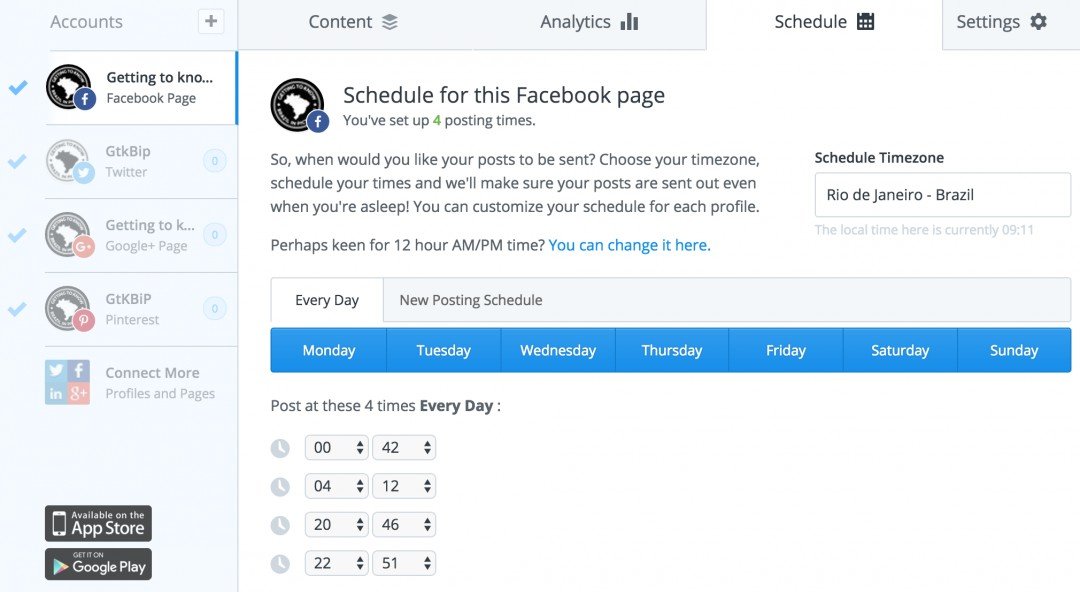
Once you explore the basic options made available by sharing the posts, you can check out the possibilities of the Schedule.
Additional and final resources
- Buffer FAQs - https://buffer.com/faq/top-10-faq/#which-social-me...
- Comparisson with Hootsuite, its main competitor - http://marketingartfully.com/2014/10/02/buffer-ver...
I will eventually make this into a training - just gotta wait for the 3 months as a Premium Member! But for now...
Did you enjoy this training? Please comment?
Do you have any questions I can help you with? Don't be shy - ask them here!
Please share this and if you want to stay tuned to my latest blog posts don't forget to Follow!
Share this insight
This conversation is happening inside the community.
Join free to continue it.The Internet Changed. Now It Is Time to Build Differently.
If this article resonated, the next step is learning how to apply it. Inside Wealthy Affiliate, we break this down into practical steps you can use to build a real online business.
No credit card. Instant access.