Instructions:
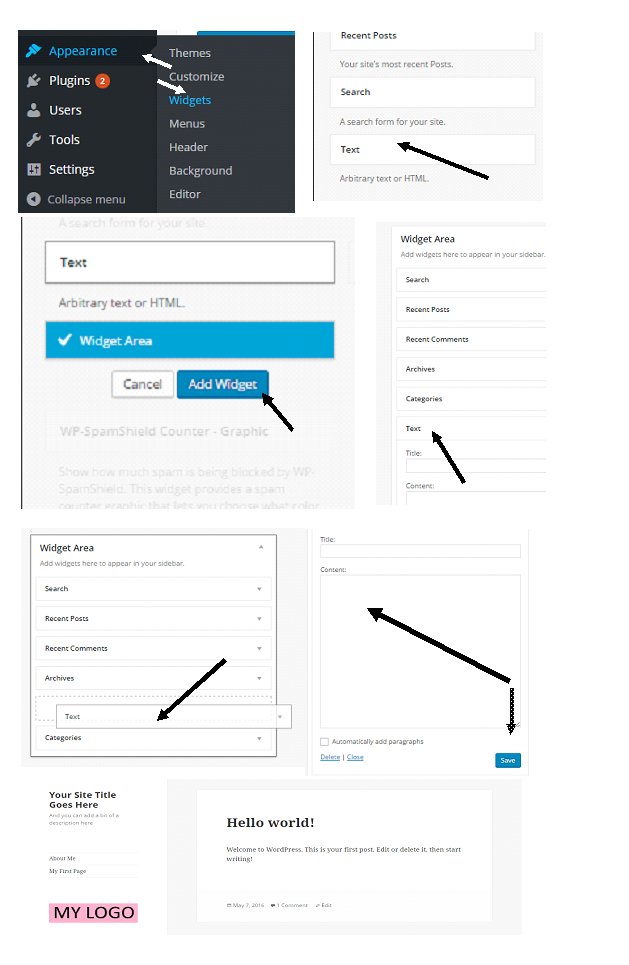
Go back to your dashboard – hover over “Appearance” and click on “Widgets” A list of widgets will appear, look for the “Text” widget. You might need to scroll to the bottom. Click on the “Text” widget. Next click on “Add Widget” This will add the widget to the “Widget Area” to the right of your screen.
Click on the “Text” widget again and drag it to the top of any other widgets.
Click on the “Text” widget again (in the “Widget Area”) this will open up a “Title” box and a “Content” box. You can add a title if you wish, (but it will appear over your logo), or you can leave it blank.
In the contents box you now need to paste the HTML that you copied in the last lesson and remember to click “Save” below the widget area.
When you view your site, you will find that your logo is not at the top where you wanted it – it will be below the first (main) menu.
Don’t worry, this will be rectified in the next lesson.