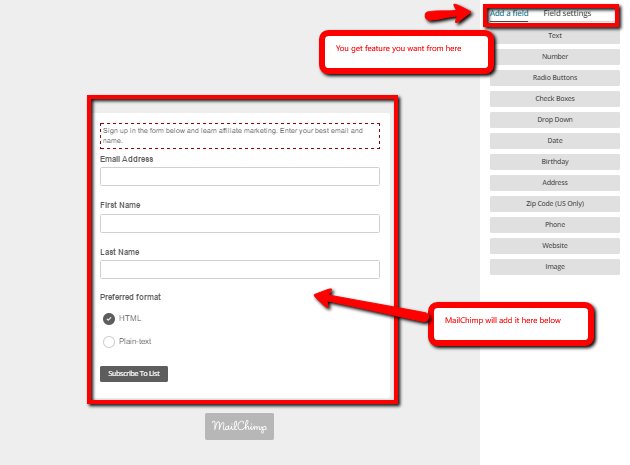
Build it tab is where you can customize what fields you want the form to appear. Maybe first name and Surname or only First name. Or just Email address, whatever you want to be in the fields.
It's the place to add the structure and content to your signup form and response emails. You can add and remove list fields, and also be changing Field settings.
Steps to Works.
On the Add Field Menu, click on the field type you would like to add, and Mailchimp will add it to the bottom of the form. So a new field is added at the bottom, now edit it by typing the name in the new one in the Field Settings menu.
Write a descriptive name that you can use with merge tag in the field tag area.
Let users fill out whether the field is required or optional by choosing the required field.
Choose whether Field visibility will be visible on the form or hidden for personal use, by clicking on the appropriate icon.
Add help text that will appear above the field to give subscribers more information.
Set the default merge tag value, that Mailchimp will use if the recipient doesn't,t have a value for a merge tag using your campaign. Click save field if you have done what you want.
You can use this process to add more fields to your signup form.
If you want to go back and edit an existing field, you can do so by clicking the field to display the field setting menu.
If you want to delete a field from the signup form you and all the data associated with this area from your list, click the minus icon. However, if the field contains subscriber data that you want to keep on your list, you want to light the hide the field in your form instead you click the Hidden icon. If you want to duplicate a field, click the plus icon.
You can also reorder fields, by clicking and dragging them into the order you like.
*If you remove a field from your signup form will eliminate that field’s data from your list, please be careful when deleting.*


