Adding Layers and Positioning
Okay, so, repeating the previous steps, let's add a couple of more useful images as layers
Step C: Adding more Layer elements
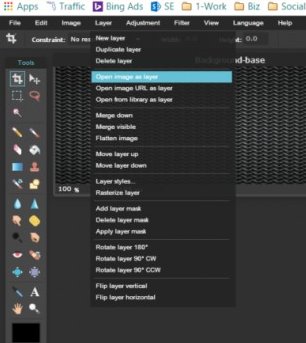
Again, click theLayer pull-down menu and select Open Image as Layer locate your logo from your computer, select it and click Open to add it to your project:

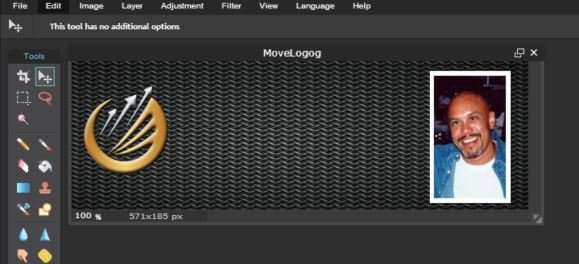
Step D: Moving the new layer
Again, click theMove tool (see above image) and then click and drag the new layer image (the logo in this example) and let's move it left to make room for text.
Step E: Adding Text or a Text Image
Okay, at this point you can add the "Text Image" from the free CoolText website I mentioned earlier OR you can add regular text from within Pixlr. Let's take a peek at both options.
Step E - Option 1 - Adding the Text Image from CoolText
Option 1 - Adding another layer - the "Text Image"
Just as in the previous steps, we simply click the Layer menu pull-down option and again select Open Image as Layer:
Then, webrowse our computer and locate the text image we downloaded from the CoolText website and click Open.:

(The above is a PNG image I created on CoolText and saved to my components folder)
Here's how it appears when added to our Pixlr project:

Now, it's looking good, right?
Okay, let's look at option 2 - Adding text directly from Pixlr:
Step E - Option 2 - Adding the Text from Pixlr
Option 2: Using PIxlr to add Text
Instead of Option 1. We can add text using the Text Tool directly from Pixlr.
So, look to the left - the Tools menu thingy. Click the Text Tool as shown below:

After clicking on the Text Tool to select it, you will receive a Text Dialog box to add the actual text you want to show up on the image:

Let's take a closer look at the text dialog box and what you can do with it:
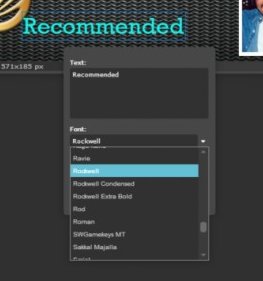
Here's the Text dialog box after I have typed in the word "Recommended":

You'll also notice some other options within the Text dialog box. Just like within WordPress, you can click to Center, Left Justify or Right Justify the text - not really needed since you can move it after. Additionally, you can click on that wee color box to change the color of the font as such:

When you click on the Color option within the Text dialog, another screen pops open for you to select color ranges.
I know it can be daunting at first, but it's really easy. It's Click and Play..... Within the circle of colors you can move the smaller circles to change color ranges quite quickly as seen here:

So, here, I clicked on the right side of the box in the middle and the bottom of the color circle within the outer circle ring. They yielded the white color as seen above in the upper right.
Then, I simplyclick OK.
That will return you to the Text dialog.

Changing the Font in Pixlr
Additionally, you can click the down arrow shown in the text dialog as Style in order to change the font. PIxlr gives you a dynamic look at the font which is really nice!
Okay, so now we have chosen either a Text image OR text using the text function within Pixlr
Note: If you really want test out your creativity, use both! Text image above and Pixlr text below! Try it out!
Okay, let's move on to some final touches!