Creating Courses in Canva


Canva Course Creation Feature
(Canva Course Creation Feature Summary)
Canva has a course creation feature that’s open to both premium members as well as free members. This came back to mind when one of our members here (@EricCantu) made a post today about turning your articles into YouTube videos. So, I decided to make a training post on it. In the following pictures I will show you how to get to this side of Canva.
(15min)
Finding the Canva Course Feature
Now, I found this feature by accident and couldn’t figure out how I even got to it the first time, or the second, or the third. Simply because Canva doesn’t make this feature easy to find. The site is so enormous that there are many hidden features that are just waiting to be found. Let’s start with our first picture. I am viewing this from my iPad so things will surely look more space out on a desktop or laptop. Nothing out of the ordinary this what you see when you log into Canva. Move on to picture 2.
Picture 1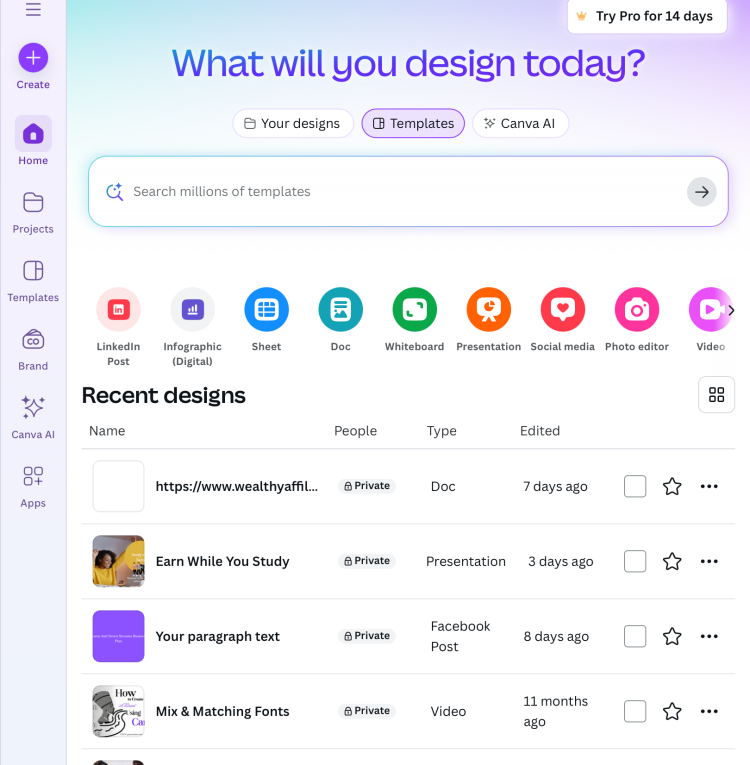
In picture two you will see two circled buttons. On the left you have projects. On the right you have “add new.” You will click on the "Projects" button found on the left side “First”. Before you do this your Canva Dashboard will resemble picture 1#. After you click on the “Projects” you Canva Dashboard will look like picture two. Next as shown in picture two, to the right or far right if you are looking at this from a computer you should see a button that says “+add new”. Click on it. This leads us to picture three.
Picture 2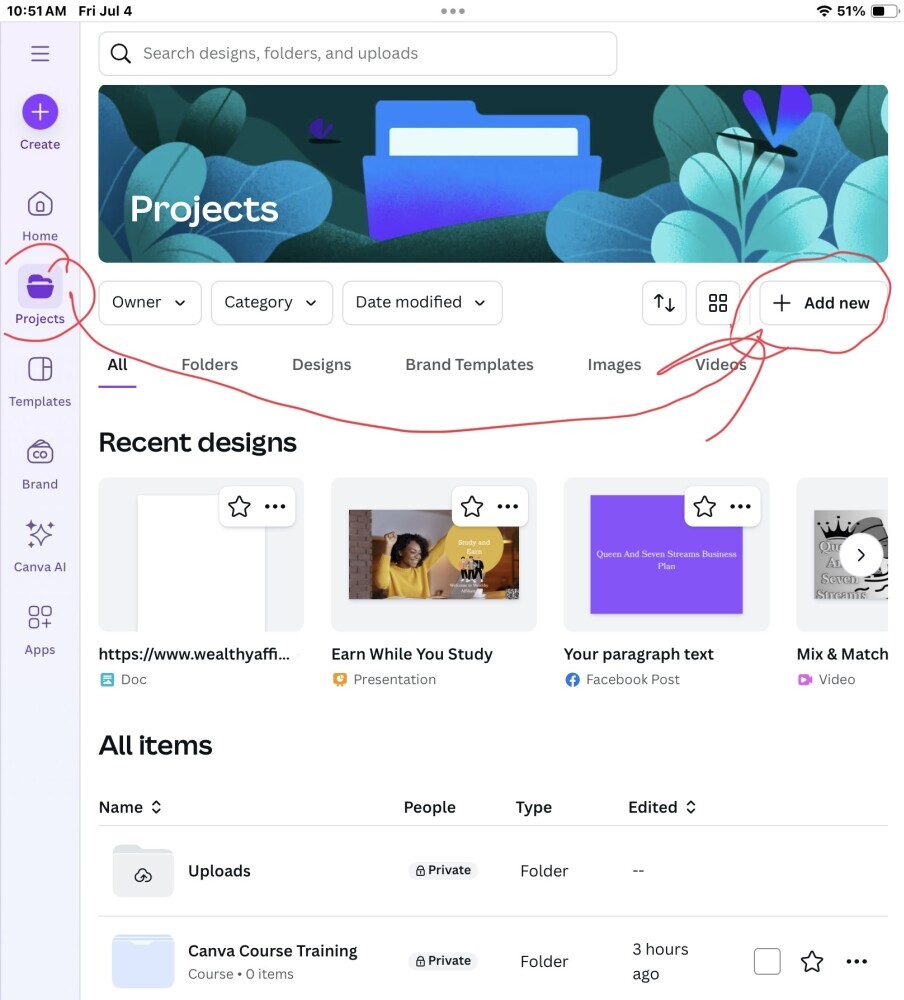
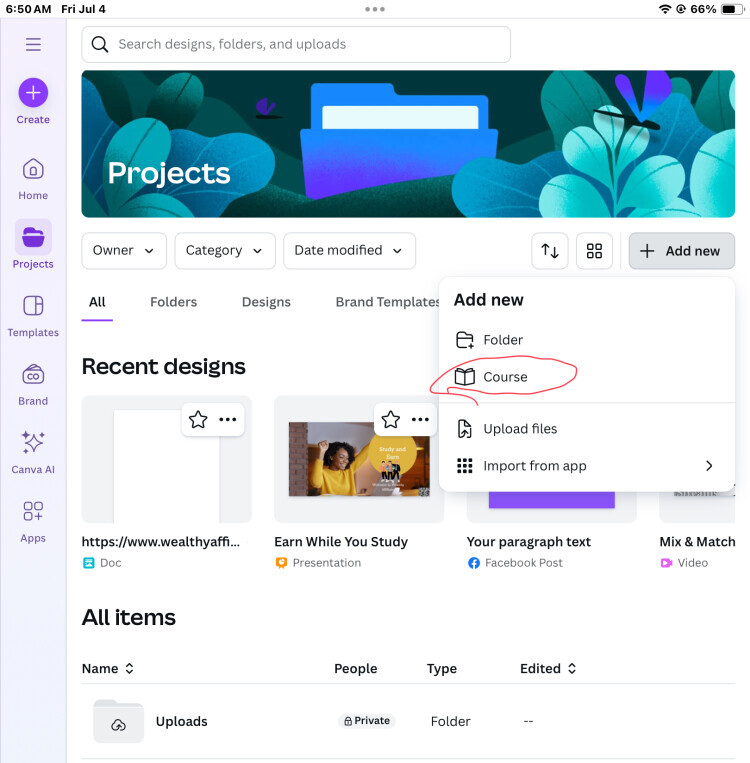
Canva Course button is found!
Now, if you have followed along thus far you have the Canva course creation button! Yay! Now, let's go a little bit deeper and see where this button leads us. As shown in picture three below you see course beneath the folder click on it and this leads us to picture four.
Picture 3
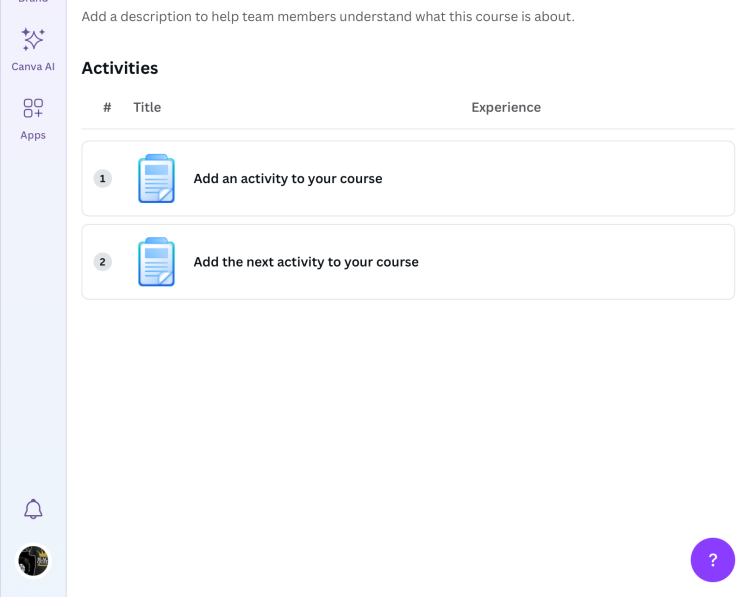
Picture Four is where you should be at now after clicking on the course button found in picture three. In picture four you can see the words new course.
This is where you name your course. Sort of like file arrangement. Beneath the title you can see “Description” this section allows you to add information explaining what the course is. Now you also have Course and Reporting. These are found just before the description section.
If you click on course nothing will happen because we are already in that part of Canva. However, when you click on Reporting, this will take you to a plain canvas. With some information telling to add Course activity and assign it to others. This is basically a system where you can track how far along people have come in the course you have created.
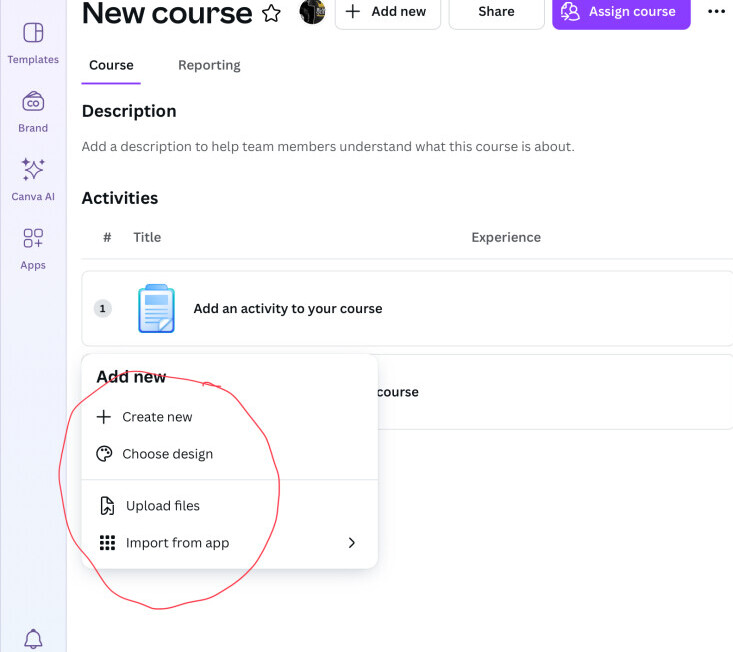
To get back to the previous screen you would simply click on the Course button found next to reporting. Now beneath them we have activities which are the courses below. To start creating courses you would simply click on one of the blue clipboard icons. A pop-up menu will show up. You should see create new, choose design, upload files, upload folder and import from app.
As seen in the next picture (5). Keep reading.
Picture 4
Course Creation
Now in picture 5 you see five sections Circle that was mentioned above: create new, choose design, upload files, upload folder and import from app. Click on either and a new pop-up window will show where it leads to. For example: if you click on “create new” a pop-up window will show everything you see in picture six that can be found below 5.
👇scroll down
Picture 5
In picture six you can see all the ways you can repurpose your content. If you have data that will be Canva Sheets, If it’s a document that will be Canva Docs and so forth.
To the right of the left column, you will see different size variations, icons and mediums that you can create your content four. I am looking from an iPad, so I would have to scroll left to see the rest. It is the same viewing from a computer.
Once you have decided on what medium to choose for your content that you are going to repurpose (via the little purple and white boxes) it will take you to that tool that you chose and you can begin creating content or repurposing old content there. Look to picture 7 & 8 to see what this may appear like.
Picture 6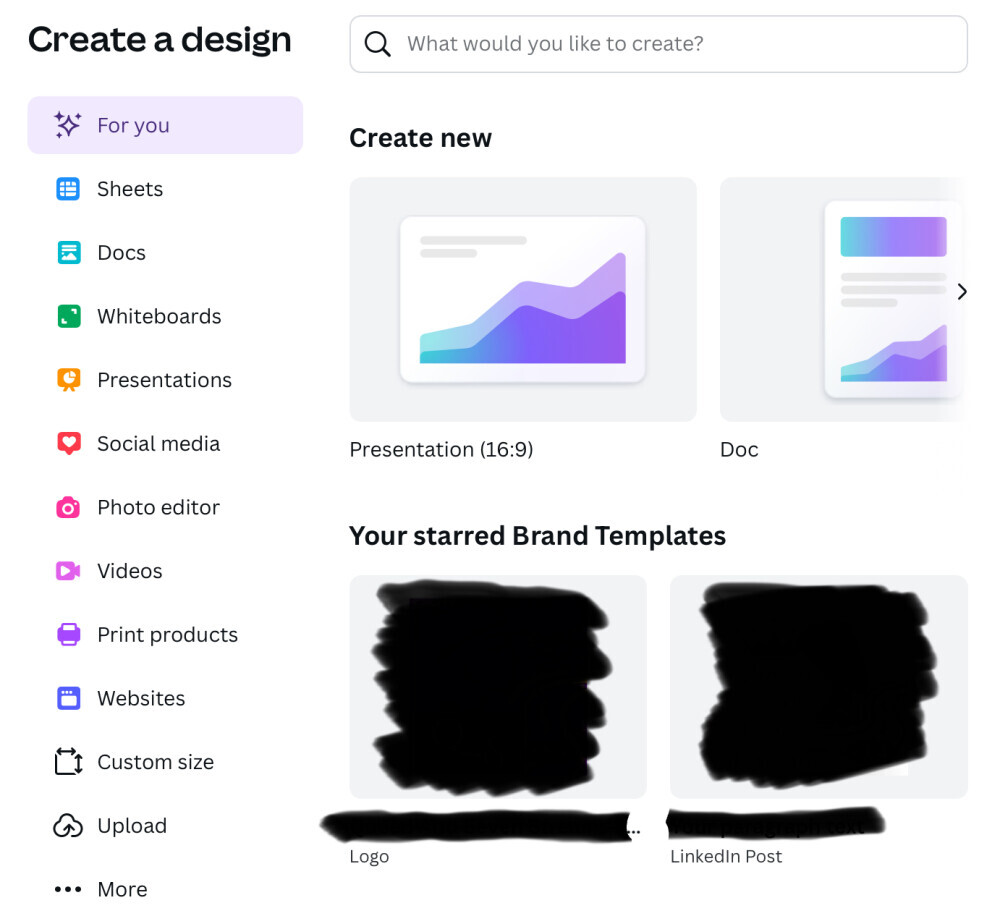
Here we are in pictures 7 and 8
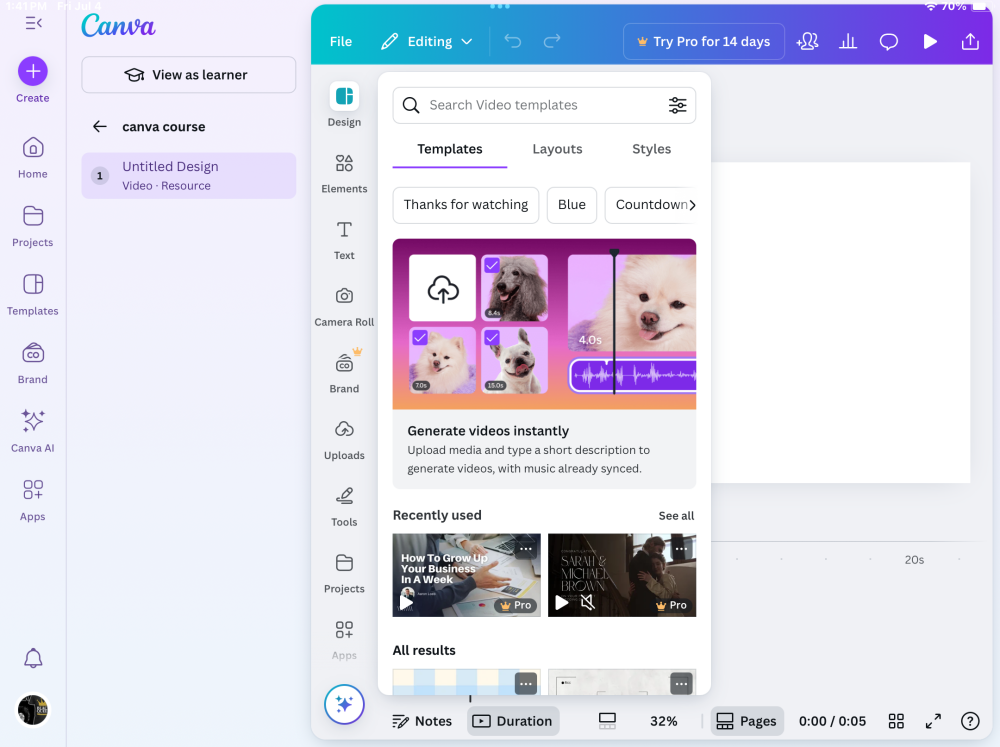
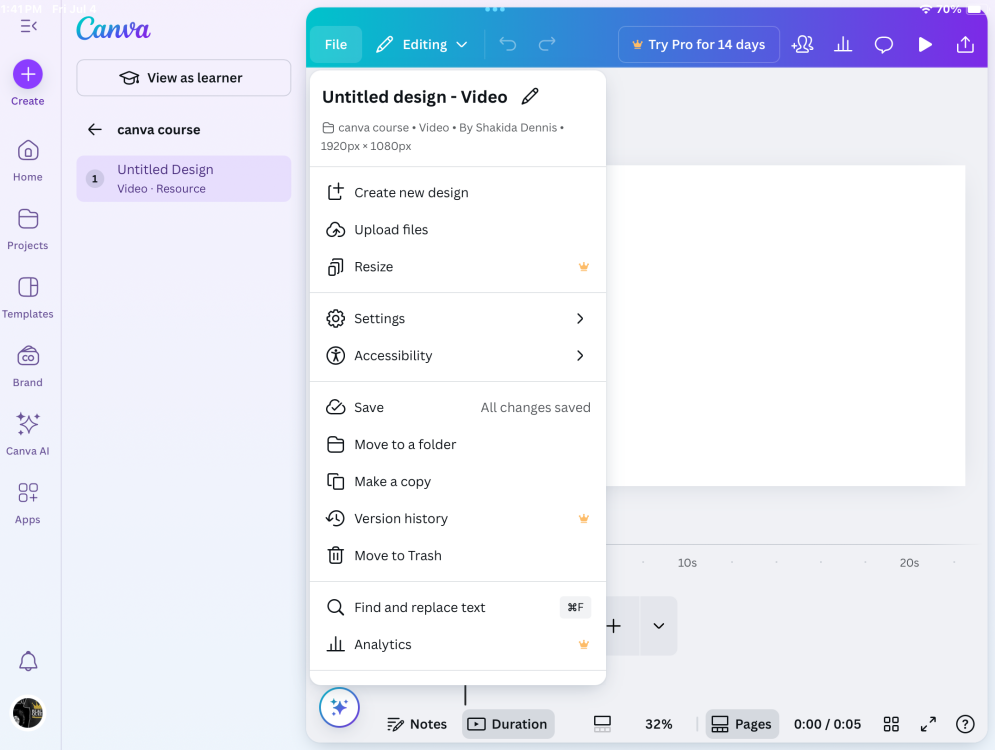
In picture seven this is what your dashboard will look like if you choose video. When you look to the left column, you will see the words "Untitled Design".
In order for you to name your design you will click on the words "File" found center left <-- of the screen next to an icon that looks like a pen which is next to the words Editing.
Once you find it. Click on it. This will take us to the 8th picture. Picture 8 is a drop box and shows more than just renaming the video. But I'll let you guys play with that 😉.
Move on to Picture 9.
Yes, this training course has a lot of pictures.
Picture 7
Picture 8
After renaming my course/file in the in the file section of picture 8 I click on "<-- Canva Course" to exit out of this section of the course creation without leaving it altogether. You can find the button in picture eight in the left column underneath "Try Pro for 14 Days."
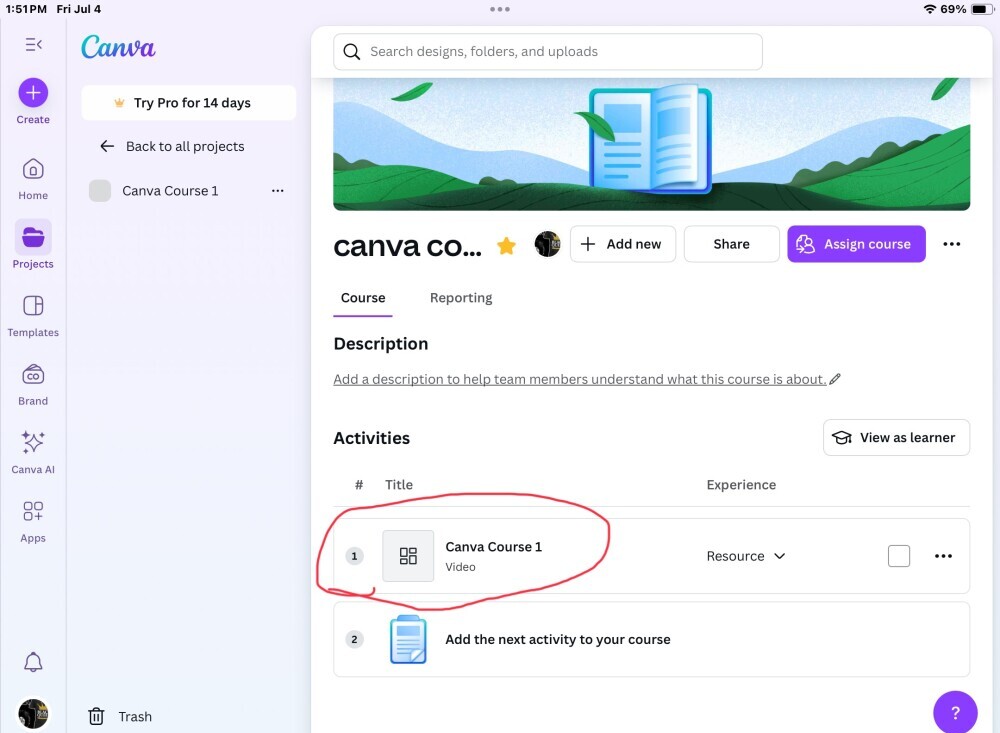
This brings me back to Picture 4 with one minor difference. If you look at picture nine something has changed. The first course has been renamed to Canva Course 1 video. In picture for it was just a blue clipboard. Now it has a name with some funny looking squares that only indicates that there are no pictures or images of this content until I add some.
Now I am coming upon my limitation with this training because I am operating in a free account and not premium. So, there will be certain sections like the Assign Course Section, that I cannot access. This is due to me not being a school teacher. I'm assuming Canva specifically wants this feature for teachers and students in real schools and universities.
That does not mean that those of us who are not educators are left out. If you look at picture nine again real close like. I have Canva Course 1 circled. To the far right you will see 3 little elliptical dots. Click on them.
Picture 9
Picture (s) 10-13
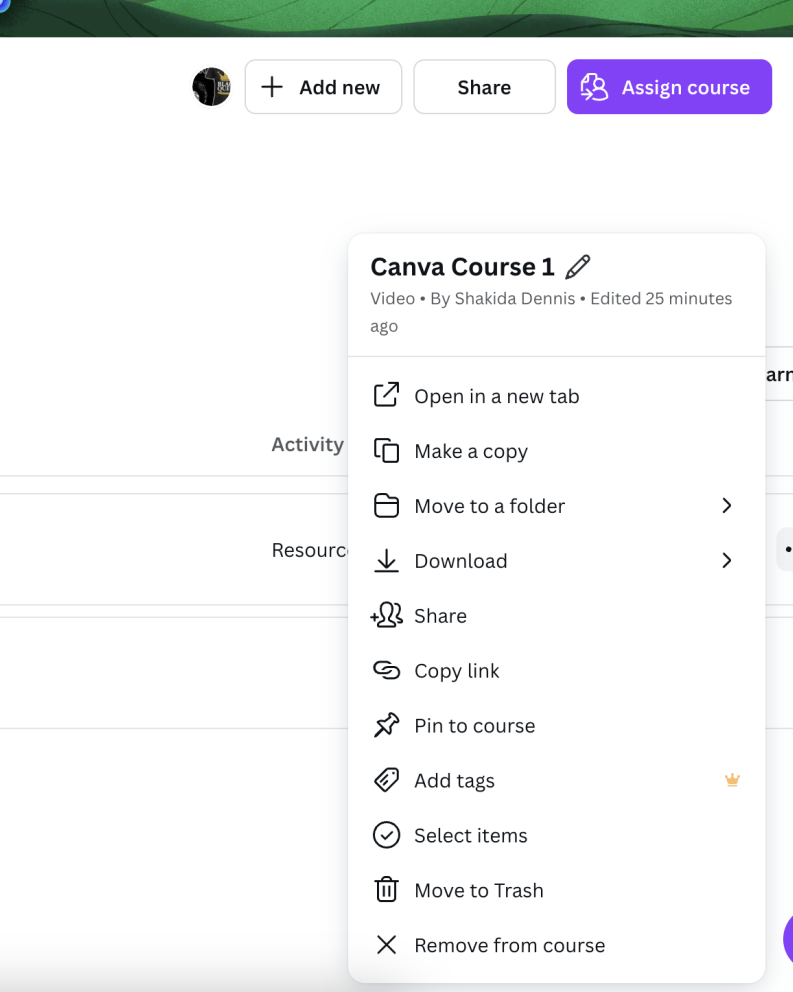
Once you have clicked on those little three dots this drop box below will pop up. Now we have only one way to share our course list in this drop box but only one works for us. The Share button with the two little human head icons is the one that works.
The copy link does not and that is really odd because when you click on the share button, you will be offered the exact same copy link except it is active.
Here's why, you have to give permission for others to access the link who do not have an account with Canva. Now at the top of the screen we have a share button as well located left of the "Assign Course" button.
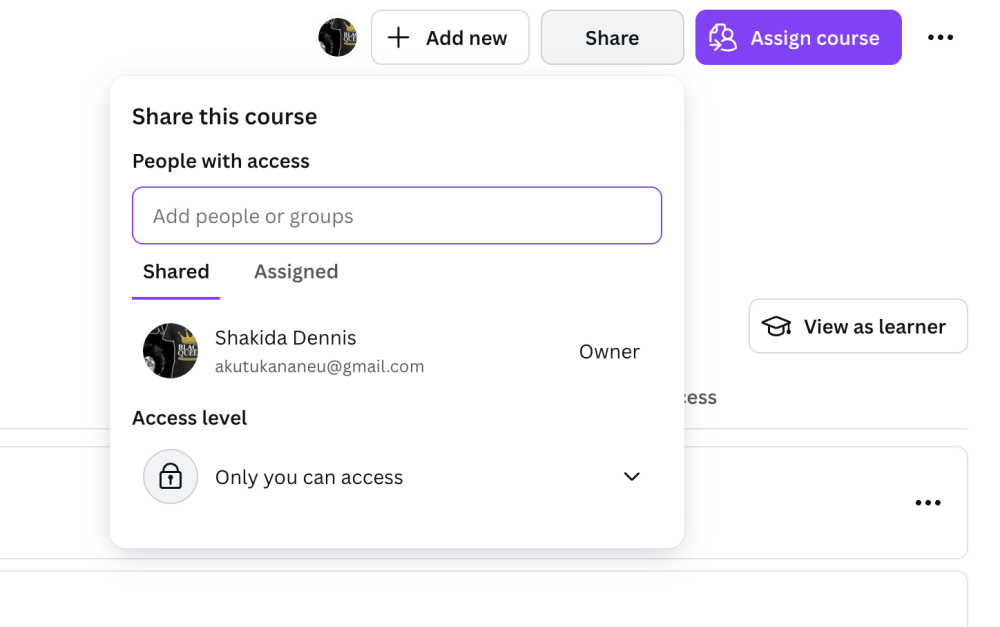
This too does not work because it functions as an in-house share button. Meaning the link can only be shared to those who have a Canva account and who are a part of your team. As it shows in picture 11.
The share button is highlighted light grey. When you look beneath access level it says only "I" the owner has access. I cannot even give access to anyone outside of Canva by this way unless they are a part of my team.
Moving on to picture 12 . Scroll down 👇🏾
Picture 10: three little dots
Picture 11 Share button.
Permission Granted/Revoke feature
Picture (s) 12-13
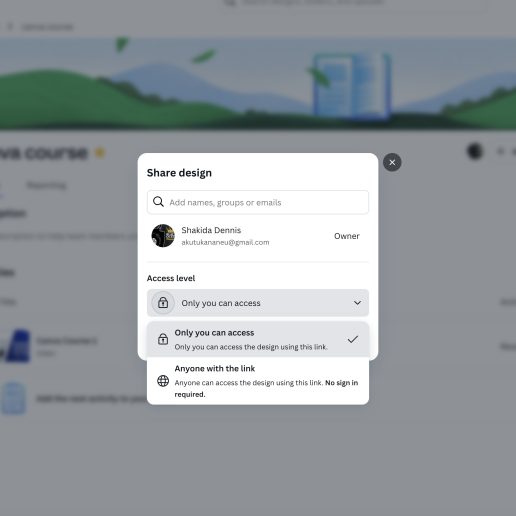
Here in this picture, it shows how you can give permission to those who want to view your content without giving them editorial access (that would still require a Canva account anyway). Remember those three dots found in Picture 9? Go back to them. Click on them then search for the words "Share." It has two little human head icons next to it.
This will pull up picture 12 👇🏾.
As you can see, you can change access to your content to “just you” OR anyone with the link. If you chose anyone with the link that takes you to picture 13.
Scroll down 👇🏾👇🏾👇🏾 for the final time
Permission Granted/Revoke feature 2
Here in our final picture 13. This feature gives you the power to decide who can see, edit or view your content using your special link. Once you have decided on how you want your viewers to access and engage with your link and the content within Canva. You are free to share that link with whomever your audience is.
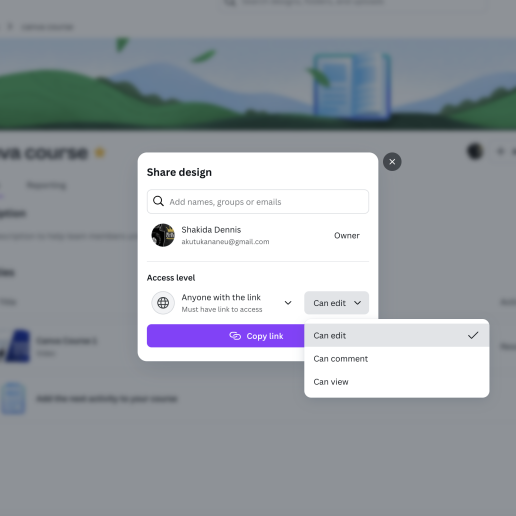
And that is it folks!
Let me know what you think about this Canva feature.
What questions do you have about it that I might have missed?
Now that we have video, I will be doing a walkthrough of it as well at a later date. It will be much shorter and easier to follow.
Happy BLOGGS!
Join FREE & Launch Your Business!
Exclusive Bonus - Offer Ends at Midnight Today
00
Hours
:
00
Minutes
:
00
Seconds
2,000 AI Credits Worth $10 USD
Build a Logo + Website That Attracts Customers
400 Credits
Discover Hot Niches with AI Market Research
100 Credits
Create SEO Content That Ranks & Converts
800 Credits
Find Affiliate Offers Up to $500/Sale
10 Credits
Access a Community of 2.9M+ Members
Recent Comments
12


Hey Shakida, this is quite a detailed course tutorial. Have you created some courses in Canva yet?
Yes, it is slowly coming along. I have to take a full day. Because I have never done something like this using canva and Canva is huge and easily to get lost lol
I kinda miss the old WA layout we had years ago. Because we had different sections where you could set up different course training, like Kyle does with his training and all the viewer has to do is click on the next button and go to the next course.
What you see here is old skill I used from way back then. Video I am still working on. I guess I am very finniky now and trying to do it without errors. Outside of camera shyness.

Thanks for sharing, Shakida!
Thanks to you, I start building my first course in Canva. It's still work in progress, but I am happy so far with the outcome :)
Best,
Maria
You are very welcome. I just do not like how these pictures came out on this blog. I shrunk them down and some how they reverted back to the original sizes. Oh well, keep at it. I have started several courses in Canva. I’m like a kid in a candy shop can’t stop creating. Happy blogs!
No worries, the pictures are good to understand where and how to use this feature.
Haha, we are all kinds with so many new tools and features :)
Happy blogs to you too :)
This took me some time to write and edit. I do not like how the pictures came out though. I tried to shrink them down but they went back to regular size. I will inquire about this.
See more comments
Join FREE & Launch Your Business!
Exclusive Bonus - Offer Ends at Midnight Today
00
Hours
:
00
Minutes
:
00
Seconds
2,000 AI Credits Worth $10 USD
Build a Logo + Website That Attracts Customers
400 Credits
Discover Hot Niches with AI Market Research
100 Credits
Create SEO Content That Ranks & Converts
800 Credits
Find Affiliate Offers Up to $500/Sale
10 Credits
Access a Community of 2.9M+ Members
Wow, Shakida! This is fantastic information. I wish I had an idea of a course to do to use it :)
Thanks for your work in doing this training.
Teri
You are very welcome. My course that I am creating is taking some time, but it is coming along well.