Social Media Link Widget How-To


Published on March 30, 2018
Published on Wealthy Affiliate — a platform for building real online businesses with modern training and AI.

I thought I'd share an easy how-to on putting your social media links on your site for your visitors to be able to follow you easily. I hope you find this blog of use.
Why Social Media?
Why not? If we're being realistic we want to make sure we grab all the traffic we can. If links to our social media keep our viewers engaged and entice them to come back to our page as we post new material why wouldn't we put them up?
Do I Need to be a Member of Every Social Media Site Out There?
Of course not. Most people will pick the ones they are already using or may setup accounts on those they hear about often. In the end you want to make sure you use the social networks that make sense for you niche.
What Do I Need to Do?
First off, if you haven't already, setup your social networking accounts, pages, collections and/or groups. I've found that setting up areas specific to my niche are preferred to having someone just join my primary Facebook or Twitter account where I might post content not relevant to my site's visitors. Keeping your content relative to your niche will keep your visitors following you. If you make random posts this can turn off your followers and they may unfollow you.
Obtain the direct links to your relevant social media groups, pages, circles, collections, etc. and keep them handy. You can usually get the links by visiting the associated page and then copying the link from your browser's address bar.
Ready to put this into action?
Start your free journey today — no credit card required.
This article is not about setting up your actual social networking accounts. I may post an article later on how to do that although I'm sure such articles already exist.
OK My Social Networking Sites Are Good to Go - What now?
First off create or find icons for each of the social sites you wish to offer on your website. Using a graphical representation for each social media site will give your links a more professional look vs just having linked text a user can click on. I recommend a smaller size and some sort of shape consistency. An example would be 256 x 256 pixels and square or circular designs. If you perform a Google search for social media icons or round Facebook icon, etc. you'll be presented with quite a few options. Just make sure that, regardless of what image you use, you have the right to use it. You can link to these images from some other site that's hosting them (as long as they permit you to do so) or you can upload them to your site and reference them locally. I recommend the local option. That way if the site you were referencing changes their links, goes offline or some other issue pops up, you won't be affected. Simply upload them to your site media like you would any other image.
I've Got My Icons All Lined Up - What's Next?
Alright now we have done our prep work let's get these links onto our site for our followers to click. Follow the steps below and you should be good to go:
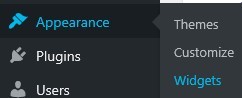
- Log into your Site Manager


- Navigate to Appearance > Widget
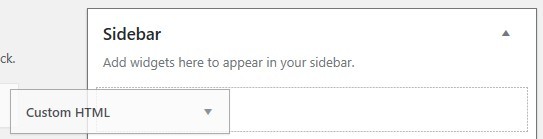
- Drag the Custom HTML widget to the location you want to have the links appear on your site (I chose the top of my sidebar).
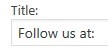
- Enter a descriptive title such as "Follow us at:"
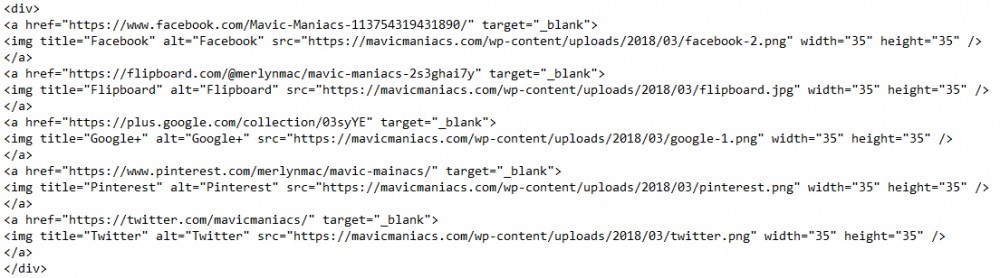
- Type in <div> and </div> into the content field.

- Paste the following code in between those tags replacing data1 with the actual URL to your social media page, data2 with a title of where the link goes, data3 with the alternate text description for non-graphical browsers and data4 with the link to the graphical image:
 Example:
- Repeat step 6 for each social media link you want to add changing the relevant data fields as appropriate.
- Click Save.

- Click Done.

My site's links were used for the example image in step 7. This is what the end result looks like on my page:
The target tag will make the link open in a new tab or window. If you'd rather the link simply take the visitor from your page to your link simply remove this tag.
The width and height tags tell the browser to fit the graphic within those confines. You can adjust these as you see fit.
I hope you found this post helpful and please, if you have any comments as to how I can make it clearer or better in any way, let me know.
Thank you,
Scott Hinkle
Share this insight
This conversation is happening inside the community.
Join free to continue it.The Internet Changed. Now It Is Time to Build Differently.
If this article resonated, the next step is learning how to apply it. Inside Wealthy Affiliate, we break this down into practical steps you can use to build a real online business.
No credit card. Instant access.