Create A Custom Banner For eBay Marketing
eBay used to provide a tool, Creative Generator, that would create a custom banner ad that you could use. Since they’ve become the new eBay, that seems to have gone away and the Creative Generator tool is geared to predefined items that eBay wants you to sell.
Don’t get me wrong. They’re nice banners. They just don’t have a banner ad for that Martin 000-28 guitar that I want to sell! Lol. You can also search for an item by Title but unless it already has a predefined banner ad, you get no results.

The Custom Banner tool will search for and find your item BUT… it will also return every item that matches your search criteria plus – if it has room – some that you weren’t necessarily searching for. The result is a slick looking banner ad with multiple items that you can specify “Auto Scroll” or leave it to scroll manually. Time waster, if you ask me.
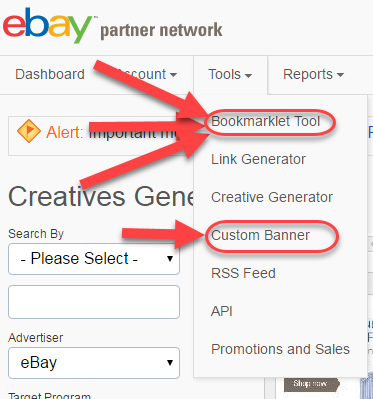
So what do you do? First thing, and you only have to do this once, is set up a bookmark using the Bookmarklet tool. That’s the first option above with the three arrows pointing to it.
Click on the Bookmarklet tool option and you’ll be taken to a page that lists all of your eBay campaigns. A campaign is your marketing campaign name. In the list, you’ll see the Campaign ID followed by the Campaign Name. I’ve got mine blocked out for privacy reasons. I left the one named “default” – I never use it.
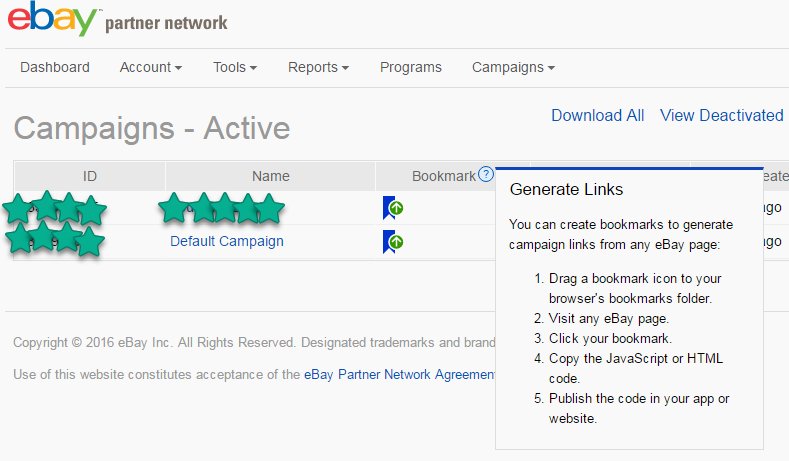
In the middle there’s a bookmark icon. The title, Bookmark, has a question mark beside. Put your cursor on the question mark and you’ll get instructions for generating a link. You basically drag the bookmark icon into a bookmark folder.
From that point onward, you go to eBay, find the item you’re looking for, then get out your bookmarks and select it. The bookmark name will be the same as your Campaign Name.
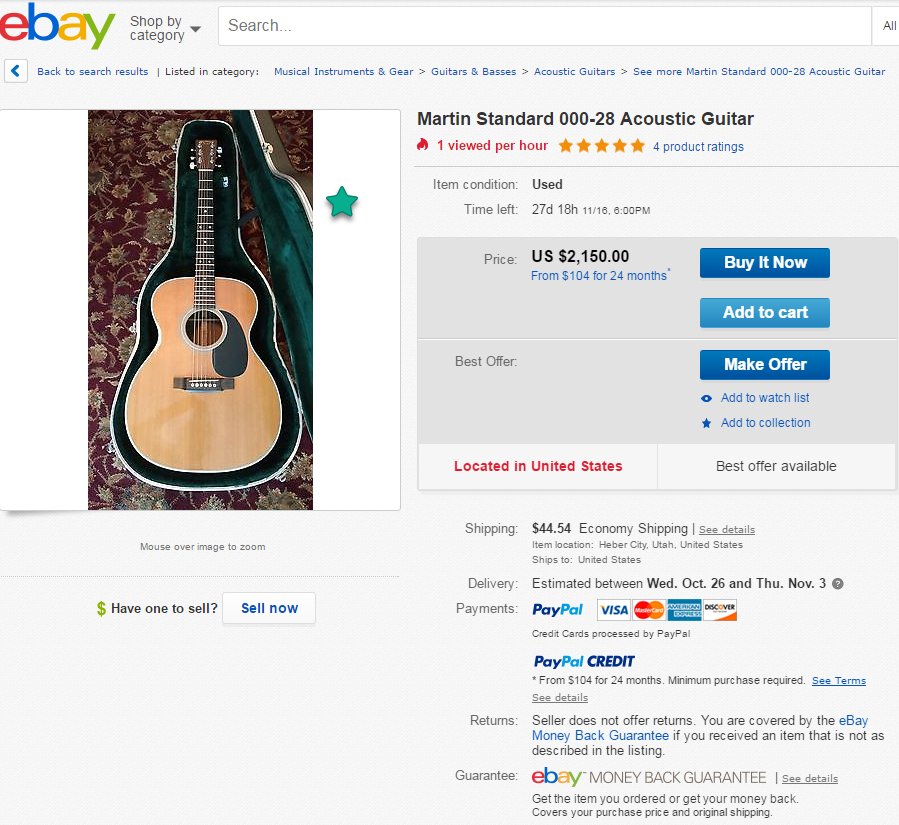
So now I’m looking for that Martin 000-28 to sell. I go to eBay, do my search. When I find the guitar (or item) that I’m looking for, I click on it to go to that item’s eBay selling page.
Once it’s in your browser, select the bookmark.
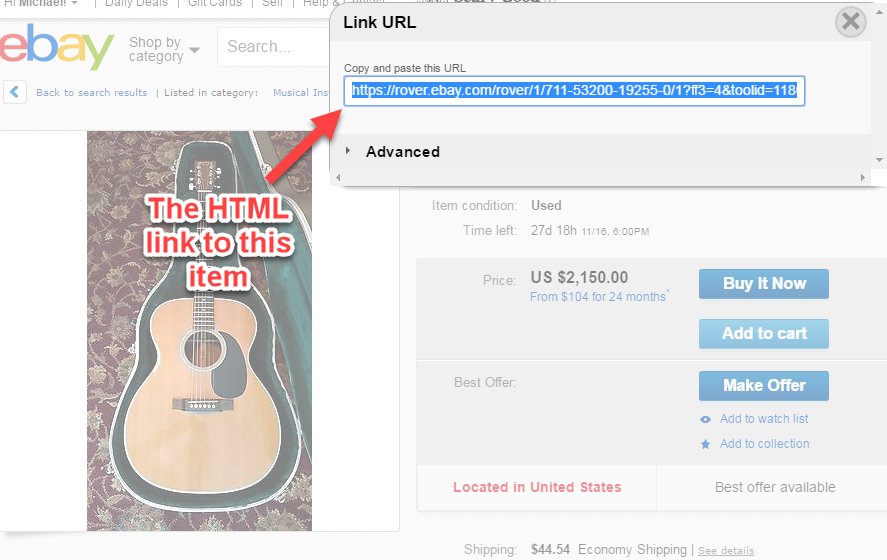
The HTML link to the item is already selected. You can just cut and paste. But remember, it’s just a link. Just as an aside, there is an Advanced tab you can select. It will give you the same link in Javascript. But it’s only a link. No picture or description or price…
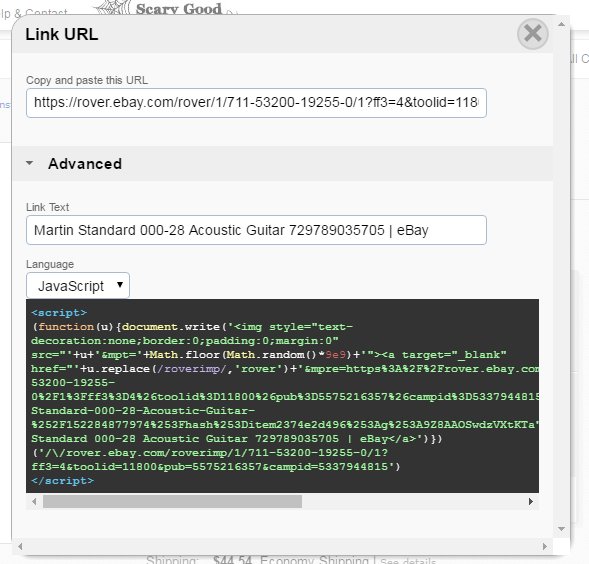
So, at this point you just select the Link URL in the top window titled Copy and paste this URL. Copy the link into the clipboard with CTRL-C or however you do a Copy.
Open a blank document in Notepad and paste the link there. If you use any of the three links you can get at this point and all you’ll get is a link with the item description. Still no picture or price because the image source link ends with CACHEBUST. Busted link because the picture has a hovering watermark that you use to zoom in different parts of the image. So we will have to change the img src attribute to point to a good image and make our own description and price.
Click on the image of the item and it should go into it’s own window. Right click on that image and select “Copy Image Address.” Go back to Notepad and select everything between the double quotes after the src= attribute. Paste your image address there.
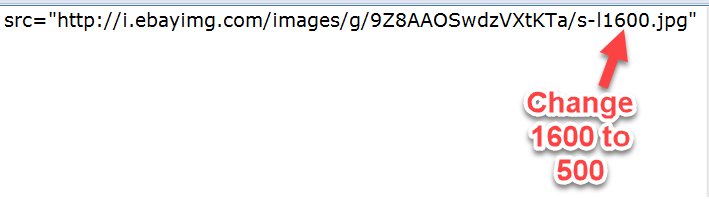
If you leave the image URL as is, you will probably have a very large image, so I change whatever number they have in the link – here it is 1600px – and change it to 500. You can experiment with whatever size(s) you want to.
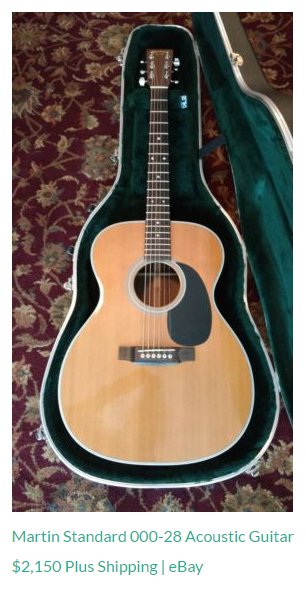
Once you change the px value, there’s one more thing to change to make sure the description wraps around the bottom of the image. In Notepad, go to the end of the entire link and you’ll find the item description. Place the BR tag in front of the description. The last thing in the description is also the Item ID. I usually replace that with the price.

Do a CNTRL-A in Notepad to select everything, then Copy it into the clipboard. Go to your web page and edit it or open up a Widget. Paste the entire thing there. Then what you’ll get is this:
You may want to make one other modification if you want to hide your affiliate id and campaign id. Copy the URL in the HREF tag and use one of the tools for tiny URL’s, like GOO.GL or BIT.LY. Replace the long URL with the short one and you’re good to go!
Hope this helps someone and opens up eBay for them to sell from! It’s really not that difficult once you do it. The old adage says, “You learn how on the first one.”
Mike
Join FREE & Launch Your Business!
Exclusive Bonus - Offer Ends at Midnight Today
00
Hours
:
00
Minutes
:
00
Seconds
2,000 AI Credits Worth $10 USD
Build a Logo + Website That Attracts Customers
400 Credits
Discover Hot Niches with AI Market Research
100 Credits
Create SEO Content That Ranks & Converts
800 Credits
Find Affiliate Offers Up to $500/Sale
10 Credits
Access a Community of 2.9M+ Members
Recent Comments
12


Thanks for the info. I was looking for this and it has become very handy! WA Rocks
Ask and you shall find!


See more comments
Join FREE & Launch Your Business!
Exclusive Bonus - Offer Ends at Midnight Today
00
Hours
:
00
Minutes
:
00
Seconds
2,000 AI Credits Worth $10 USD
Build a Logo + Website That Attracts Customers
400 Credits
Discover Hot Niches with AI Market Research
100 Credits
Create SEO Content That Ranks & Converts
800 Credits
Find Affiliate Offers Up to $500/Sale
10 Credits
Access a Community of 2.9M+ Members
I am an E-Bay Partner Network Associate and I used to love the Creative Generator. But yes, they took it away recently. I really appreciate this and will be following through on your training to learn how to create an item that I am promoting on E-Bay. :)
That's great to hear, Stephanie! Let me know how it goes!
Mike