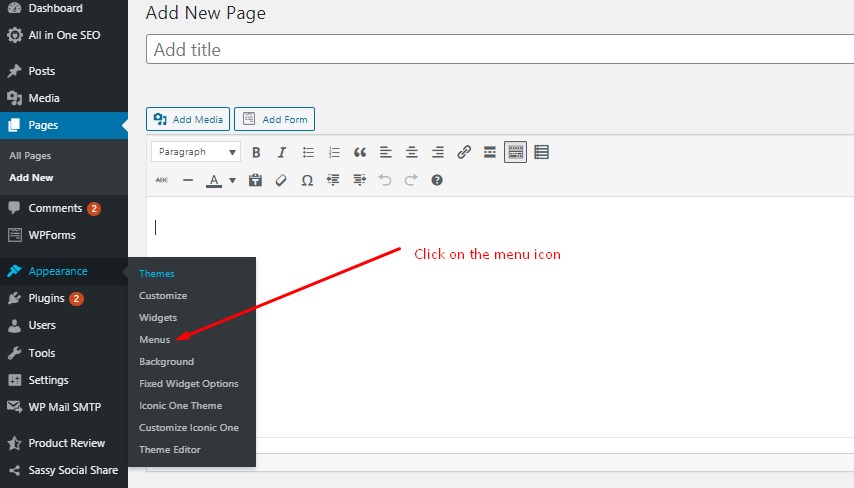
As usual, log into your dashboard. Click on the appearance button after which you can select the menu

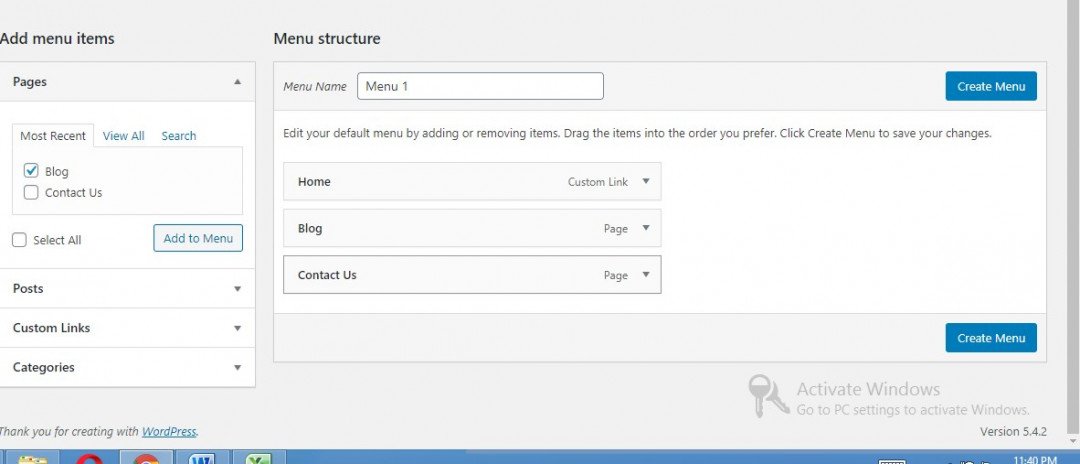
It will take you to the platform where we can create a menu and manage it. The first thing is to give the menu a name. In front of the menu name, you can assign it a name. I always prefer a name that associates with the position of the menu.
You can call it Top menu, Header menu e t c. Now click the create menu Icon.
Your menu platform should open and should be something like the image below here I have called mine menu 1

You should see a tab tagged “Add Menu Items”, this contains a list of the pages you have created on your website. Select the pages you want to appear on your menu. Since we are on our header menu, you can select pages like Home, Blog, About, contact us, etc.
After you have completed the selection, click on the Add to Menu icon. You will see your menu items listed in a vertical position. Not to worry they will appear horizontally on your website. Simply by moving each of the items you can properly position them the way you want.

And

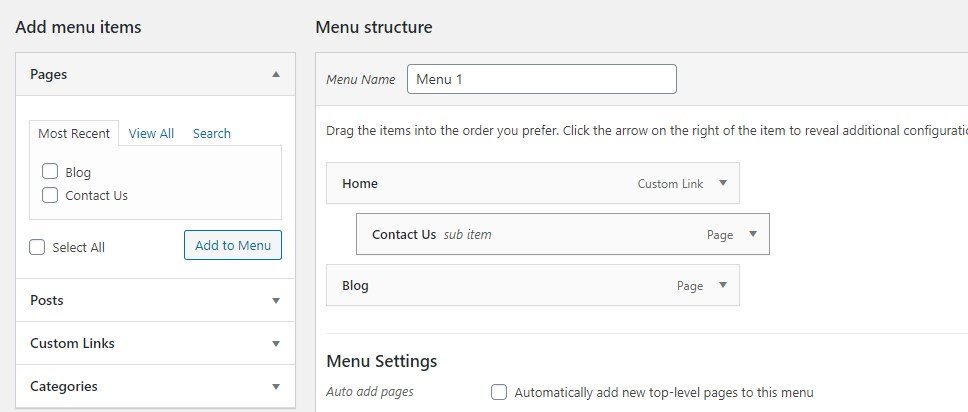
- While in image one I moved the contact us page slightly to the right, it is not aligned with the home page and the blog page. This shows that the contact us page is a sub-menu.
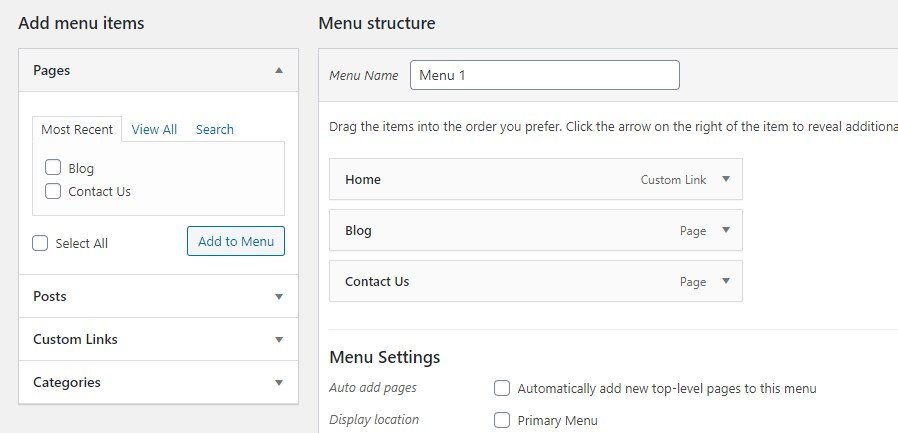
- In the second image, I have returned the contact us page to the same alignment with both the blog and home page. This shows they are all at the same level, also there was a change in position.
Note: all this occurred just by dragging the buttons in my dashboard. You can play around with it and see how it works. Quiet simple
The next thing is to select the location where your menu will be displayed. Look below your page and you will see a list of position tagged Menu Settings depending on your them. For the header menu, simply pick on the primary menu.


