I absolutely love using images in my pages. It brightens them up and makes the articles more appealing. When setting up an image through HTML, there is an img tag/element.
One thing I want to mention. In some of the newer articles about HTML, they call tags elements instead of tags. I am old school so I call them tags. This can be confusing so I wanted you to know that sometimes you may hear something like your Head element.
Image Link in MEDIA
First I want to show you how you can find an image link of an image you have uploaded to your media. Open your Site, log into wordpress, go to dashboard and click on Media. Click on the picture you want the link from and a box will open up:
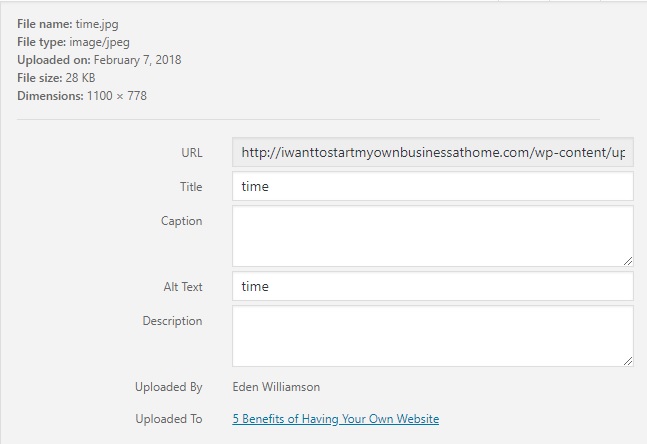
As you can see the first box is URL. This is the URL to your picture. You will need a URL to manually add a picture through HTML. I am going to use this URL for my example.
The basic HTML code for an image is:
<img src="something.jpg" alt="Something Standing">
I don't even want to get into a talk about directory locations etc. But basically, this img is saying the image itself is in the same file folder as this page. Usually, in Wordpress, the images are stored in our Media folders created by Wordpress.
<img src="Linktothepic" alt="Something Standing">
Something about the training wouldn't allow me to put the link. LOL It would show the picture instead.
Word of Caution
Out of courtesy and etiquette, you should never ever link a picture image to show on your page to a picture on someone else's page without explicit permission. This will cause bandwidth use on the other site and is considered bandwidth theft. People do not like it since hosting sometimes offers packages with a certain amount of bandwidth.
If you want to use the picture, write to owner of the site and ask them if you can use their picture or link to it. If they give you permission to link to it, then you are good to go.
Be curteous to your fellow bloggers! It goes a long ways!!
In our next section we are going to discuss Formatting Elements.
Top Helpers in This Lesson

Last time i tried to use html & make some modifications to my site but it is saying that i don't have right to do that modification & i should contact the editor...so i stop my modifications.thank you for the helpfull lesson


