Lesson 4: Preview, Activate, and Publish Child Theme

Lesson 4: Preview, Activate, and Publish Child Theme
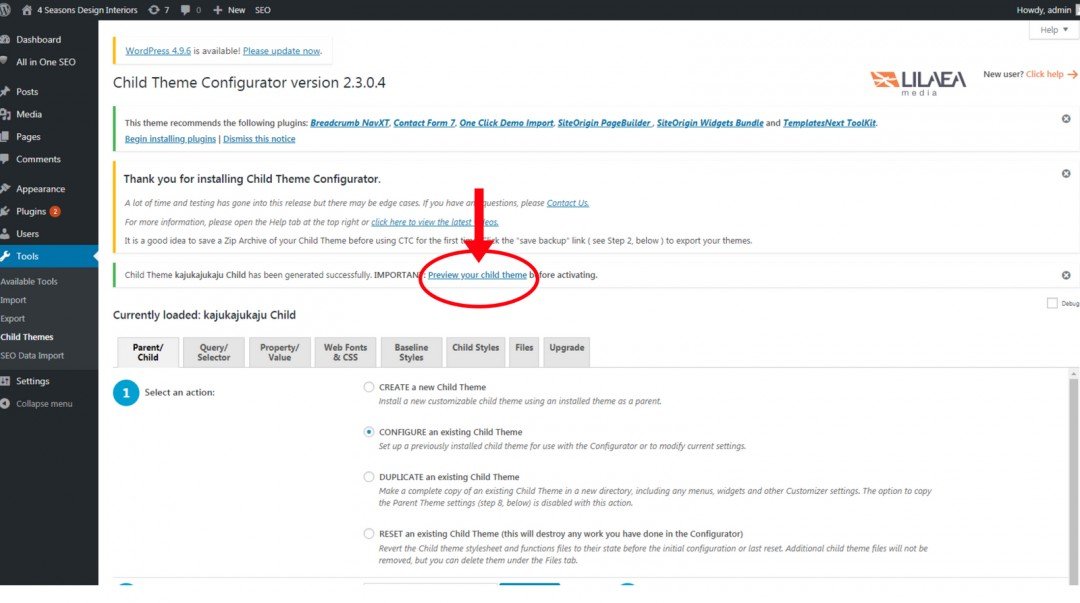
17. Now back in the Dashboard, Click Preview the New child theme.

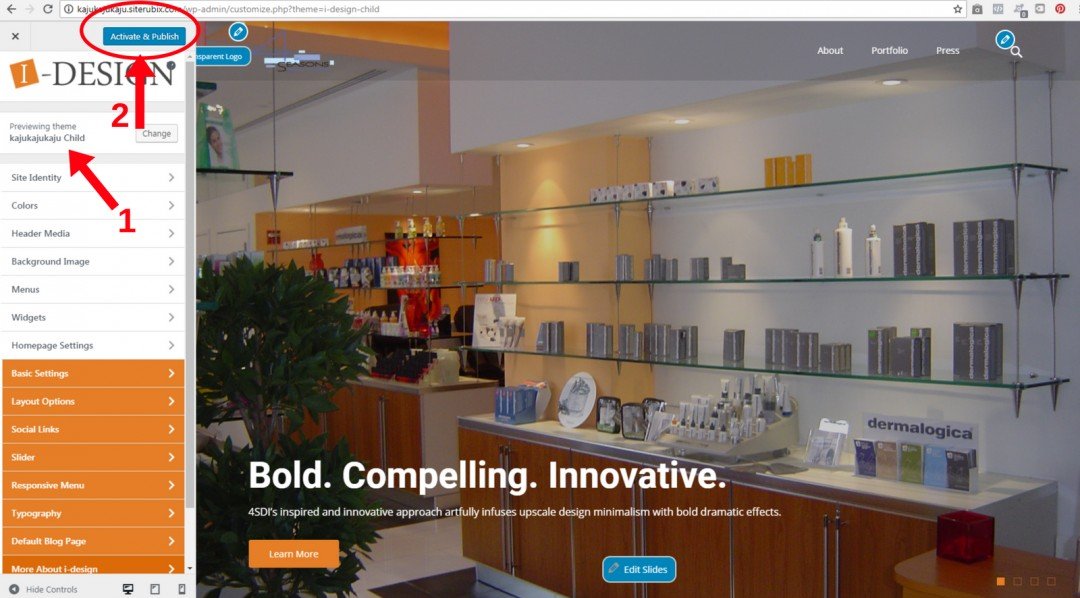
18. Verify that the previewing theme is of the form [your-theme-name-child]. It will open in your Customizer and look like this. Here it is kajukajukaju Child.
It looks good!
Click Activate & Publish.

The LAST step is we must REVIEW our work to verify our Child Theme was activated and published to satisfaction. And that the CHILD THEME (Clone) and PARENT THEME (Original) co-exist on the same page in Appearance > Themes.
When you are ready, click “Next Page” to Lesson 5
Join the Discussion
Write something…
kimgwinter
Premium
Great training, thank you Kaju! I've set up my child theme and it all worked perfectly. So just to clarify, when I want to make any changes or add content, I do that in my parent theme. Will those changes copy over to my child theme when I activate my child theme? Is the child theme meant as a carbon copy to replace the parent theme if the parent theme gets damaged or loses info?
Chezbrown
Premium
Couldn't you spell your name or something this morning that you had to type it all those times for your test site OR do you start your first test site with just Kaju.siterubix.com and then for each test site you just add another Kaju on to the name lol. Not sure I would like to see it if you had 7 or 8 test sites lol. xxxx


