Most TablePress settings are handled "on-the-fly" as you go about creating your tables, as you will see in this segment of the training...easy! :)
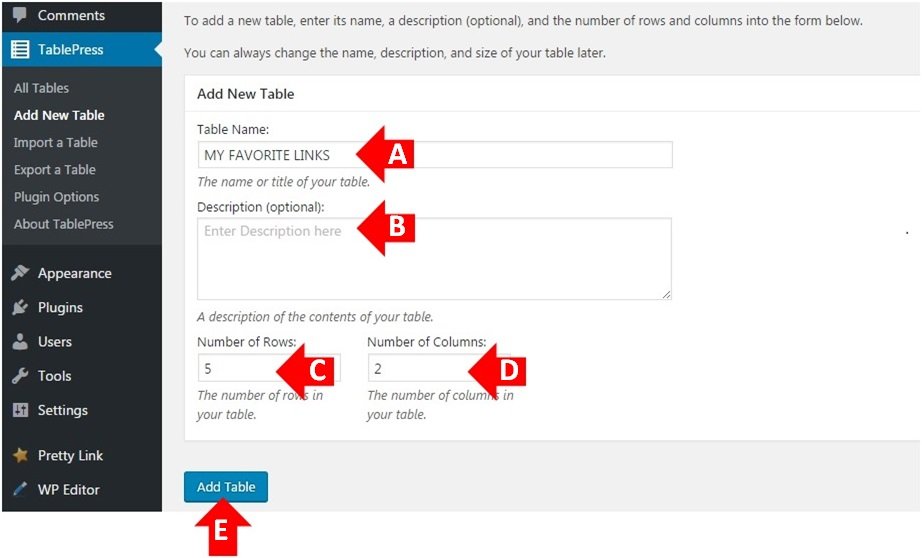
Step 5A (see example below): Name your table. You will have the option of having this appear as a heading or title for your table later in the process, so keep that in mind when choosing a name (it can always be easily changed later if necessary).
Step 5B: Enter a description for your table. This too can optionally appear with your table or it can be for your reference only. I like to name my tables to keep them organized, but I prefer to describe my tables to my readers in the text above and below each table, so in this example I will leave that blank.
Step 5C: Type in the number of horizontal rows you want your table to have. Keep in mind that if you want a heading you will want to add an extra row for that purpose. If you also want a footer in the table, then add still another row for that to the total number of rows (one of the best features of TablePress is how easily old tables can be modified and new ones created, so if you decide you need more, or fewer, rows or columns later on it's no problem).
Step 5D: Type in the number of vertical columns you want your table to have. If you want a left-hand header column or a right-hand total column, be sure to add them to the total number you type in.
Step 5E: Select: "Add Table"
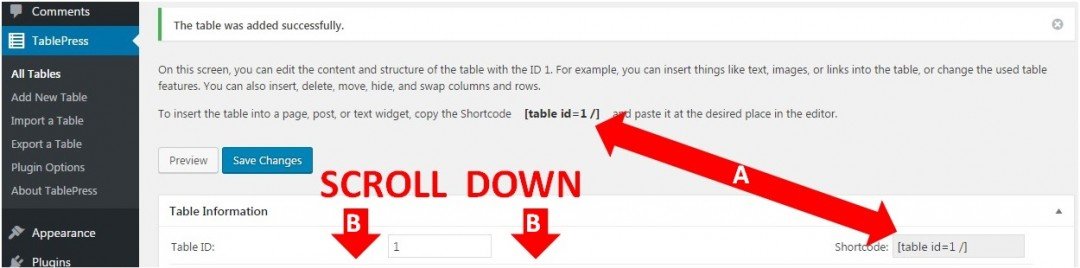
Step 6A (see example below): Note: each table you create will not only have a unique name (whatever you named it in Step 5A, but also a unique html code assigned to it. This code begins and ends with [ ] brackets. Where you place this code (including the brackets themselves), will determine where that particular table appears on your website.
Step 6B: Scroll down and let's look at the rest of the table creation page.
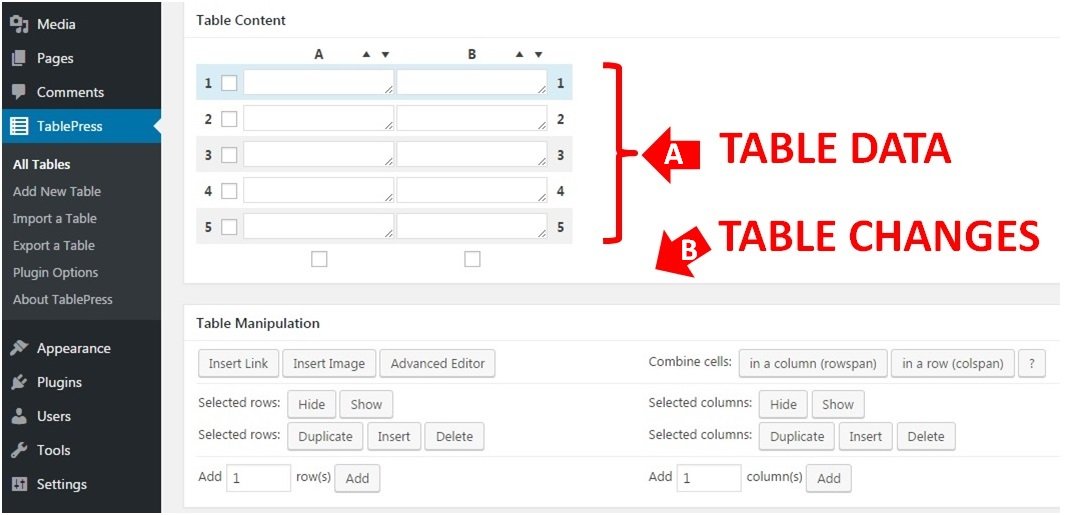
Step 7A (see example below): You can now see the created table area where we will add the specifics for this particular table. As per our settings earlier, we have 2 columns and 5 rows to work with.
Step 7B: Further down, we have the ability to make adjustments to the table as we go. We can insert links and images into any of the provided spaces in Table Data area "A".
There is also an Advanced Editor, but we are wanting to get our table up quickly and easily, so we won't be diving into that section in this tutorial.
We can edit rows or columns using the combine, duplicate, insert, delete or add rows buttons. Play around with it. Don't worry, you can't break anything. Nothing appears on your website or even in your page/post editor until you paste a table [code] somewhere.
We can also hide specific rows and columns from displaying when on our websites, while leaving them in the table here in the editor for later use, by using the Hide and Show buttons.
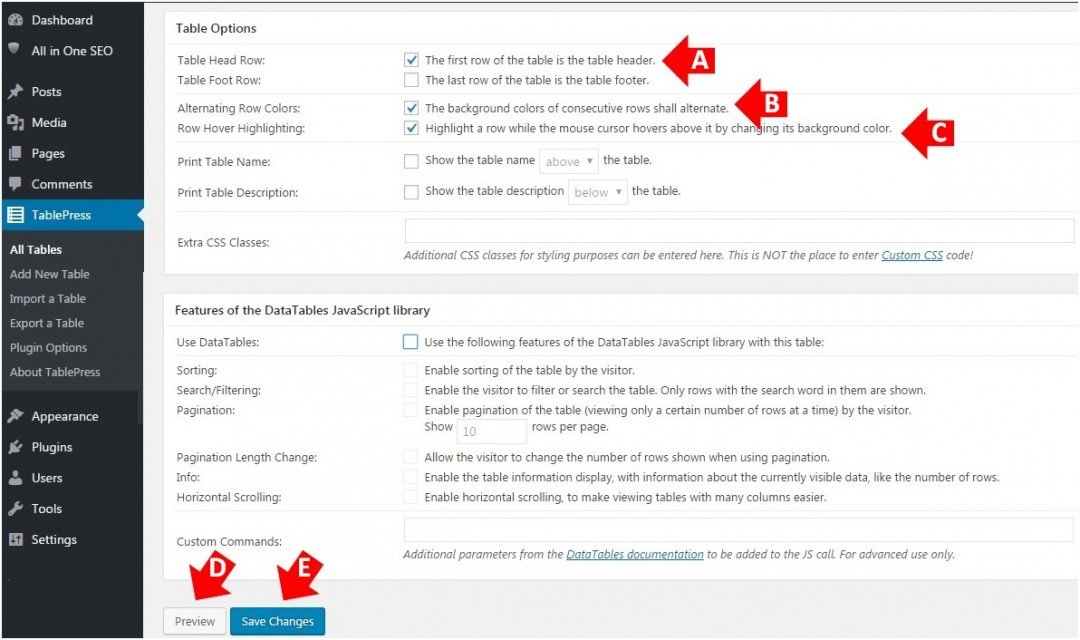
As we scroll down just a little further, there are 2 more sets of settings to look at: Table Options and Data Table Features.
Step 8A (see example below): Here we have the option to assign special functions to the first and last horizontal rows of the table we have created. In our example, we want the top row to be a heading for what's underneath, so we will only check the first box, but leave the second box blank (it is always best to outline your plans for a table ahead of time to speed this process up and make things easier).
Step 8B: This option alternates the background shading behind every other row. It is for appearances only. In our example, we will check this box.
Step 8C: This option causes the row where the mouse is hovering to be highlighted. It is also for appearances only and doesn't change the over all function of the table. In our example we will also be using this. I like the way these 2 options (B and C) look, so I always check both of these boxes as I think it makes the table easier to read and use.
You have the additional option to display the table name and description you typed in earlier if you wish. In this example, we will assume the table is well explained in the surrounding text, so we won't choose these options, today.
TablePress also allows for some custom CSS coding to further modify the features of your tables, but that's more advanced than we need to be in this tutorial, so just ignore that option for now.
Step 8D: At any point in adding data to our table, we can "Preview" what we've done. We will cover this option in more detail later in this tutorial when we have something added to our table to look at.
Step 8E: As with any project inside of Word Press, be sure to "Save Changes" often, especially before exiting the current screen.
The "Features of the Data Tables Javascript Library" is a feature that allows you to offer various table sorting and viewing options to your website visitor. This is a really useful tool if you have large tables of data, where sorting would help the audience find the specific information they are looking for.
However, most of use will not be creating tables larger than what can be viewed entirely on our screens without even scrolling down, so I will leave this function for you to play around with if you wish.
Now, we are ready to add our data and create a unique table for our website! Let's do it! :)


Thanks, Chris for sharing this training.