How to Insert Images to Your WA blog?


I am doing this blog post to help out anyone who would like to know how to add images to your Wealthy Affiliate Blog. I have also been asked how to insert the images so, I thought that it could help out others as well.
Most WA members probably all ready know how to do this, but, there are a few new members that do not know how to add the images into their WA blog and at first I was one of them until, I recently figured it out by clicking here and there....
When you are creating your blog content in WA, you can add an image just as you would with you WordPress blog. Create your content and simply insert the image into the place that you would like it to appear on your WA blog. So if you want an image on this next line just place your cursor in the spot you want the image to appear, click image, click browse and find the file, open the file, then crop, and click done.
I added the image here: Picture below shows you there were no images in the beginning

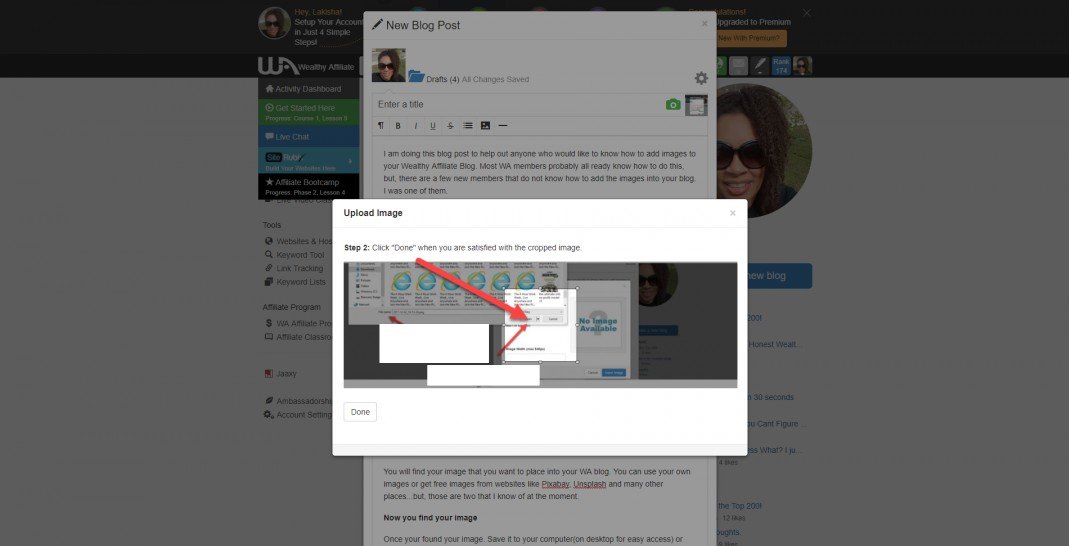
Need further instructions follow this ....and hopefully it helps
How to add the image...
You will have to find your image that you want to place into your WA blog. You can use your own images or get free images from websites like Pixabay, Unsplash and many other places...but, those are two that I know of at the moment. And, if you know of any more free image sites, feel free to share...
Find your saved image
Once you have found your image. Save it to your computer(on desktop for easy access) or remember what file the image was saved under.
Word of Advice
Before you upload the image make sure you place your cursor in the exact place you want the image to appear. then proceed with uploading the image.
I have found if my image is not in the exact place I would like the image to appear, I have to either erase and start over or move words around. Either way it goes it seems that I have to always just start over, so to avoid this it is always best to pick the spot you want the image to appear in first then upload...Keep reading!
When you are ready to upload your image, you will:
Click the green camera or the icon that looks like a mountain. I find that using the icon with a mountain look works a whole lot better than the green camera icon but, feel free to try them both out and see what works best for you...

Find the image you saved whether you saved it on your desktop or elsewhere. Click that image and make sure it shows up in your File NAME:_____________ then click open...

Once you click open----> the image will upload to your WA blog:
And, that is all there is to it! Hope this has helped...and thanks for stopping by


Recent Comments
10


Great! that is even easier. For some reason my images wont copy and paste. My text, I can copy and paste though. So, I had to do it the long way...I'll keep trying maybe it will work one day...


See more comments
Excellent post! I have not tried inserting a photo in my WA blog as yet but now I know the exact steps and I am looking forward to trying it out with your clear and simple instructions on my next post!
Thank you! I am glad the instructions were clear. Thanks for stopping by..