So ...
Upon activation, go to Settings => External Media to access the plugin configuration page. As you'll see, this awesome plugin will allow you to conect several external storage locations or services: custom remote URL (!), Dropbox, Box, OneDrive, Instagram (!), CloudApp and Google Drive. In this tutorial I am going to focus on Google Drive, but of course, you can explore other services as well if you want ...
So ... Select the Google Drive tab, and check the "Eanble this plugin" checkbox to enable the Google Drive option:
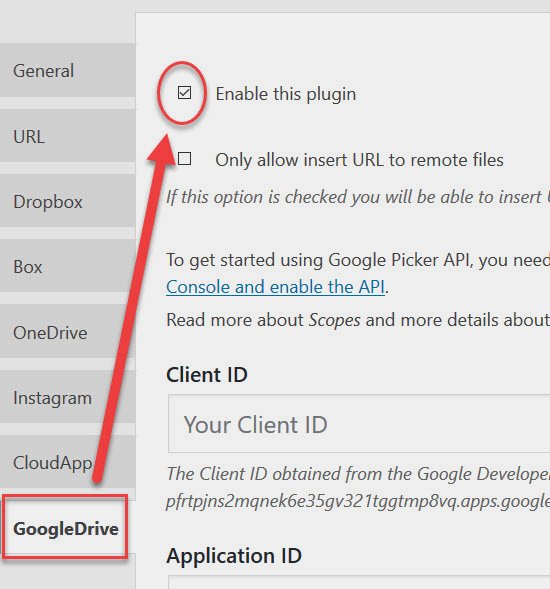
Next, you'll have to enter a "Client ID" and an "Application ID". In order to get them, you'll have to create a project on the Google Developers website. Realx, is really not rocket science ...
Go to Google Developers Console and click the "Continue" button to create a new project:
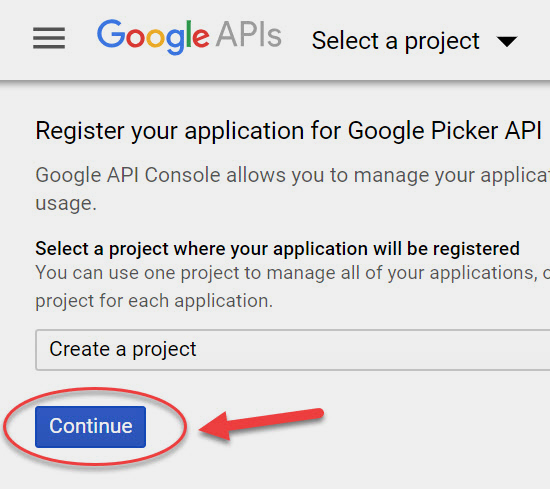
As a result, the Developer console will enable the Google Picker API. It could take some time, so be patient ... Once the API (Application Programming Interface) has been enabled, you'll see the following screen:
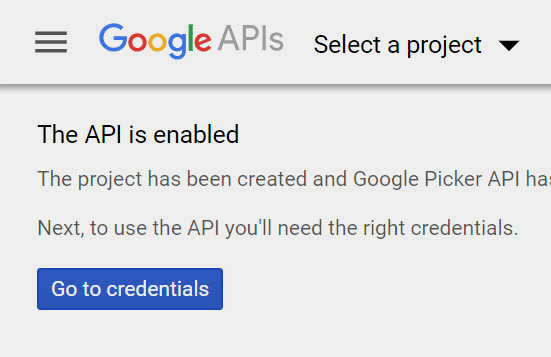
Now you need to click the "Go to credentials" button in order to define the credentials that will allow you to use the given API ...
On the next screen you can define different type of credentials. In this case you need a client ID, so you'll have to click the "client ID" link:
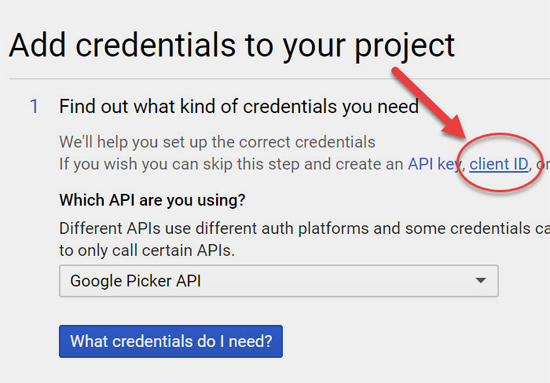
Next, you'll see a screen informing you that you need to configure the consent screen before you can generate the actual client ID. Click the "Configure consent screen" button to continue.
On the next screen, you need to provide a name for your app:
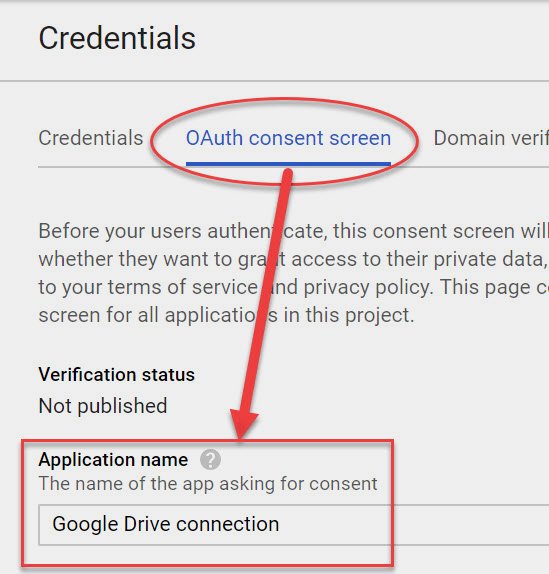
Note: if you are using a siterubix domain (or any other "uncommon" domain), you'll have to enter it in the "Allowed domains" field before you continue.
Then scroll down to the bottom of the page and click the "Save" button.
You'll be taken to the next screen ...
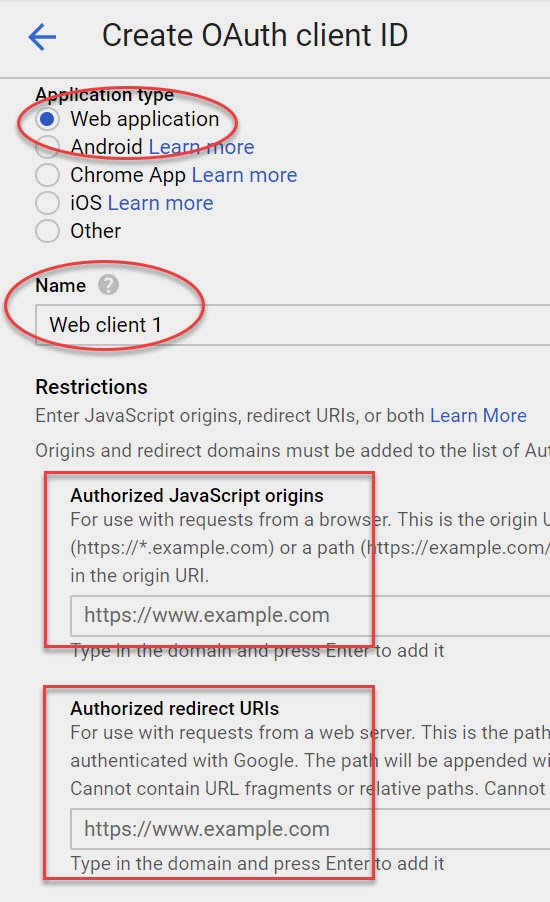
... where you need to ...
- select "Web Application" as your application type
- provide a name for the client (it can be anything you want)
- enter the URL of your Wordpress website (under Authorized JavaScript origins)
- enter the redirect URL (under Authorized redirect URIs) which can be found on the plugin’s settings page at the bottom (it will look like this:
http://www.example.com/index.php?external_media_plugin=GooglePickerAPI)Finally, click the "Create" button.
A pop-up screen will appear with your client ID:
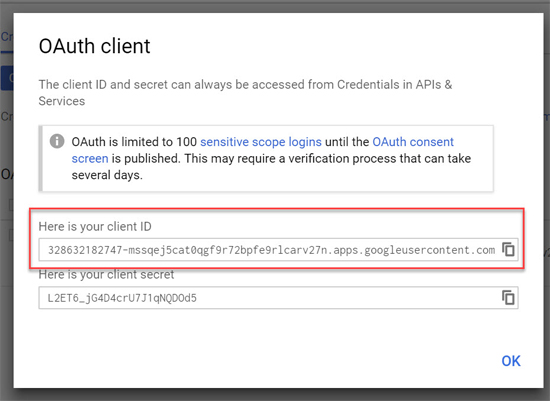
The second key required by the plugin is the application ID. Which is nothing else, but the first set of numbers in your client ID (simply copy the numbers before the dash).
Now you need to paste the client and application IDs into the plugin's configuration page:
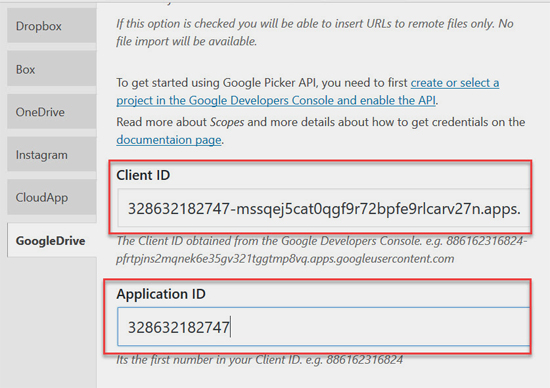
Finally, you can review the other plugin settings to meet your needs. Make sure that you uncheck the "Show starred items only" filter option, otherwise you will only see files starred in your Google Drive!
And of course, save your settings ...
And that's it! Congrats! You have successfully connected your Wordpress website to Google Drive.
Now, with all these screenshots and instructions it seems to be a long and annoying process, but the truth is that it can be completed in two-three minutes with a few simple clicks ...
OK. Now let's see the magic ...
1. Where do I look to find out how fast or slow the app is working for my WordPress? You posted 2 pictures for the performance.
2. Is the performance or speed slower if I add another application(s) in addition to Google drive such as cloud storage and/or drop box?
Thank you for putting this together!!! You come up with amazing ideas.
Hà


