Our Starting Image
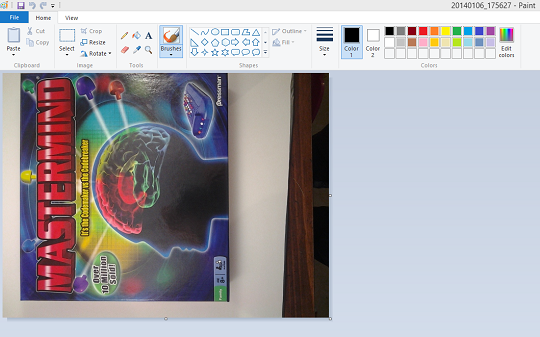
So as you can see my camera decided it liked the picture sideways. However, at this point that is ok as we are about to turn it ourselves a few times. To start cropping the image all you have to do is grab the little box along the edge and pull it in to where you want it to be.
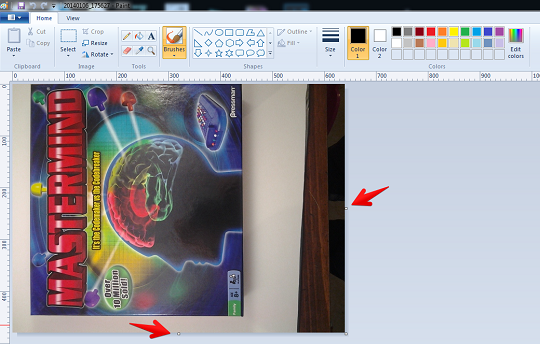
So in this case I am going to grab the little box on the bottom and drag it up to the edge of the Mastermind box edge. Then I will grab the box on the right and drag that into the box edge as well. Now our image looks like this:
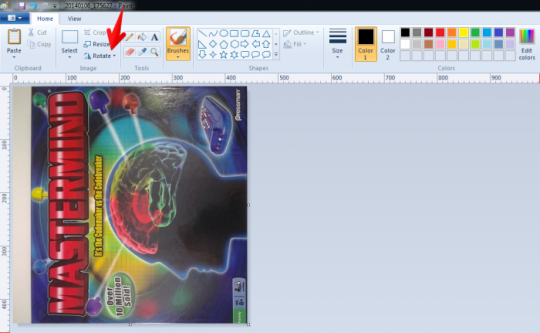
The next step is to rotate the picture and as you can see in the image above I have the Rotate feature marked with an arrow. When you click on the Rotate option you will get a drop down box like this:
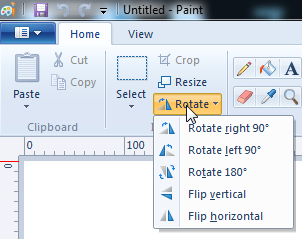
As you can see you can flip and flop the image any which way you want. In this case we only have one edge left as the image taken was already aligned with the one box edge. So here we just need to flip the image horizontally to finish our cropping. Please note here that they show you with the grey and blue triangles which way the image will move.
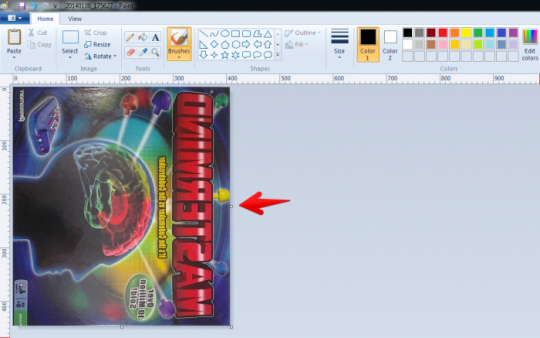
As you can see I grabbed the last box (marked by the arrow) to finish cropping the image and now just need to rotate it one more time to get it right side up.
Our Finished Product

There you have it, one image cropped in just a few seconds using the Paint Program.


