Contact Buddy - Installation Guide
A lot of themes come with contact forms built into them. So check your theme to see if it has. To check that, go to your contact page we created at the beginning of this guide and click edit. On the right hand side of the screen should be an area called "Page Attributes" with a drop down box. Check that drop down box for a template which should be called something like "Contact Form Template" depending on your theme.
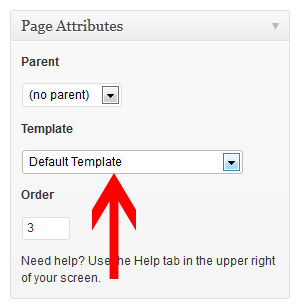
If you don't have one, continue reading on :)
So, there are many contact us plugins on out there. You can have a look yourself for one you like, but the one I'm currently using is called: Contact Buddy
So your first port of call is to head over to the developers site and download the plugin, which can be found here. It's free!
So once you download the file to your computer we go to install it.
From the dashboard, go to "Plugins" then "Add New"
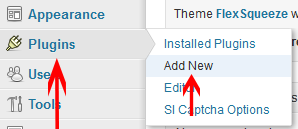
At the top click on "Upload." Now click browse, and find the .zip file of the plugin you just downloaded. It should be called contactbuddy-by-pluginbuddycom
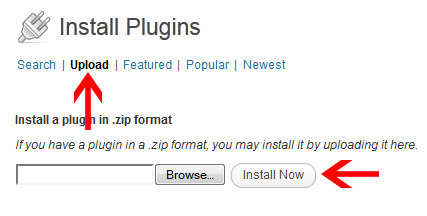
After you've clicked "Install Now" the plugin will be uploaded. Next click activate.

Once Contact buddy is installed, you'll find a new option on the dashboard, so click on that and go straight to settings
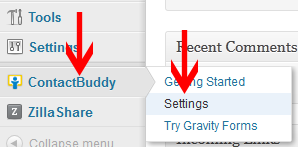
This plugin is extremely simple to set up. All you need to do is decide on a style and the email address you want set up the contact form with. This will be the email address where all the submissions through the contact form will go.
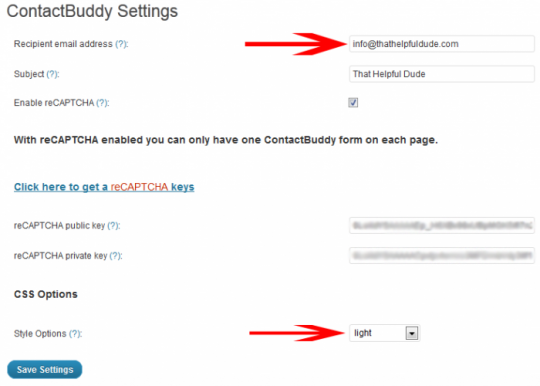
One good thing about this contact form is that you have a double captcha form and it's easy to set up!
Click on the "Click here to get a reCAPTCHA keys" to get your keys. It's extremely simple to do. All you need to do is add your email address and your domain name. TIP: when entering your domain name click the "Global Key" box underneath the domain name and you can use the same keys on any domain you use. This will save you having to sign up multiple times. Just save your keys into a word document for future use.
If it's all set up right, it should look like this:
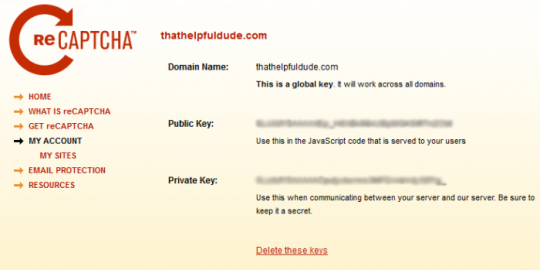
Now just copy and paste the public and private keys into the settings section in the plugin.
That's it! if you wanted to add it into a page, there will be a little @ next to the "Import Video/photo" button. Just click on that and it'll add the shortcode for you.
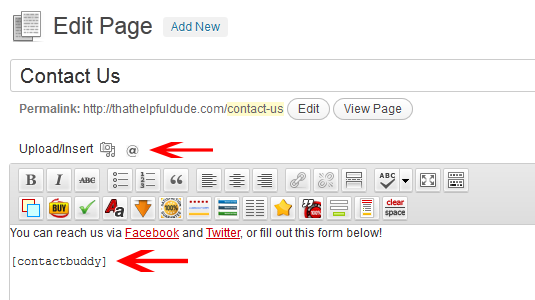
If you want to check out the form in action, look here. I've got the styles option set to light


