Non-breaking Space
One of the most common HTML entity that I use daily is :
And it stands for "Non-Breaking SPace"
I use it because sometimes my browser truncates spaces on my pages, so when I need to add real spaces to my content, I go to the text window of my wordpress editor and use this "code".
Anchor
Also, sometimes I am not able to use the "anchor tool" on wordpress, I don't know why and this glitch eventually led me to learning how to create a "page jump" on a post. It's not the quickest and easiest thing to do but once you've done it two or three times, it's as easy as breathing! Almost.
Why use page jumps?
Say you have a list of items at the top of a post and you want to use jump links so that your visitors can jump straight to a specific place rather than scroll down and look?
How do you create a page jump?
Well obviously, you have to first switch to the (not so scary anymore) text editor. =) Then look for the word where you want to insert an anchor. This is going to be where people click and are be redirected to another place on your page! It will highlight, like a link.
1) Once you have identified the word you want to place your anchor on, you want to add the below html code right before the word (let's pick "book" as an example) :
<code><a href="#unique-identifier">Click me</a></code></blockquote><p>
2) What you do then is replace "unique identifier" with a number : 1, 2, 3, etc. And then replace "click me" with "books" (or the word you picked) ; this word is where people will click !
PS : If you leave the "click me" part, it will appear on your page, right before the anchor word and it won't look very good lol.
3) The result on your text window will look like this :
<a href="#1">books</a></p><p>
I noticed at first that I ended up with twice the same word (on my visual window). It would look something like this : "If you are interested in these booksbooks" lolol. So I deleted the original one (in my visual box).
You can also do it from the text box but it's quite easier to see the text on the visual box.
I'm not finished yet!
4) Finally, you want to copy/paste the below html text that will create the anchor point where the above link goes. You will place the below html text where you want your visitors to go :
<a id="unique-identifier">See?</a>
5) I want to replace "unique identifier" with the same number you used in step 1. In our case I used "1". And you will also replace "See?" with books (or the word you picked), so that both links match!
It will look something like this :
<a id="1">book</a>
I also noticed that you should make sure that you have no unwanted spaces, otherwise the anchors won't work -_- lol
Named Colors
I will finish with a website that I use a lot when I need a code for a very specific color that I want to use on my website! http://cloford.com/resources/colours/500col.htm
To use a color on Wordpress you need to copy paste the "hex" for this color. For exemple #B0171F stands for Indian Red! If you want to use this particular color go here (see picture) and click on "custom"
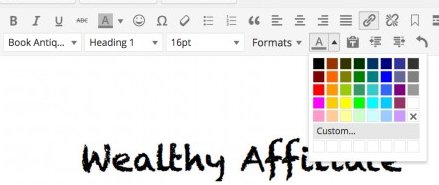
Then just type in the "hex" next to the #

That's it for today ! I will most probably update this training with more info but I hope it wasn't too boring lol
 ah ah ah =)
Cheers
Sarah


Bill

Bill

I'm not totally ignorant of HTML, but you did teach me something new with the page jumps. I'm not sure that I will have to use that, but if I ever do, I know right where my first stop will be.
I hope you consider doing more of these, I'm sure a lot of people (including myself) could benefit from it.
Have a great day! :)