Step 5: Testing OneSignal Web Push Notifications on your site
By default, OneSignal plugin will add a subscription icon to your WordPress site. Visit your website in a supported browser and then click on the subscribe button.
You will see the default ‘thank you for subscribing’ message.
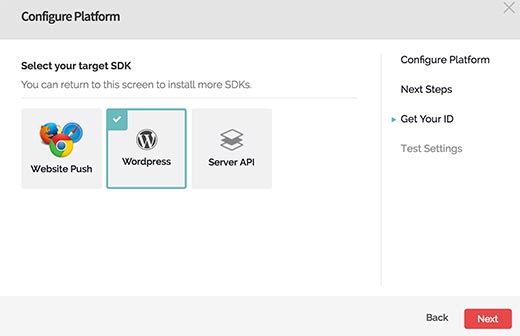
Now login to OneSignal account. Click on your app name, and then on App Settings.
Scroll down to the web platforms section and click on the configure button next to Google Chrome and Firefox.

You will see the platform configuration screen which you filled in earlier. Simply click on Save button and then click on Continue.

Since you only have one subscriber at the moment your subscriber ID will be automatically filled.
Click on the next button, and you will reach the ‘Test Settings’ step.
Click on ‘Send Test Notification’ button.
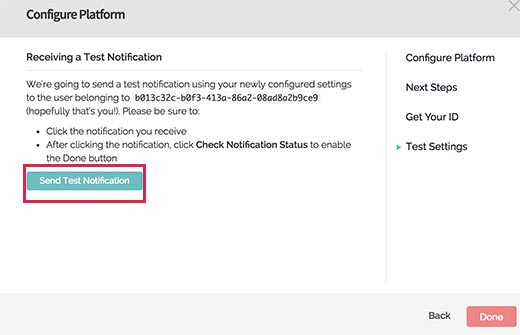
One Signal will now send a web push notification.
The notifications appearance may differ depending on which browser you used to subscribe. When the notification appears on your computer screen you need to click on it.


Conclusion
The OneSignal Web Push Notifications Plugin on your WordPress site will automatically send a notification to all subscribers when you publish a new post which will help your blog health and bring more traffics to your site.
I hope you liked this article, Ask questions and drop your comments in it's section.
Thanks
Bibian,


Thanks!
Dallas


Thanks for this training! This is so helpful.
Tried and True
ELAINE