Once you installed and activated the AMP plugin, you have to set up the plugin's settings. One of the great things about the Official AMP plugin is that set up is super easy. All you have to do is follow the simple to read instructions in the plugin.
Depending on your theme and website, you may set up AMP a little differently than I did. For the sake of this tutorial, I will show you how I did it.
Follow The Plugin Set-Up Instructions
To get to the set-up instructions, first, click on AMP plugin's settings. You can access this via the AMP menu on the left of your WordPress dashboard or through your plugins page.

You should get a screen that looks like this:

Click on the "Open Wizard" button and you will open up a window that looks like the image below.

You will be prompted with a choice of setting up as a developer or non-technically savvy. Most of us will choose the simple setup option that I drew a red box around. Select the simple setup option and click next.
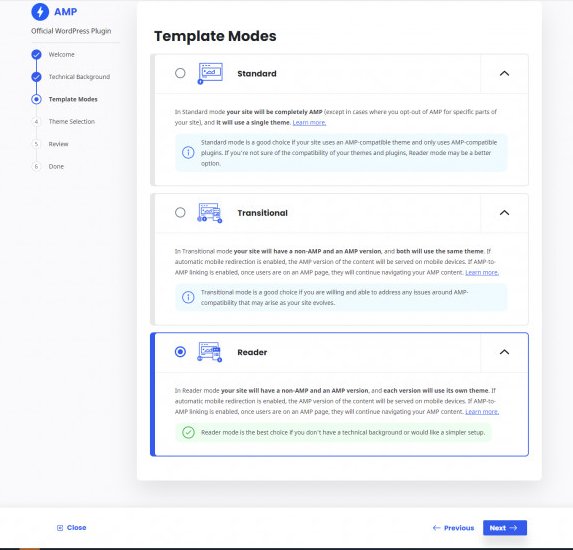
You will then see a page that prompts you with a choice of template modes. You can read through them all and see which one suits you the best, but for most people, the best option will be the "Reader" option. Select your template and click next.
Clicking next will take you to a screen where you will then select different themes for the AMP version of your website.
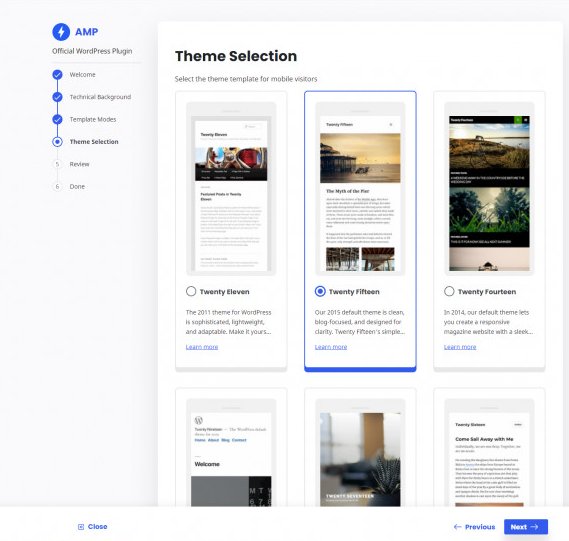
I personally chose the Twenty Fifteen theme for the website I was working on and this tutorial, but choosing a theme is completely up to you. The main difference with the themes is how it looks. Play around with different ones and see which one you like the most.
Once you select a theme, click next and it will bring you to this page:
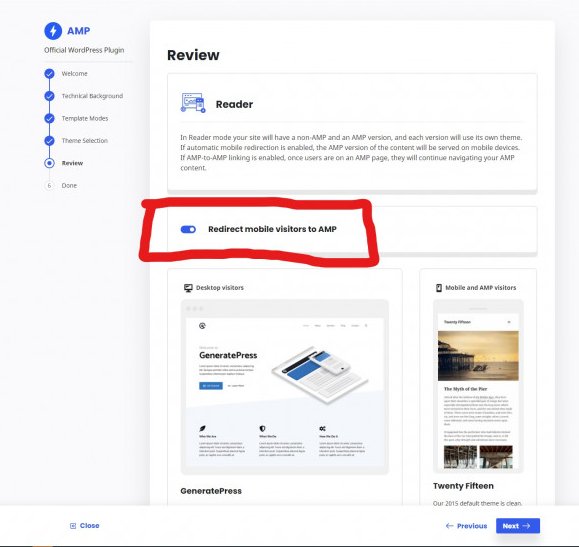
Make sure you turn on "Redirect mobile visitors to AMP" and click next. Then you're finished!
To see the AMP version of your blog posts, add /amp to the end of your link. For example:
https://yoursite.com/your-blog-post/amp