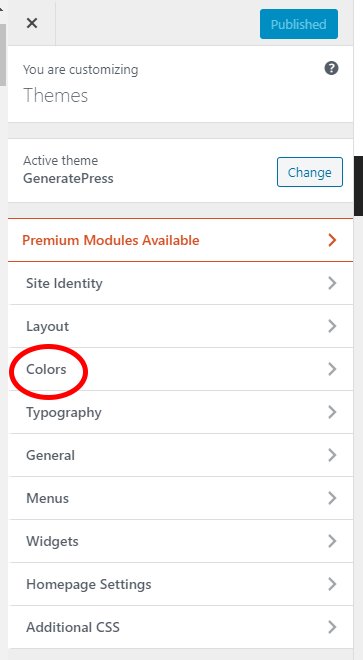
In the customize area, you will now need to click on the Colors link.
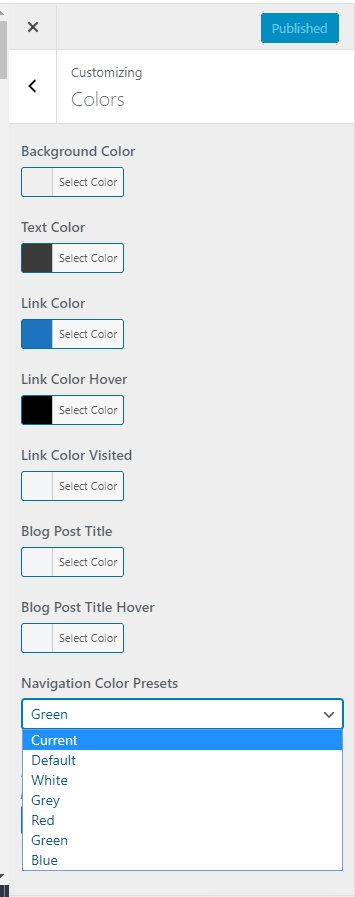
Here is the area where you can change the colors of your site, to whatever you desire them to be.
Below, you can see that there is aNavigation Color Presets option. There, you can select from 5 different colors besides the default to change the color appearance of your site quickly and easily.
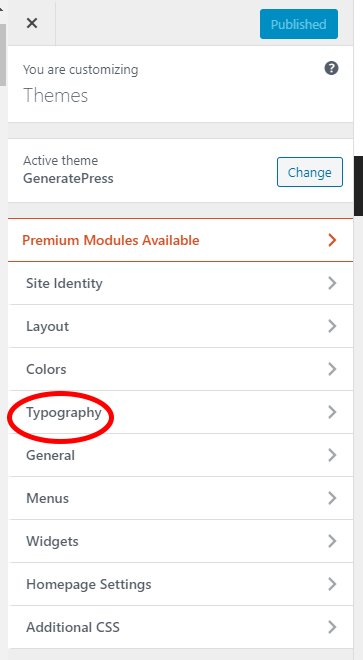
Next we'll want to look at the Typography option.
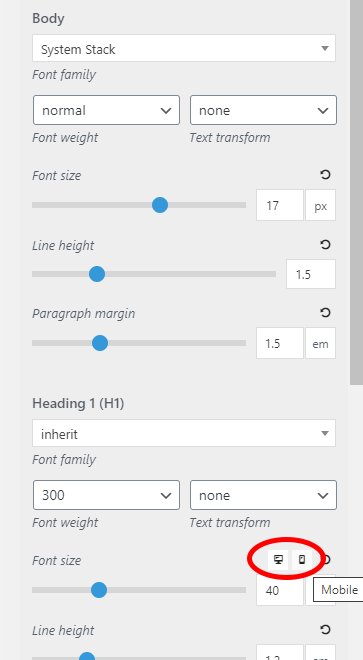
The Typography area is the section you can use to make changes to your fonts. The size, type of font, and line height can all be set in this area.
If you look at the red circle in the image you will see a monitor graphic, and a smartphone graphic.
This allows you to change the font sizes for first desktop systems, then when you click the mobile icon, you will be able to set the font options for those who view your website with mobiles devices.
The next section to cover is the General section.
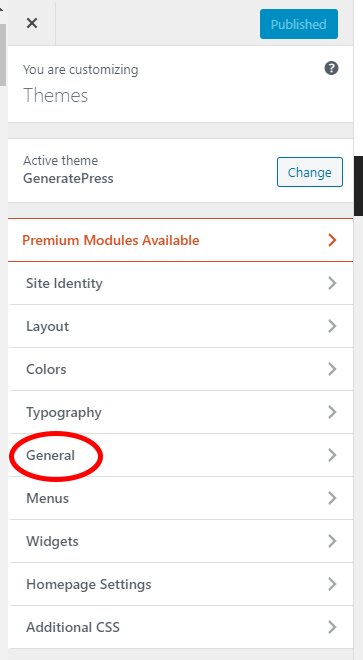
The general section has a few options that are clicked by default.
I will not get into great detail about these options as I do not wish to cause confusion, it's best to leave these set with the default settings.
Combine CSS allows for quicker page speed and Cache Dynamic CSS saves the CSS cache to your database to improve site performance.
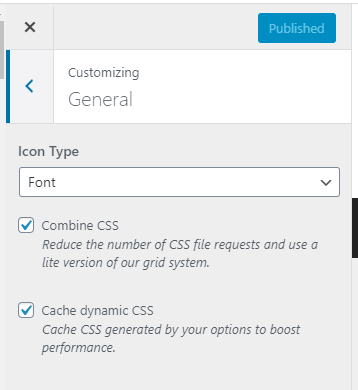
The next section to review is the Menus area.
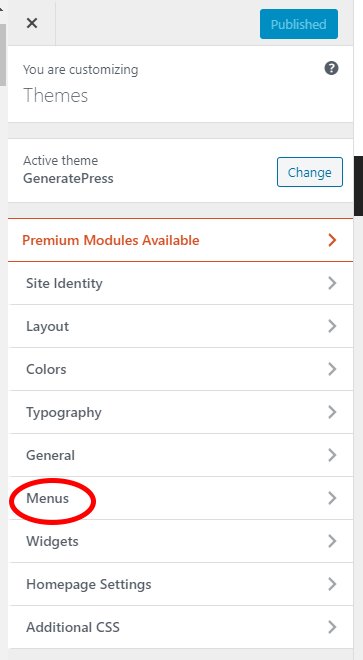
Here you can set the 3 menus that I mention in Working With WordPress Themes
You do not need the Top menu with this theme, but I do recommend it.
It provides a means for you to display affiliate links, or links to any other websites you may have, in a very attractive and professional manner at the top of your website.
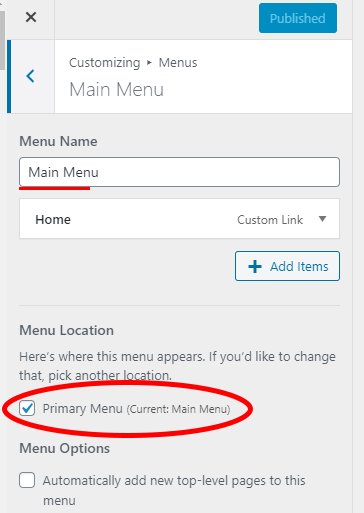
Right here, you will want to click theMain Menu link.
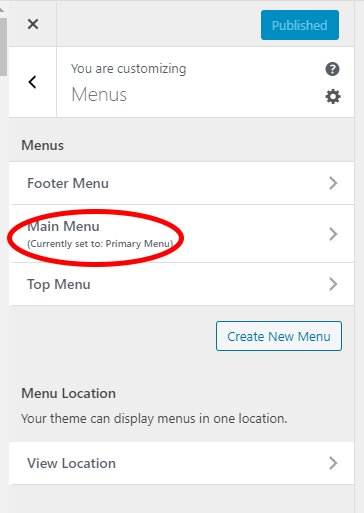
Then check the Primary Menu box, to set the main menu as your primary navigation menu.
We will set the top and footer menu in a moment, but not here in this section.
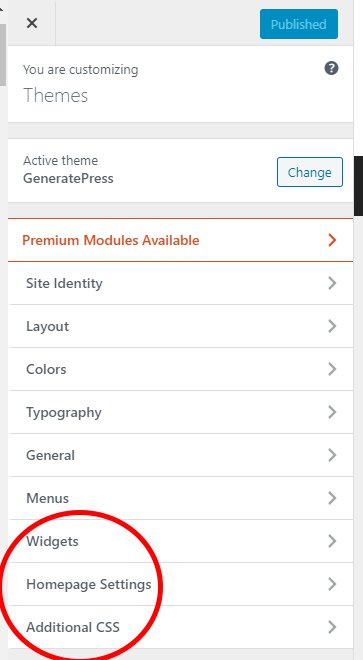
The final 3 areas that you can utilize to configure your website are circled in red below, but we will not be working on those areas here.
You should have already set your Homepage Settings, so there is no need to change that, and the Custom CSS section is mainly for programming purposes.
Thanks for the training. I have a question.
Does the free version of GeneratePress have the author box?
Recently, I switched to GeneratePress (free version), and I no longer have the author box on my post.
The theme that I was using before had the author box.
I was informed that it is available in GP, and I was to add a new user (as an author).
I watched the video that was sent to me, and I tried several times, but was unsuccessful.
I am currently using an author box Plug in.
Thanks in advance for your help.
Blessings
Jackie
I have a question: when you select content/sidebar for only one post and then create a widget with ads for the sidebar, would the ad appear only in that post or on any other post with the same format content/sidebar.
Thanks. Marisa
This course is excellent and very easy to follow. Your images explain it all too! Thank you.
2 questions:
Not long ago, I was having trouble with not getting my logo to show up. Members and SiteSupport could see my logo but I couldn't see it at all on my laptop and my friends who live in remote locations also couldn't see it.
It was only after I put my logo in Retina Logo, I was finally able to see my logo and my friends could see it too.
Do you know why that is? I know I should just be content and be thankful my logo can be seen by people outside of WA but I just want to understand why I had to put my logo in Retina Logo.
My other question is, will you be doing a course on the Premium Generate Press?
I want to make my static page a little more elaborate with more helpful information. So I guess, my desire to make this page more diversified and I believe that comes with the design features of this theme.
Thank you, Maria and I look forward to more of your courses.
Have a Blessed day.
Monica


