Up to date instructions to set up Your Domain Name Servers at NameCheap


Happy friday the 13th! I so love this day! I know that a lot of people are affraid of friday the 13th because its suposed to be bad luck but i have never found that to be true. I have found that a lot of things usually change for me on that day though, so since it is a day for change I always work hard toward making the most out of the positive changes which I have some control over. So for me today i was determined to throw myself into WA and focus on making as much positive change in my bussiness as i could! starting with my new websites through namecheap. But when i went to set up my new web site i ran into a bit of a problem. That's okay though because a very wise man once told me that for every problem there are at least 10 solutions so all i need to do is just find one!easy right? not so much namecheap.com keeps changing the the way they do things so i had to dig a bit. In their defense i think they have made it simpler in that there are fewer steps involved. so since i have yet to write my first blog i figured i would add a new step by step. So thanks so much for suffering through my babling and i will try to make the rest of this tutorial as painless as possible!
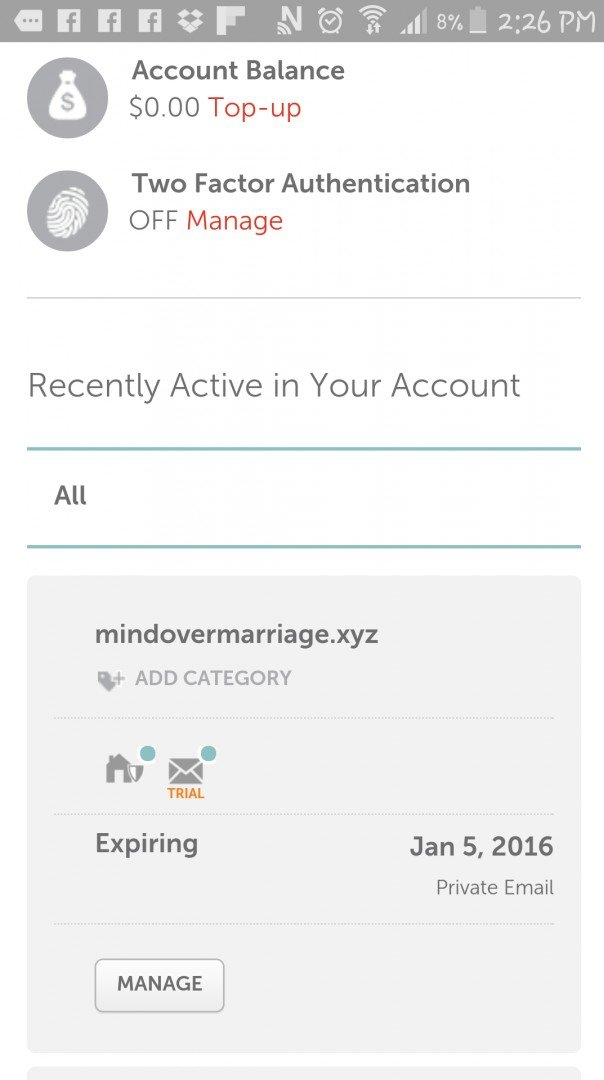
STEP 1: log into your cheap name account. after you have logged in click on the manage button.
STEP 2: Scroll down to NAME SERVERS.There will be a drop down arrow which will give you 3 options:
Namecheap default
namecheap shared hosting
custom
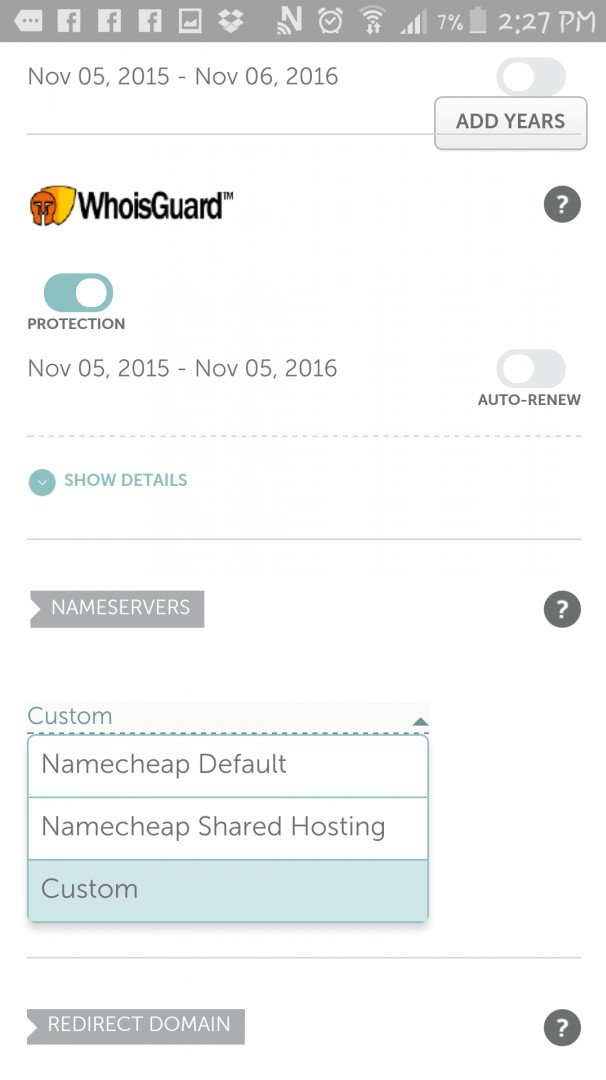
STEP 3: click on CUSTOM.
Step 4: enter
ns1.mywahosting.com into line 1 and
ns2.mywahosting.com into line 2
you can do this very easily by highlighting the address with your mouse and pressing the ctrl button and the c button together on your key pad. then go to the line on name cheap where you need to enter the address, click on it then press the ctrl button and the letter v button together.
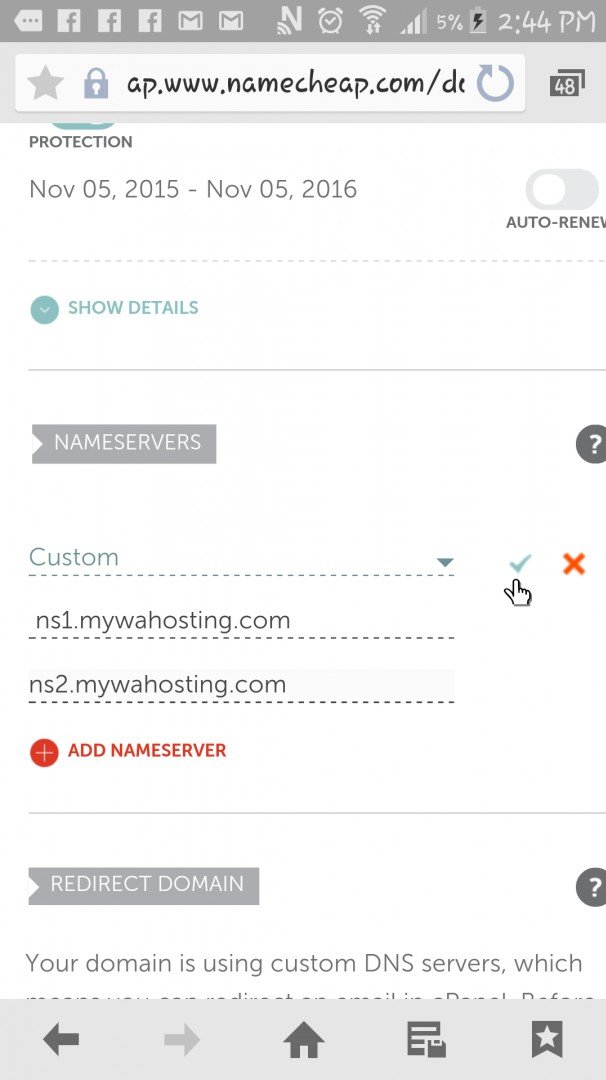
STEP 5: click on the little green check mark shown in the picture above and give yourself a pat on the back for being so techy!
I hope this helps!
Join FREE & Launch Your Business!
Exclusive Bonus - Offer Ends at Midnight Today
00
Hours
:
00
Minutes
:
00
Seconds
2,000 AI Credits Worth $10 USD
Build a Logo + Website That Attracts Customers
400 Credits
Discover Hot Niches with AI Market Research
100 Credits
Create SEO Content That Ranks & Converts
800 Credits
Find Affiliate Offers Up to $500/Sale
10 Credits
Access a Community of 2.9M+ Members
Recent Comments
1
Join FREE & Launch Your Business!
Exclusive Bonus - Offer Ends at Midnight Today
00
Hours
:
00
Minutes
:
00
Seconds
2,000 AI Credits Worth $10 USD
Build a Logo + Website That Attracts Customers
400 Credits
Discover Hot Niches with AI Market Research
100 Credits
Create SEO Content That Ranks & Converts
800 Credits
Find Affiliate Offers Up to $500/Sale
10 Credits
Access a Community of 2.9M+ Members
Thanks for sharing.