How to make Windows 10 Look like Windows 7 Using the Classic Shell
This is the simple way to do it. I have a training on doing it the right way BUT there is too big a chance of you messing up something. This is basically 'Idiot Proof' as we say in the IT industry. If you find Windows 10 is too difficult for you to learn, here is a simple way to mak it look like windows 7. For my team, it was a snap but as someone pointed out to me, I am NOT dealing with Grad students.
Windows 10 may look quite fascinating and the new vibe is pretty catchy. But as an avid user of the Windows 7 environment, there is always a preference to make the desktop feel and look like the conventional ways. However, there are simple steps to get the best of Windows and yet keep the feel of the earlier edition of Windows 7 on your desktop, all this without even have to get on the registry for those tedious editing. As recently, some of the tools available on the internet is too classy and effective in getting the work done on the desktop. One of the popular and easily manageable tools in the Classic Shell with the recent release updated with patches for consistent performance and utility. There are numerous reasons on why the look and feels of Windows 7 are preferred over the latest of the release of Windows. But the prime reason in the convenience of Windows 7 on the desktop as compared to the options available in Windows 10. You can easily get the copy of the tool on your desktop by following steps.
Download and install the Classic Shell on your desktop
You can download the installation file from the homepage of Classic Menu on the internet. While you open the install file on your computer, you can select the choices to either install the individual elements of the complete package. The individual components included in the install options are the likes of Classic Explore which are by default, turned off.
Get the classic shell settings configured
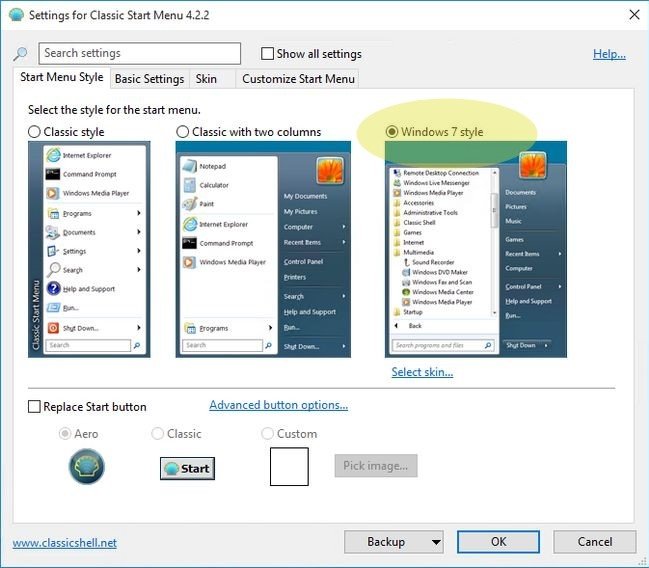
Once the Classic shell is installed on your desktop, you need to configure the settings based on the personal preferences. To get the settings configured in the menu, you can access the options from the Start Button on the toolbar. The following selection menu as shown below should pop up.
You can prefer the selection as to base on the Styles of Classic, Window 7 etc. As in this case we are referring to the Windows 7 style and hence, the Windows 7 style should be selected. Once selected, you can click Ok to proceed.
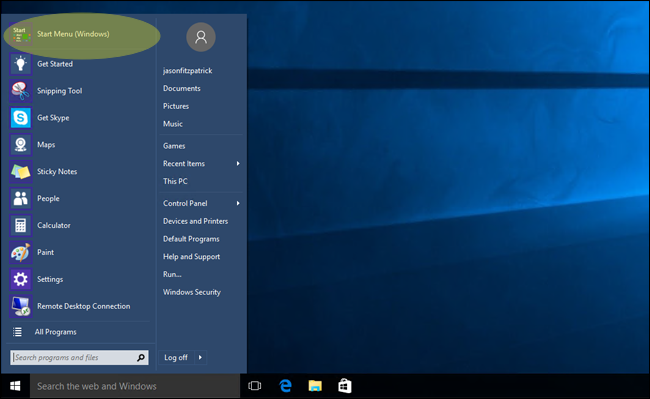
After the initial settings are applied, you can click on the Start Button again to get the Windows style Start Menu on the desktop.
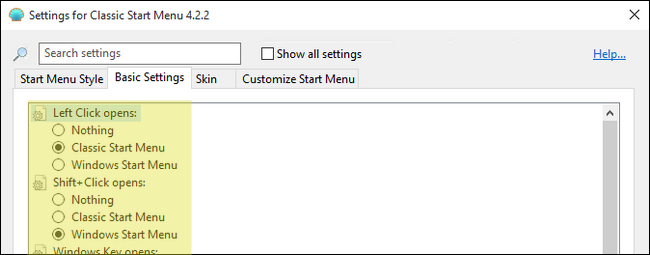
Personalize the secondary properties for the look and feel of Windows 7.
Further tweaking into the properties of the desktop will give greater effect for the look and feel of Windows 7 on your desktop. To get to the personalization options, you can select the settings from the classic menu as shown below.
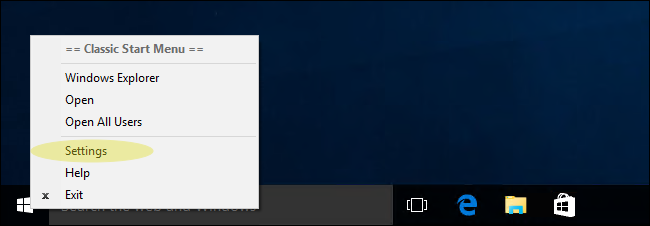
The settings tab allows you to get the convention themes of Windows 7. You can also download themes to get the theme used through the options in Classic Shell Menu.

Getting the properties set on the Start Menu
As with the personalization efforts, the properties on the Start Menu can also be customized to look and feel like Windows 7. For getting the properties edited, you can select the customization options from the Classic Menu. You can find a selection drop box that includes the many of the options that you might need to get the desktop the perfect look of Windows 7. You can either disable, Hide or display the selections as and when you need on you menu options.
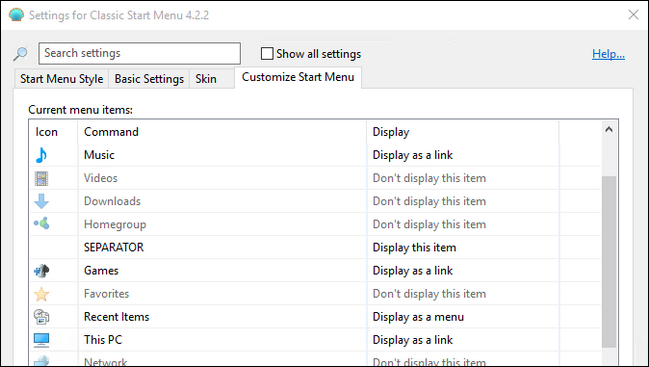
The tabs that are categorized include the Start Menu Style, Basic Settings and Customize Start Option, each with the distinct set of custom features suited for the best of options. Once the changes are done, the settings can be exported for portable and saving options for later use of the same settings.
Join FREE & Launch Your Business!
Exclusive Bonus - Offer Ends at Midnight Today
00
Hours
:
00
Minutes
:
00
Seconds
2,000 AI Credits Worth $10 USD
Build a Logo + Website That Attracts Customers
400 Credits
Discover Hot Niches with AI Market Research
100 Credits
Create SEO Content That Ranks & Converts
800 Credits
Find Affiliate Offers Up to $500/Sale
10 Credits
Access a Community of 2.9M+ Members
Recent Comments
1
Join FREE & Launch Your Business!
Exclusive Bonus - Offer Ends at Midnight Today
00
Hours
:
00
Minutes
:
00
Seconds
2,000 AI Credits Worth $10 USD
Build a Logo + Website That Attracts Customers
400 Credits
Discover Hot Niches with AI Market Research
100 Credits
Create SEO Content That Ranks & Converts
800 Credits
Find Affiliate Offers Up to $500/Sale
10 Credits
Access a Community of 2.9M+ Members
Thanks for sharing.