Adjusting Your Pictures Before Putting Them On Your WordPress Site


Published on February 12, 2015
Published on Wealthy Affiliate — a platform for building real online businesses with modern training and AI.
WordPress is a definitely an amazing platform for establishing your website since it is tremendously adjustable, adapting to pretty much any particular instance.
However, one of the very things which personally face hardships with is adding and adjusting pictures for my website. I feel as if I’m really a perfectionist when it comes to how I want my pictures to appear on my site. I will spend sometimes up to an hour just adjusting an image in the HTML format so that the text kind of moves in and centers the picture, like I want it to appear.
It shouldn’t be that painstaking to add a picture on a page or blogpost. So what are my options really?

On the internet
There are a lot of tools on the internet which you can utilize in order to adjust the overall size of your pictures. The vast majority of them seem to do very great job of sizing it. By simply searching on Google, you will be able to have access to many tools that help you out with this for free!
In my case, though, I love to utilize a site known as Shrink Pictures, which delivers a free internet service which really gets the job done. This, however, isn’t the best methodology out there. I only utilize it since I recently just discovered that it even existed, and I guess because I got too lazy to actually find the time to look for other tools that could help, but that’s beside the point. The tools do work when I really need them most. Sometimes, though, if a picture doesn’t have a good form in the first place, and if the picture you get from Shrink Pictures is pixelated, I might get into a little bit of trouble. In any occasion where this occurs, I just try to look for a better picture or just utilize one of the programs that I have already downloaded as software onto my personal laptop.

On my Laptop
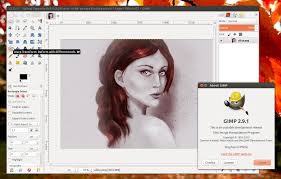
I would just like to say that there are many alternatives out there that will definitely help you to adjust the size of your picture on your personal computer. Some of these alternatives include one of my personal favorites: Gimp as well as Photoshop and many other well renowned programs can adjust picture size. However, could be a little excessive when it comes to just wanting to adjust the size of your picture.
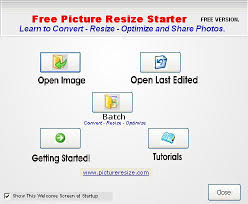
A free tool is at our disposal to attain at cNet. It goes by the name of Free Picture Resize Starter.
One specification that is very useful with this software is the capacity to batch adjustable pictures. This procedure can, however, be very meticulous. Free Picture Resize Starter affirms that I can set a limitation and use it on all my pictures.
Ready to put this into action?
Start your free journey today — no credit card required.
Placing My Pictures On My WordPress Site And Adjusting Them
The Visual Editor Approach
One of the boundaries of the visual editor is that when you are adjusting pictures you have a limitation placed on the augmented divisions for adjusting your picture. I have also discovered that the outcomes are inconclusive and very spontaneous. My rationale could be mistaken with this assumption, but if I have a fully enlarge picture and I transfigure the quota to 80% when utilizing visual editor and exit it, then input the visual editor again, the slider quota should be at 80%. Unfortunately, this is not the case, because it goes back to 100% in sizing. It is at this point that my exasperation increase, so I will just leave it at that. It can get very complicated with Visual Editor. This is precisely why I personally don’t utilize the visual editor software to adjust my picture’s settings.
The HTML Editor Approach
This is honestly my most comfortable program to utilize. It is perfect for adjusting the images on any WordPress site in my opinion. It is absolutely stable as well as reliable at the same time.
When you are placing an image into the WordPress HTML editor, you are given many settings for adjusting your picture. This, however, ultimately hinges on the original length of your picture. Often times “Large” and even “Medium” are not really the best sizes for your thumbnail if the original photograph is just too small. I usually find myself picking “Medium” when I start and then I kind of just move forward from there.
If you place your attention towards HTML for the picture, you will see two boundaries that you will want to modify:
width= “456”
height= “123”
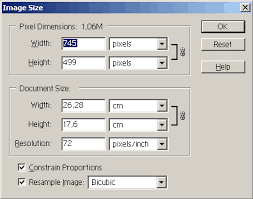
These are the 2 significant numbers that you will want to focus on. I sometimes expand these numbers, but you don’t want to enlarge them a ton. I will most likely only ever go as high 15% and nothing bigger, but depending on the case, it could range from 10%-15%, going any bigger will definitely make the picture caliber photo degrade. Generally, I try to get a picture that is bigger than what is actually required. Afterwards, I’ll just minimize the numbers until I end up with what I need.
Remember, you do not want to just alter them unsystematically because those numbers show both a height/width proportion which you want to keep. So, if for instant your width is 400px and you deduct it to let’s say 250px, then you want to drop your height by about 27% also. This does not have to be a flawless deduction of resolution, does have to be somewhere around those lines because you don’t want a disfigured photo.
To keep these statistic, you really have to do some math, nothing more complicated then division of course. I mean come on guys, you can’t be that bad at Math, haha, I joke. But, because you and I know that we can make life easier by simply using a calculator, preferably one that you can google, and a notepad which you can also find on google, then boom! There you have all your data regarding your picture enhancement analytics.
Here’s an example of what your data/numbers should look like:
While it does seem like a little bit of work, it really does help you in the long run guys and that is what ultimately matters. It can get tricky to compute the dimensions, but like with everything else, with time you will definitely get the gist of how to do it.
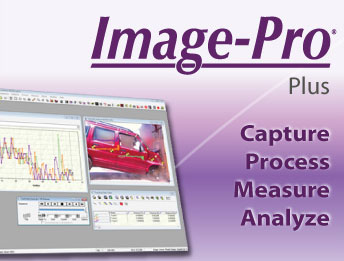
Image-Pro Approach: Another WordPress Picture Handling Tool
The Image Pro tool is one of the smartest devices for adjusting pictures on WordPress. Some of my personal favorite specifications are most likely
·Its capacity to grab a picture from your computer or a Windows Explorer tab, as well as its capability of also pulling your download list and placing it straight into WordPress so that it is able to upload.
2) Its capacity to pull and insert photos from the display window under the visual editor and place it into the visual editor again.
3) Its capacity to visually adjust in the visual editor countless times until it looks perfect.
4) Its capacity to alter photo properties without pulling out the conventional WordPress Media Pop-up through the “Selected Image” window that opens up when you go to the picture.
This is obviously a vigorous resource for dealing with Photo adjustments on WordPress Platforms. I, personally don't like using it too much though, because it will sometimes input unrelated hidden symbols which make things a tad out of line, but a fast stroll over to the HTML tab lets me to get rid of it without an issue. Overall, I would say that there are more benefits that I have delineated if you utilize these tools than negatives, but these are just from my personal experiences with them.
Some people misinterpret the functionality of the software I list because they don’t recognize that once you adjust the picture, it really keeps a photo on your server that is the size you set it to. This should really save you a bit on page latency, so your site could load up faster, and some space in your site server as well. So, now that I have taken the time to sort of show you my methodologies, I am really curious to hear about your very own. Please drop a comment on what your preferred method is.

Share this insight
This conversation is happening inside the community.
Join free to continue it.The Internet Changed. Now It Is Time to Build Differently.
If this article resonated, the next step is learning how to apply it. Inside Wealthy Affiliate, we break this down into practical steps you can use to build a real online business.
No credit card. Instant access.