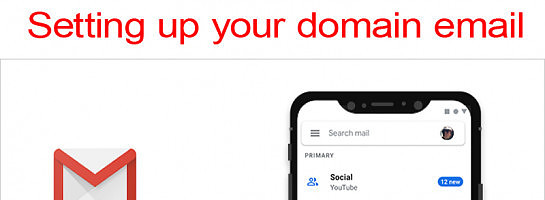
How to setup your domain email on your Android device using Gmail app.


I have been searching for training or blogs or questions about how to setup your domain email on your Android Device for more than a week now. So eventually I got it right!
And I wanted to share it with those who are still struggling with it. I see most people just divert their email to a Gmail account. I just didn't want to do this because I have been using my domain email address for years before I moved my website over to WA hosting servers.
I tried creating a training but for some reason the initial image wont load up and it just refuses that I should create the training.
So sorry...no training just a description. At least it should help.
In case you dont know how to get your email account settings: Go to your WA login page. After logging in choose WEBSITES from the left hand menu. Then choose SITE MANAGER. Look at the top of the block for SITE EMAIL. On this page all your email addresses will be listed with the SMTP settings option next to each email address. This is where you find your settings. I suggest you copy all of the settings in this block and paste it into a Word Document. Then highlight all the text and change the font to Times New Roman and even enlarge the font so that you can see all the letters and numbers clearly. As we are setting up the account on our phone, we will have to type all the passwords in manually, therefore it is important that you are absolutely sure of each number. In my own case I had a capital letter i in my password and I kept on typing a small letter L as they looked the same.
Now that you have all your account settings lets setup our email account on our Phone using our Gmail app.
So once you open your Gmail app on your phone you go to the three lines icon on the top left of your screen. This opens the side menu. Scroll down to the bottom and choose 'Settings'. Then on the next screen choose to add an account.
If you had the account setup on your phone before, like I did, you need to delete the account first before you can add a new account.
On the next screen you will have to choose what type of account it is. As it is not any of the types listed you should choose OTHER.
On the next screen you will enter your email address. After entering your email address choose NEXT.
On the next screen you will choose IMAP.
Then on the next screen you will need to enter your password. This will be the Incoming mail password which you will get from your WA dashboard. Make sure you put it in exactly as it is shown to you with capitals and lowercases. Then choose NEXT.
On the next screen you have to make sure all your Incoming settings are right.
The email address and the password should be right as you have already inserted it before. Just make sure the server is your domain name as shown in your settings you retrieved from WA.
After clicking next you will get an error message saying CERTIFICATE NOT VALID. Now you have to click on ADVANCED. This will open a long writen code page, scroll down to the very bottom of this page and click on PROCEED ANYWAY. This will bring you back to the previous screen that says Certificate not Valid. Now just click on BACK. This will take you back to the previous Incoming settings page but now you will have extra settings available to change.
The Port number will now show. Make sure the port number is 143 and also change the SECURITY TYPE to NONE.
Now go ahead and click NEXT.
Your settings should be fine now and will take you to the next screen where you will have to insert your OUTGOING settings.
The Settings which is pre-inserted is wrong. We have to change all of it,
Change the USER NAME to just your domain name. (eg mydomain.com)
Change the PASSWORD to the Outgoing Password provided.
Change the SMTP SERVER to smtp.siterubix.com
Now hit NEXT.
The next screen should allow you to change the frequency of checking new emails and the next screen after that will tell you that setup was successful.
I hope this helps someone out there.
Apologies if this was not suppose to be a blog.
regards
Michell
Join FREE & Launch Your Business!
Exclusive Bonus - Offer Ends at Midnight Today
00
Hours
:
00
Minutes
:
00
Seconds
2,000 AI Credits Worth $10 USD
Build a Logo + Website That Attracts Customers
400 Credits
Discover Hot Niches with AI Market Research
100 Credits
Create SEO Content That Ranks & Converts
800 Credits
Find Affiliate Offers Up to $500/Sale
10 Credits
Access a Community of 2.9M+ Members
Recent Comments
6


Hi Michell - This just allowed me to overcome the problem I've been having for a couple of weeks now (getting my WA email onto GMail on my smartphone). I was pointed to this by Tech Support - but a lifesaver - thank you :)


You find all your settings including your incoming and outgoing passwords in your Wealthy Affiliate account under the emails tab under your websites.
Have you setup up any emails on your domain yet?
See more comments
Join FREE & Launch Your Business!
Exclusive Bonus - Offer Ends at Midnight Today
00
Hours
:
00
Minutes
:
00
Seconds
2,000 AI Credits Worth $10 USD
Build a Logo + Website That Attracts Customers
400 Credits
Discover Hot Niches with AI Market Research
100 Credits
Create SEO Content That Ranks & Converts
800 Credits
Find Affiliate Offers Up to $500/Sale
10 Credits
Access a Community of 2.9M+ Members
Worked perfectly. Thanks very much for sharing.