So ...
You have successfully installed the Apache web server with MySQL and PHP on your USB stick.
The next step is to install the WordPress application itself.
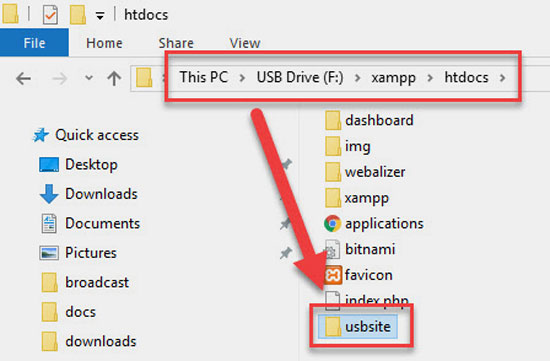
First you need to open your USB drive and go to the "htdocs" folder in your XAMPP installation directory.
Here you need to create a new folder for local WordPress site.
You can name it anything that you like. For the sake of this tutorial I'll use "usbsite" ...
As you already know, WordPress needs a MySQL database to run, so we need to create a database before installation.
Just enter ...
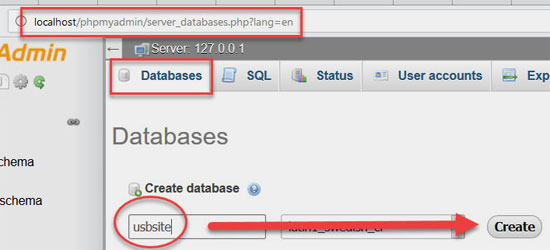
http://localhost/phpmyadmin
... in the address bar of your web browser. This will open phpMyAdmin which is a web based database management software.
Click on the "Databases", provide a name for your database (I'll use "usbsite") and hit the "Create" button:
Now you need the Wordpress application. You can download it here:
https://wordpress.org/download/
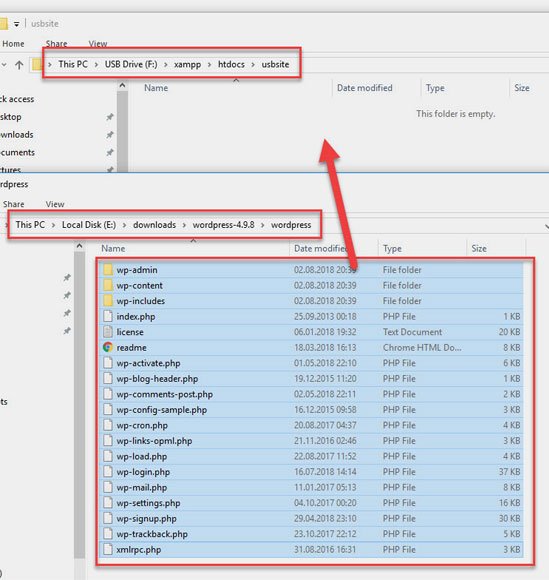
Extract the downloaded file and open the given folder.
And now you need to copy the content of the whole Wordpress folder and paste it in the /htdocs/usbsite folder (use your own folder name here!) on your USB drive:
And once you have copied all the WordPress files, you can run the WordPress installation by accessing your site at ...
http://localhost/usbsite
... in a web browser.
In some cases WordPress will inform you that it didn’t find the WordPress configuration file, so you need to create one by clicking on the "Create a Configuration File" button.
Then choose the language and hit the "Let's go!" button.
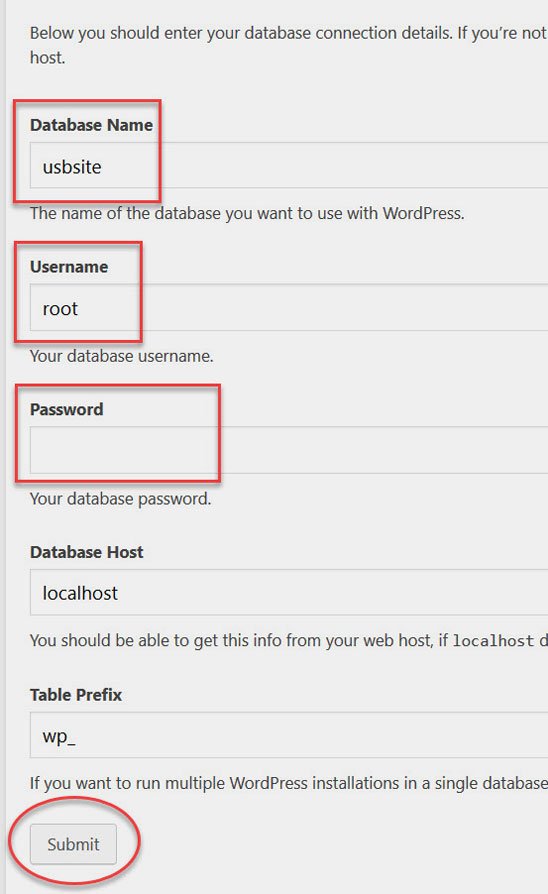
On the next screen, you'll have to provide the database name you created earlier.
In the username field you need to enter root, and leave the password field blank.
Finally, hit the "Submit" button to proceed ...
... and to access the next screen with the "Run the installation" button.
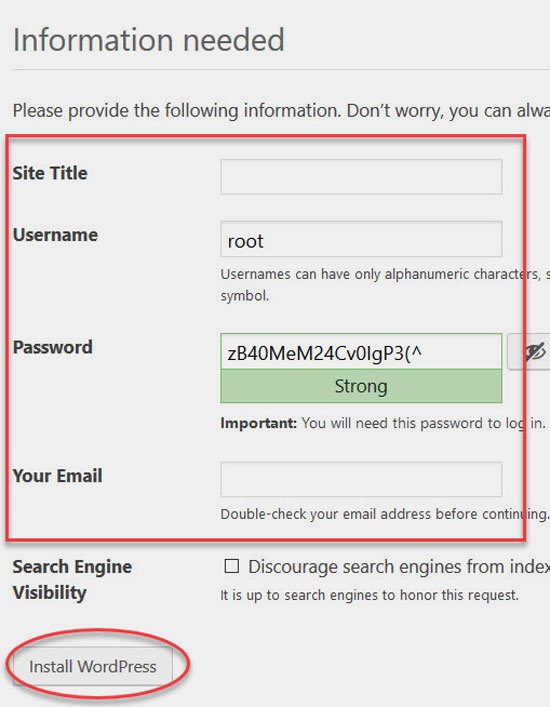
As you already know, now you will be asked to provide your site information and create an admin username and password.
This admin username and password will be used to login to the WordPress admin area.
You will also need to provide an email address.
And once you are done, just hit the "Install WordPress" button at the bottom:
And that's it!
Congrats! You have successfully installed WordPress on your USB stick!
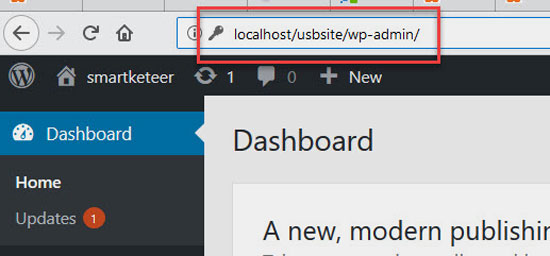
You can now proceed to login to your site and do whatever you want.
Here is my USB site:
The best part: to create another WordPress site on the same USB, simply create another folder in the htdocs directory and repeat the process ...
And that's it my friends!
If you have any comments, further questions or update requests please don't hesitate to react! Like, comment and share!
And don't forget, you can easily come back to this tutorial whenever you want.
All you need to do is to bookmark the categorized, daily updated register of my blogs and training materials. Here it is:
Posts and training by smartketeer
Thanks for your time!


