Even though there are 10 different command buttons that do a variety of things, the one I use the most is the adding text function. So that is what this page will be about. I will explain the step by step process of adding text to an image.
- Upload an image you want to add text to
- In the left side menu of command functionalities, click the letter A
- A menu will pop up along left side of screen with 7 pre-selected font styles, you can always change them once selected. There are 116 to choose from.
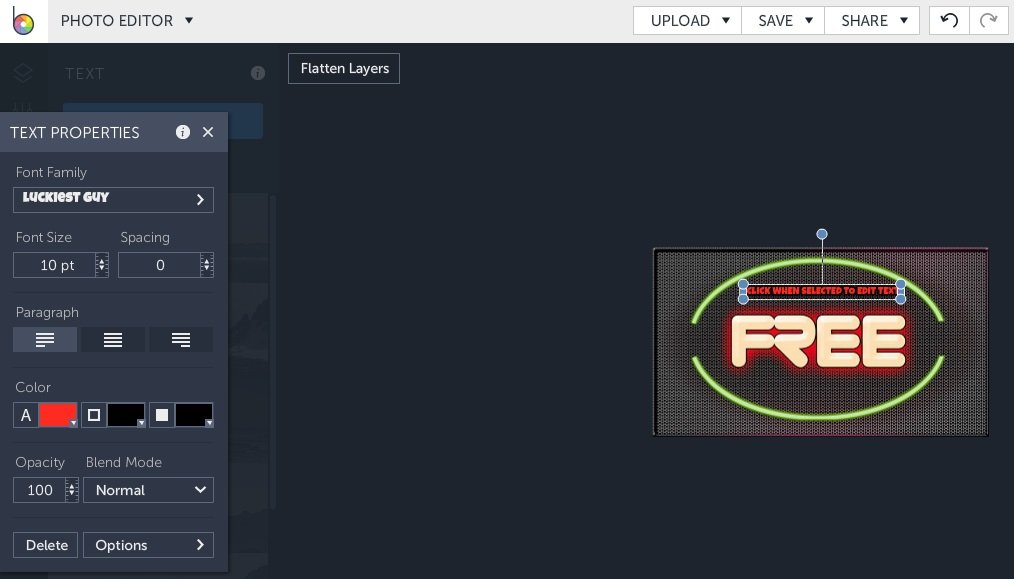
- Click on the desired font and a Text Properties UI (User Interface) will pop up. Then a text edit window on the image will appear, see below image. To type in your desired text just click in the text edit window and start typing.

As you can see in the image above, the UI is on the left of the photo editor and the “FREE” image I am going to add text to, is on the right. I want the image to say, “start an online business free click here” and I want to use a similar font and color.

As you can see above, the text edit window on the image has blue circles at either end. There is also another on top of a vertical line in the center. When you click and drag them with your mouse pointer you can expand the window in any direction or rotate it.
NEXT UP = Customizing text fonts


