Now you know a little about what HTML looks like (you don't need to understand it all, you just need to recognize it), now we will get working on your custom menu. I created a testing site to show you what it will look like and you can check it out here:
http://mytestingwebsite.siterubix.com
You will see that I have created a custom menu that I have called "My Custom Secondary Menu" which appears in my sidebar. The first four items link to posts that I have created and the last item links to a category that I have created called "Traveling". When you click on that, you will see an automatic blog roll of any post that I have created and indicated that it is in the "Traveling" category.
So let's get started.
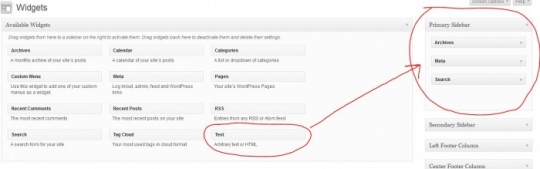
Go to your Dashboard and under the "Appearance" menu on the left, go to "Widgets."

From your Widgets Area, click and drag the "Text" widget to the "Sidebar".
When you drag and drop the Text widget in the sidebar, it automatically opens asking you to create a title and type in any text you want to show. Create a title like I did below:

The final step is to put in the HTML code in the main box which we will do on the next page.