Day 4 - Learn How to Build a Website Yourself in WordPress 2017


Hey there and a Big Welcome to Day 4 of Learn How to Build a Website Yourself in Wordpress 2017 – let’s keep moving on!
NOTE:
In order to see any of the previous day’s posts – check out My Posts blog roll on the bottom right hand side.
I’m about half way through Part 2 of Jays 4 part video series as linked below:
https://my.wealthyaffiliate.com/training/build-a-niche-site-2017-live-case-study-2-of-4
And I really have to say that Jay’s training has been invaluable to creating these posts. For most part I’ve just followed through and noted here everything that Jay and I have done…
So here's …
A recap on what I did yesterday – Day 3:
- Configured settings in All in One SEO
- Activated XML Sitemaps and Social Meta
- Filled in the Social Meta Home Title and Home Description
- Checked that my theme is looking clean and easy to navigate
- Changed around the Widget area for my preferred site layout
- Built out my Main Menu and Footer Menu
So today – Day 4 - we’re going to add Google Analytics to our website
Step 1: Google Analytics
The reason for adding Google Analytics is so that we can collect stats and analytics about our site. In order to do that I’m going to create a new Google Analytics account, so here's the process:
Go to: Google.com/analytics
Sign in (top right) > Analytics > Admin (bottom left) > Create new account (where it says ACCOUNT below that there will be a drop down menu if your Analytics is already showing the data for a current website)
Account Name – used my main keyword > Website Name – used my main keyword > Website URL – inserted my website URL – ALSO changed the http:// to https:// in the drop down menu > Industry Category - selected my category > Reporting Time Zone – set to my time zone > Get Tracking ID > Accept Terms of Service > Copied the Tracking ID
Then I go to my website – Dashboard > All in One SEO > General Settings > Google Analytics ID – Pasted the Tracking ID in the box provided > Clicked Update Options
And next we’re going to set up Google Search Console
Step 2: Google Search Console
The reason for adding Google Search Console is so that you can analyse clicks from Google Search, get alerts for critical errors or issues and test whether Google can successfully understand your content.
Go to: Google.com/webmasters
SEARCH CONSOLE (green button)
ADD A PROPERTY – copy and paste my URL into the box provided and click ADD A PROPERTY
Once added > I’m not a robot – tick > VERIFY
You should come up with something like this:
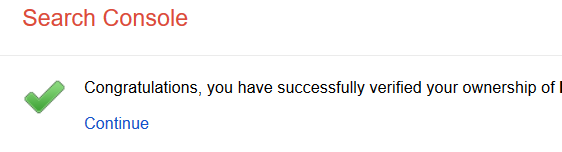
When you click on Continue you will see where your data will show up once you start getting visitors
On this page you will see to the right hand side and you will need to click > Sitemaps > ADD/TEST SITEMAP (red button) > Add/Test Sitemap just by adding sitemap.xml Submit > Refresh the page – top middle of screen > It should show on the next page as being added
Step 3: Connecting Google Analytics & Google Search Console
Now we’re going to connect these two accounts
Go back to Google Analytics > Admin > Property Settings > Adjust Search Console (scroll right down to the bottom) > It will show Search Console Settings – Search Console Site – Edit – click on Edit > Select your new site > Save > Popup box – Click OK > Go back to Analytics and clickDONE>SAVE (bottom of page – blue button)
What this has done is associated my Google Search Console with my Analytics.What that means is when I look at my website data > Google Analytics > Acquisitions (left hand side – scroll down) > Search Console > Landing Pagesit will show me all of my Google Search Console data inside of my Google Analytics
So that’s the end of that process and I’ll leave it there for today ….
That Completes Day 4 AND also completes Part 2 of Jays 4 Part Series
https://my.wealthyaffiliate.com/training/build-a-niche-site-2017-live-case-study-2-of-4
I consider that that’s all of the ‘background bones’ of my website – tomorrow we get stuck into creating and adding our content – this is the ‘good stuff’!
I’ll see you tomorrow with the next episode of Learn how to build a website yourself in WordPress in 2017.
And again, you’re most welcome to leave a comment or ask a question below if you wish to do so, thanks and …
Cheers,
Jacqueline
Join FREE & Launch Your Business!
Exclusive Bonus - Offer Ends at Midnight Today
00
Hours
:
00
Minutes
:
00
Seconds
2,000 AI Credits Worth $10 USD
Build a Logo + Website That Attracts Customers
400 Credits
Discover Hot Niches with AI Market Research
100 Credits
Create SEO Content That Ranks & Converts
800 Credits
Find Affiliate Offers Up to $500/Sale
10 Credits
Access a Community of 2.9M+ Members
Recent Comments
9


Hey there Debbie,
Thanks a lot for your lovely comment, I'm very happy to share the process while building this new website.
I'm learning as well while creating these posts and yes it is a great outline - I will be putting the daily recaps into a Word document for future reference. I'm glad it's helping others out as well.
Thanks again Debbie, cheers,
Jacqueline

Hey there Albert,
Thanks for the encouragement, it's very much appreciated. I'm glad you're enjoying the series, tomorrow is a 'goodie' as we're moving onto creating content.
Cheers and thanks again Albert,
Jacqueline

Hey there Michael,
You're absolutely right, it is critical to receiving traffic and SEO!
I hope you're enjoying the series with this new website build, cheers,
Jacqueline
See more comments
Join FREE & Launch Your Business!
Exclusive Bonus - Offer Ends at Midnight Today
00
Hours
:
00
Minutes
:
00
Seconds
2,000 AI Credits Worth $10 USD
Build a Logo + Website That Attracts Customers
400 Credits
Discover Hot Niches with AI Market Research
100 Credits
Create SEO Content That Ranks & Converts
800 Credits
Find Affiliate Offers Up to $500/Sale
10 Credits
Access a Community of 2.9M+ Members
you kinda confused me a bit yesterday. I want to add my home page and did not fully understand how to do that, could you go over that again please?