How to Find the Correct CSS Selector


Sometimes you want to edit an element on your website but it's not available to you in the normal tabs in the Appearance > Customise screens.
Your only option, in this case, is to add a bit of CSS to your Additional CSS tab. However, the biggest frustration you'll come up against is finding the correct CSS selector to edit.
Luckily there's a tool in most modern browsers that makes this step a piece of cake: the 'Inspect' tool.
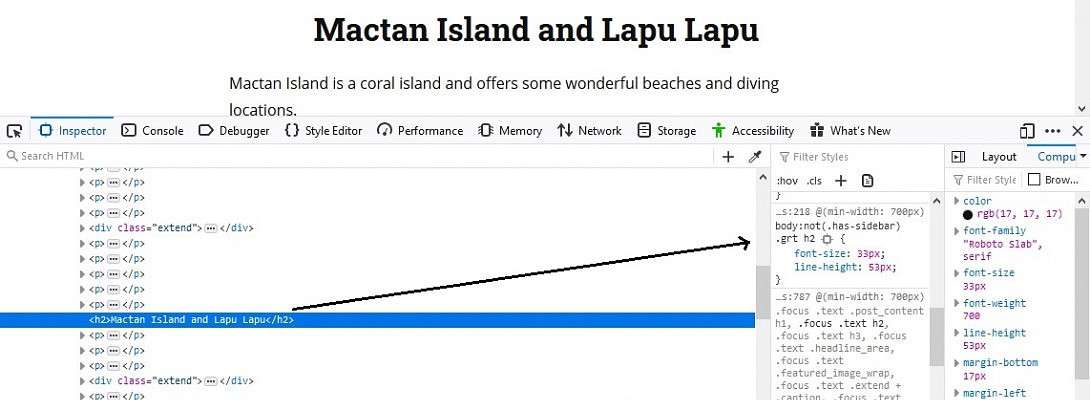
So here's what you do (refer to the screenshot below):
- Right-click on the element you want to edit (in this case the sub-headline) and select 'Inspect' (or 'Inspect element' if you're using Firefox). When the panel comes up you'll see that your element is highlighted.
- You can see it's an h2, so look for the h2 in the styles panel (the middle one in the image below)
- Copy the selector (.grt h2 in this case)
- Go to your Appearance > Customise screen in WordPress and click the 'Additional CSS' tab at the bottom.
- Paste in the selector you copied and add the property and value you want to edit. For example, if you wanted to change the font size of this sub-headline you would type the following:
.grt h2 {
font-size:25px;
}
- Click 'Publish' and you're done.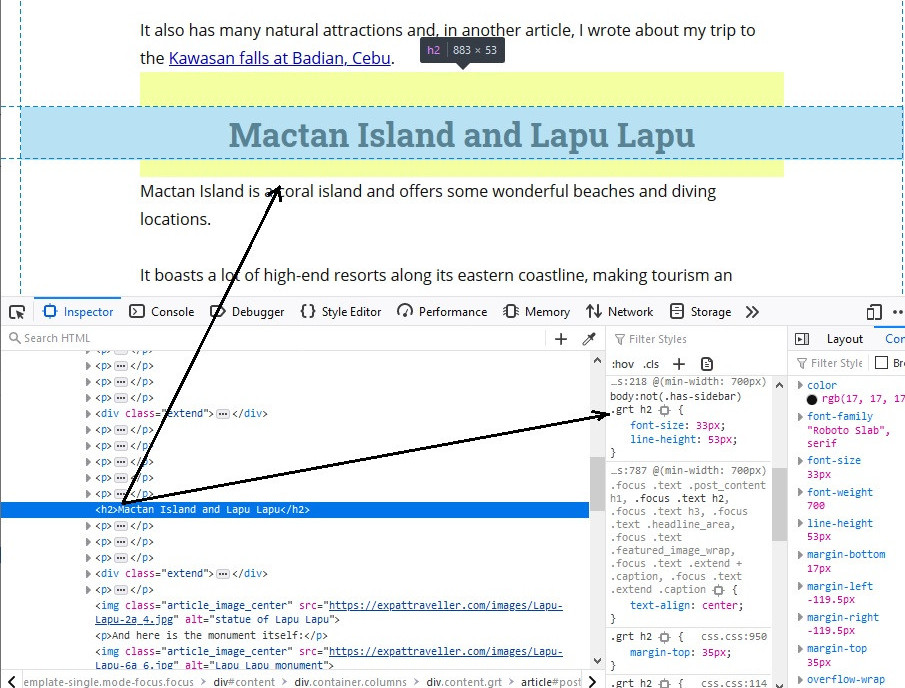
Hope that helps but let me know if I need to clarify anything.
Cheers,
Martin.
Join FREE & Launch Your Business!
Exclusive Bonus - Offer Ends at Midnight Today
00
Hours
:
00
Minutes
:
00
Seconds
2,000 AI Credits Worth $10 USD
Build a Logo + Website That Attracts Customers
400 Credits
Discover Hot Niches with AI Market Research
100 Credits
Create SEO Content That Ranks & Converts
800 Credits
Find Affiliate Offers Up to $500/Sale
10 Credits
Access a Community of 2.9M+ Members
Recent Comments
3


Join FREE & Launch Your Business!
Exclusive Bonus - Offer Ends at Midnight Today
00
Hours
:
00
Minutes
:
00
Seconds
2,000 AI Credits Worth $10 USD
Build a Logo + Website That Attracts Customers
400 Credits
Discover Hot Niches with AI Market Research
100 Credits
Create SEO Content That Ranks & Converts
800 Credits
Find Affiliate Offers Up to $500/Sale
10 Credits
Access a Community of 2.9M+ Members
Thank you for the tips!