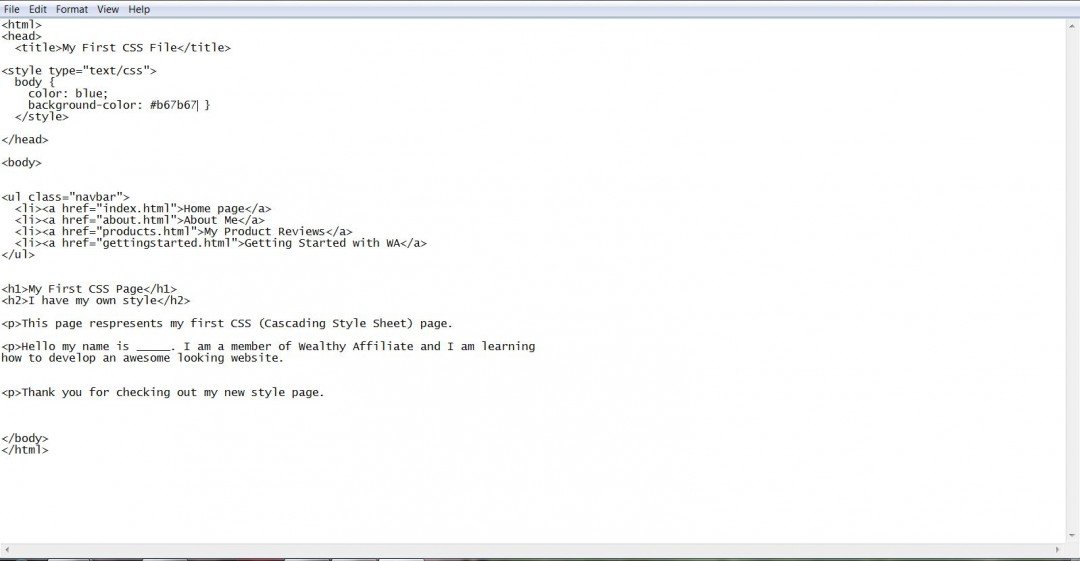
Keep your editor open. You do not want to close it as you are making updates and adding more code and content to your webpage. You can open it in your browser to see what you have created so far.
Note that the links in your navigation bar do not work yet, because those pages have not yet been created.
In this part of the tutorial, we begin to create our style sheet by first adding color. We will begin with first using a style sheet that is embedded in the HTML file.
Your style sheet is going in to be inside your <head> tag and after the <title> tag, as shown here:

Take note of where it indicates color. This is the color of your text. I chose blue, but you can change it to whatever color you like for your text.
I also want to encourage you to play around with your background color. I chose a random color, but using a color wheel tool such as the one below you can select your own background color:
http://www.sessions.edu/color-calculator
Again, save your HTML/CSS file and give it a file name using the .html extension. Find the file within your file manager and open it into your browser. If it does not open into your default browser, click and drag it to your browser.
The browser view should look like the following (may be different if you chose different color schemes within your style sheet):

My time to upgrade to Windows 10 came last night. I was so glad that you had written about how much time it took that I just went to bed and only had a short wait this morning for it to finally finish. So far (one hour) I like it. I gave Microsoft Edge a bit of a try but I then chose Google as my default browser as it seems much easier to work with because it is more intuitive.


