Step 5:


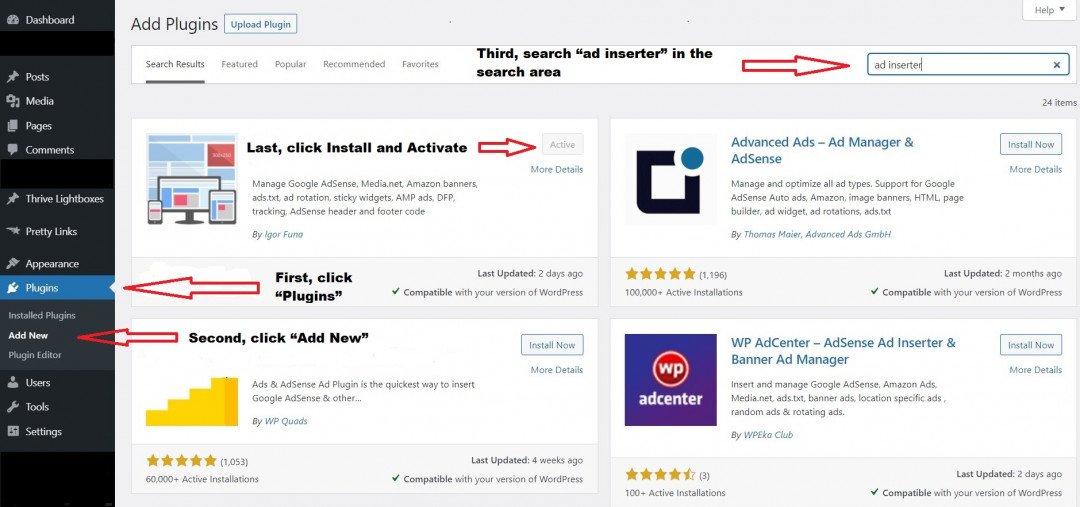
After copying ads.txt, you have to go to your WordPress website, click on Plugins, then click on Add New and search for the "ad inserter" plugins in the search area, then click on Install and Activate.

As shown in the pictures below:


Step 6:


In your WordPress site, the "Ad Inserter" plugin is already activated, so you can put ads.txt in it now.

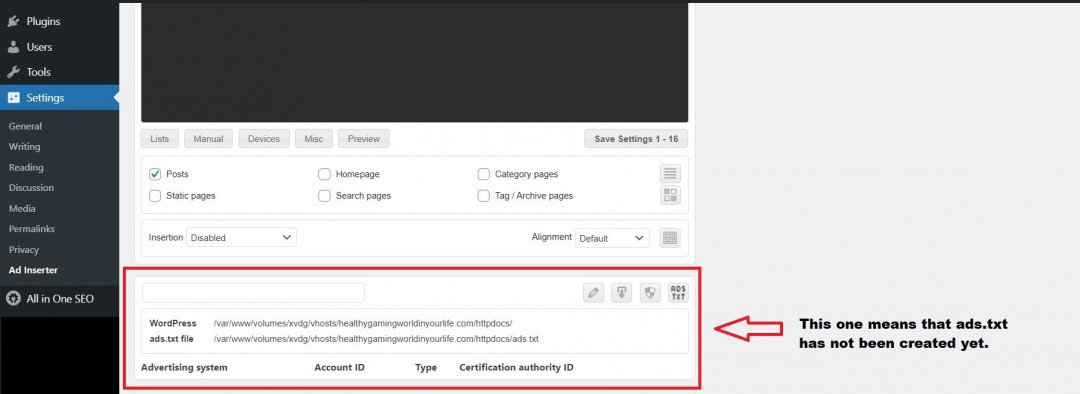
Now, go to Settings and click "Ad Inserter", you will see the word "ADS TXT" displayed after "Ad Inserter 2.7.0", just click it.

Use the mouse to scroll down, then you will see a large frame with the "WordPress" and "ads.txt file" URLs on it.

At this point you can paste the Google AdSense ads.txt you just copied into the large frame and you are done.

Please remember to click on the checkmark icon to "Save" it.

As shown in the pictures below:

In ad inserter, a sample of ads.txt was not created.

In ad inserter, a sample of ads.txt has been created.


Join the Discussion
Write something…
Recent messages
This tutorial allowed me to learn how to create Google Adsense ads.txt step by step.
Reply
Nicotee Premium Plus
Hi Natalie,

Thanks for visiting my tutorial!

Wish you successfully create ads.txt on your WordPress website.
Reply
I successfully created the ads.txt file on my WordPress site. Thanks!
Reply
Nicotee Premium Plus
Hi Faith,

I'm glad that you found this tutorial useful :)
Reply
Jocelyn30 Premium
Good one Nico!
Tahanks
joce
Reply
Nicotee Premium Plus
Hi Jocelyn,

You're welcome. Hope you enjoy my tutorial!

All the best to your online business :)
Reply
Jocelyn30 Premium
Likewise Nico
Reply
Thanks for making this complete tutorial, it’s exactly what I was looking for!
Reply
Nicotee Premium Plus
Hi Christopher,

You're welcome.

I'm glad that my tutorial can help you out.
Reply
CherryRed20 Premium
Thank you so much, Nico.

As this is useful information.

Myra
Reply
Nicotee Premium Plus
Hi Myra,

You’re welcome.

It’s my pleasure to helping people out :)
Reply
Top