Step 2
Next step is to create a text widget.
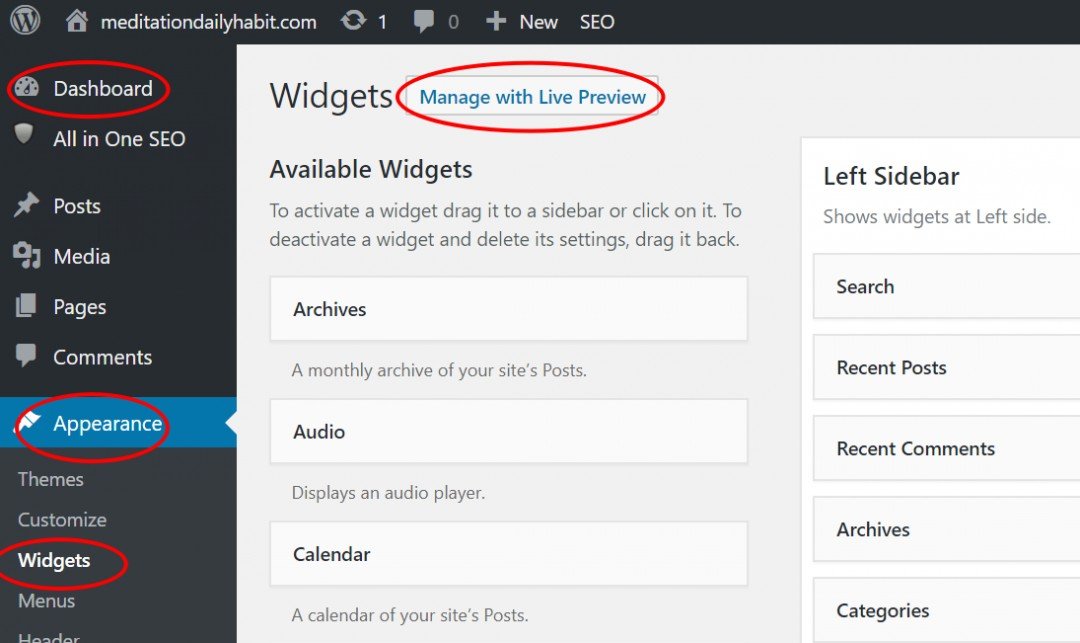
Go to your "Dashboard" >> "Appearance" >>"Widgets" and then choose "Manage with live Preview"
Choose where you want your widget to be placed (right/left sidebar, footer), then click on 'Add a Widget' and then on 'Text':
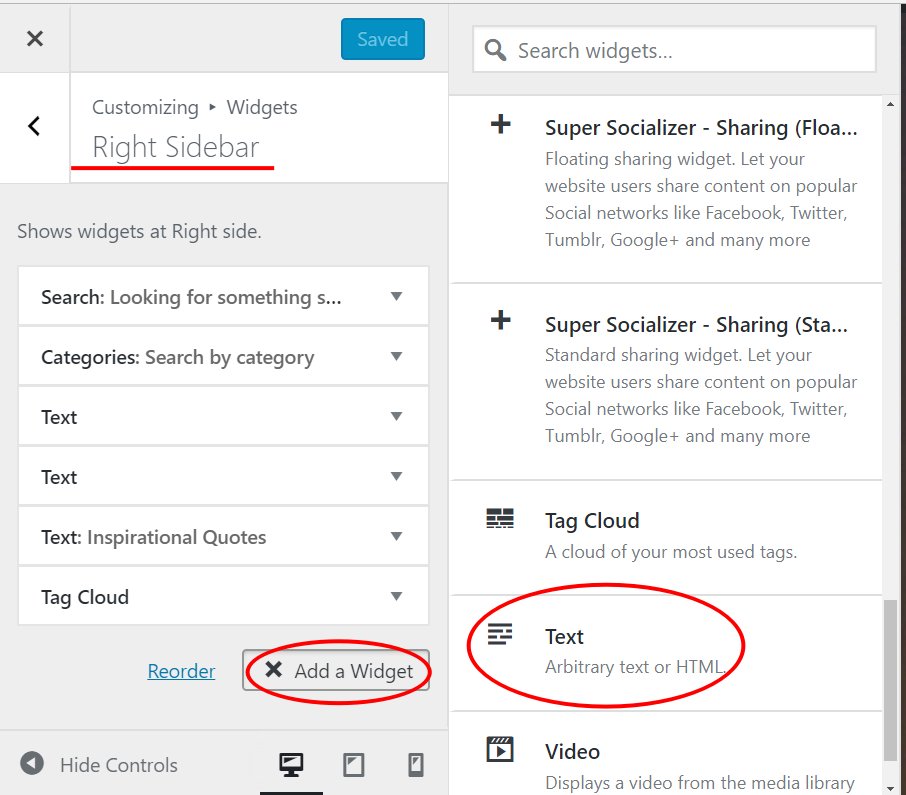
A small window will open. First thing to do is to choose "Text".
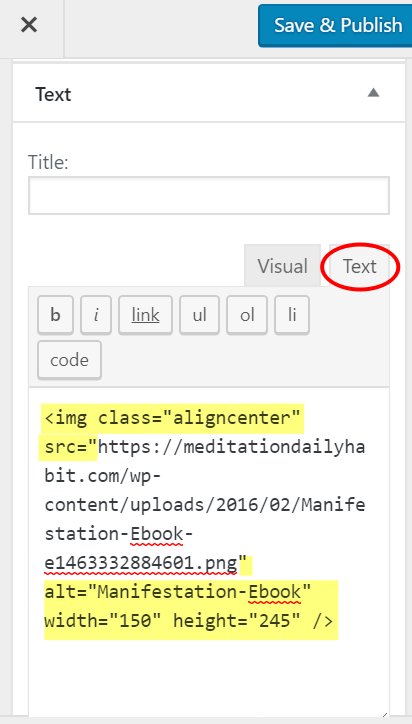
In the image below you can see the code that loads the image into the widget. The part that is not highlighted is the URL that we took from our image library instep 1.
The highlighted parts are the following:
<img class= "aligncenter" src= "image url" alt= "write a title" width= "170" height= "245" />
Clarifiction: Inside of the quotes of thealt attribute you should write an alternative title for your image. With the width and height attributes you can adjust the size of your image.
One last step and we're ready. Click on Next Page!