Keyboard Cleaning


THE VAGARIES OF THE COMPUTER KEYBOARD
As a computer keyboard is something we all use I have no compunction about writing this post. I address this to the physical keyboards of laptop computers rather than the chunky keyboards of yester-year which were/are used for full size PC’s. They all depend on :-
- Cleanliness
- Regular service
- A basic understanding of the technology involved (helpful).
The laptop computer keyboard is a work of art and technology. It is also the perfect magnet for dust, food particles and the occasional drink. If you don’t have the occasional catastrophe you will still probably notice that odd keys slow down or do not react in a positive manner by placing the letter you require when and where you want it on your document. The reason is that over time the keyboard picks up the detritus of our living and working conditions and gradually some of those fragments gum up the works.
Solution:-
- Buy a new keyboard.
- Send the affected keyboard to the repair shop and await its return.
- Clean the damn thing yourself!
As a Scotsman, of course I chose the last option on the list!
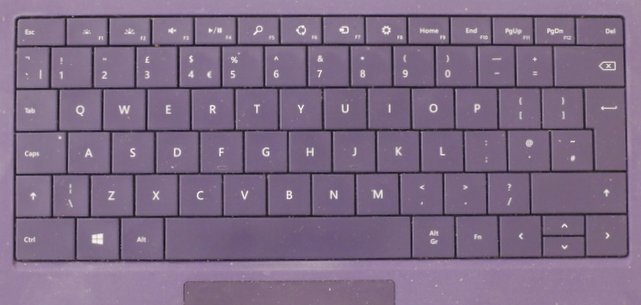
Here is an exterior shot of my keyboard looking ‘virgo intacto’ state. At least it looks that way.
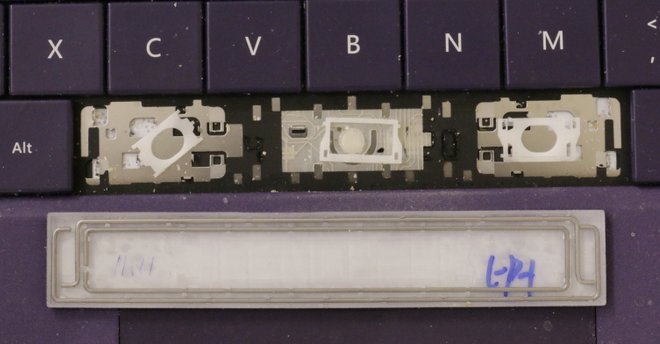
My problem was that the spacebar had stopped working and therefore there were no spaces between my words in anything I wrote. I started imposing the spaces manually; clicking in after the last letter of each word and then pushing everything to the right – murder !!!
Reluctantly, I decided to remove the offending key and was in no way prepared for what I was about to find. This is my spacebar and the mechanism that is revealed when it is removed:-
 The small pieces, made of ‘white ‘nylon-type’ material number three in total. I naturally thought that they fitted something like this, but after much research I discovered that the left piece is supposed to fit into the central white piece. When the two pieces are combined in the correct way they are referred to as ‘hinges’ and they do work like a hinge in some ways. They also look ‘symmetrical’. None of the pieces are symmetrical although you need a microscope to see that they are not. The left-hand white piece not only fits into the central white piece but it does so by the correct locating of two pivot pins which when fitted to the keyboard, allow the hinge to open about ¼ inch. The piece, properly assembled is fitted to the keyboard by easing it onto positioned metal ‘lugs’ in the required positioned.
Here is an enlargement of the pieces of the hinge:-
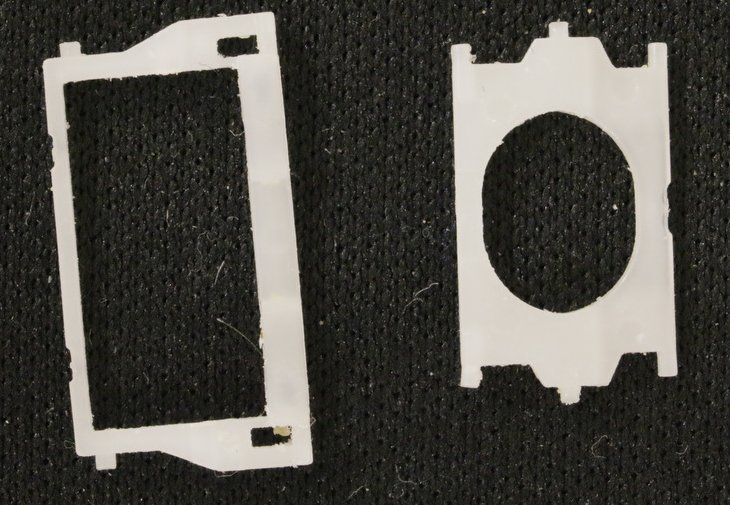
Note that each piece is asymmetrical and that the two pivot pins of the right-hand piece fit into the holes in the left-hand piece which you cannot see either here or with the naked eye. The magnification here is approximately X30. Also note that provided each piece is rotated the same way then each piece has two possibilities of fitting together correctly!
This is what the hinge should look like if you assemble it correctly:-
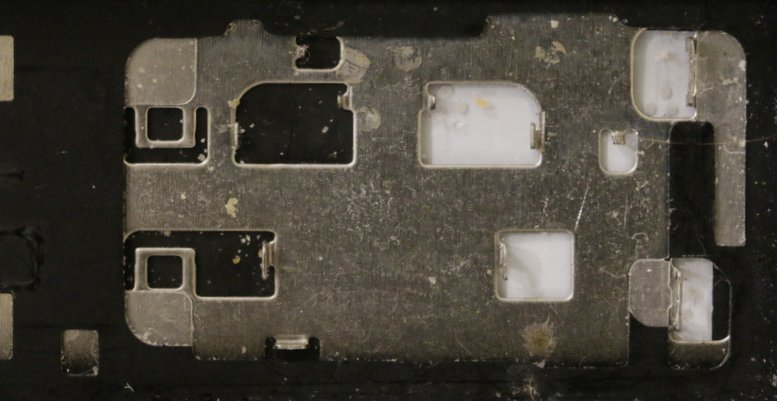
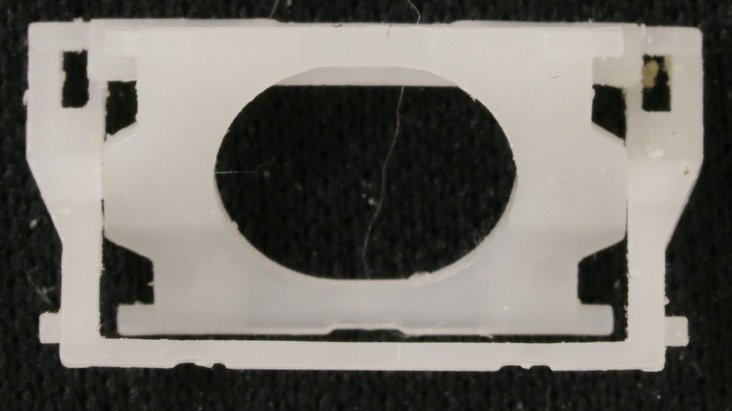
Now let’s look at the plate that you find on the keyboard to which these hinges attach.
Now for the hinges themselves, correctly fitted over their locator lugs. They should look like this:-
Now we just have one problem remaining. Fitting the key to the keyboard with all the necessary mechanisms engaged.
First, the underside of the key:-
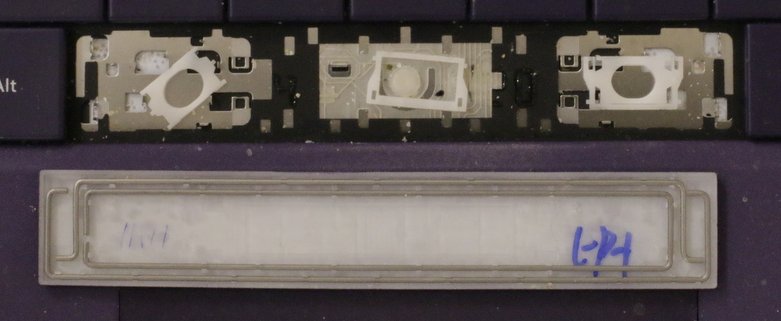
Ignore the hinge in this picture. For the correct positioning of the hinges refer to the previous picture. Just look at the underside of the spacebar. It consists of three wires. The top and bottom wires locate into lugs on the keyboard. The central rectangular wire is there purely to stiffen the plastic key. However, here’s the problem. To fit the key properly you have to turn it through 180 degrees left to right (or right to left). I have lifted the top and bottom wires so that you can see them. The bottom wire attaches to the lugs that lie above the hinges; the top wire locates the lugs that are below the hinges. The whole thing ‘concertinas’. The first wire, top or bottom is reasonable easy to fit because you can see it and ‘get at it’. However, once correctly positioned and fitted the top face of the space bar is very close to the surface of the keypad and, as we say in England, ‘a right sod’!
So there you have it. Microscopic hinge fittings and torsion springs and a problem in miniature three dimensional mechanics and all this to get the detritus out of your keyboard.
Technical Details:- My laptop is a Microsoft Surface Pro 3
I accomplished the task over several days.
I think I have retained some of my sanity! (All though the judges are still out on this).
Join FREE & Launch Your Business!
Exclusive Bonus - Offer Ends at Midnight Today
00
Hours
:
00
Minutes
:
00
Seconds
2,000 AI Credits Worth $10 USD
Build a Logo + Website That Attracts Customers
400 Credits
Discover Hot Niches with AI Market Research
100 Credits
Create SEO Content That Ranks & Converts
800 Credits
Find Affiliate Offers Up to $500/Sale
10 Credits
Access a Community of 2.9M+ Members
Recent Comments
1
Join FREE & Launch Your Business!
Exclusive Bonus - Offer Ends at Midnight Today
00
Hours
:
00
Minutes
:
00
Seconds
2,000 AI Credits Worth $10 USD
Build a Logo + Website That Attracts Customers
400 Credits
Discover Hot Niches with AI Market Research
100 Credits
Create SEO Content That Ranks & Converts
800 Credits
Find Affiliate Offers Up to $500/Sale
10 Credits
Access a Community of 2.9M+ Members
OMG! I will just but a new one. Thanks.