If you're tech-savvy and manage your own domain settings, follow these steps to optimize your email authentication:
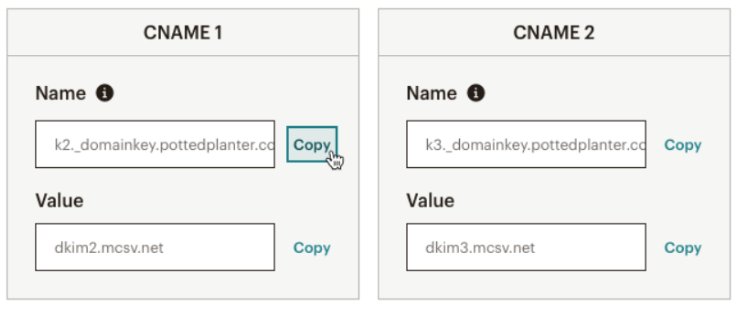
- In Mailchimp, you'll encounter prompts to add CNAME1 and CNAME2, essentially unique identifiers for your emails.
- Copy the specific alphanumeric values provided by Mailchimp for these identifiers.
- Paste these values into the corresponding fields within your website's domain settings. Consider this process akin to configuring a cryptographic key unique to your domain.

These codes serve as cryptographic signatures tailored to your domain, enhancing the precision of email authentication. By seamlessly integrating these identifiers, you establish a secure and personalized connection between your website and Mailchimp, contributing to heightened email deliverability and reinforcing sender authenticity.
*If you're not too comfortable handling technical stuff on your website, no worries! You can contact Wealthy Affiliate SiteSupport by submitting a ticket. In the ticket, select your website linked to your Wealthy Affiliate-supported email and ask if they could help by adding these specific CNAME records to your domain.
"Hello, can assist me in adding 2 CNAME records to my domain.
CNAME 1
Name:
k2._domainkey.yourwebsite.com
Value:
dkim2.mcsv.net
CNAME 2
Name:
k3._domainkey.yourwebsite.com
Value:
dkim3.mcsv.net
I am attempting to authenticate my domain emails with MailChimp."
After reaching out to Wealthy Affiliate SiteSupport for assistance, they'll take care of adding those new CNAMEs for you.


