I Was Stuck, Frustrated & lost — Then AI Saved My Migration


Published on June 1, 2026
Published on Wealthy Affiliate — a platform for building real online businesses with modern training and AI.

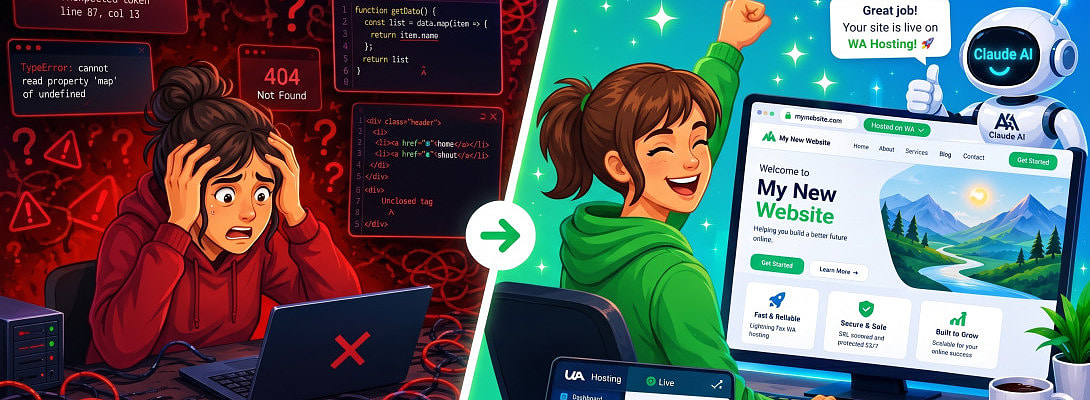
My Story
Let me be honest with you — when I decided to move my website from GoDaddy to Wealthy Affiliate, I had no idea what I was getting into.
I had my backup files downloaded. I had WinSCP open. I thought, "How hard can this be?"
Pretty hard, as it turned out.
I uploaded all my files via FTP, pointed my domain to WA, opened my browser with excitement — and saw WA's default "Welcome to Your Premium Website" page staring back at me. Not my site. Not my content. Just a blank placeholder.
Then came the confusion. Where is phpMyAdmin on WA? Why is the folder called httpdocs and not public_html? Why is my IP being blocked? Why is my database not importing?
I spent hours going in circles, second-guessing every step. It was frustrating. It felt like every solution created a new problem.
Eventually I turned to Claude AI (claude.ai) for help. Claude reviewed my screenshots, spotted my mistakes immediately, and walked me through every single step in plain language. Within a couple of hours my site was fully live on Wealthy Affiliate hosting — exactly the way it looked on GoDaddy.
That experience is why I wrote this guide. I don't want you to go through the same frustration I did. Here is exactly what to do, including every gotcha I ran into along the way.
What You Need Before Starting
- A full backup of your GoDaddy website (files + database)
- A Wealthy Affiliate Premium membership
- WinSCP — free FTP client from winscp.net
- 7-Zip or WinRAR to extract your backup
- Your GoDaddy login to update nameservers
- About 2-3 hours of time
Understanding Your GoDaddy Backup
Your GoDaddy backup contains two critical things:
- wp-content folder — all your themes, plugins, images, and uploads
- APP-DATA.SQL — your entire database (every post, page, user, and setting)
Everything else is standard WordPress core files. Keep both of the above handy.
Step 1 — Extract Your Backup
Right-click your downloaded .tar.gz file and extract it using 7-Zip or WinRAR. You should see wp-admin, wp-content, wp-includes folders and several PHP files including APP-DATA.SQL.
Step 2 — Add Your Domain to Wealthy Affiliate
- Go to Websites → Site Manager
- Click Build a New Website
- Choose "On a domain I own" and enter your domain
- Let WA install a fresh WordPress
Important: WA uses httpdocs as the web root — not public_html like most other hosts. This tripped me up at first.
Step 3 — Get Your FTP Credentials
- In Site Manager click your domain → Details
- Note your FTP Username and FTP Password
- Also save your WordPress admin credentials shown on that page
Ready to put this into action?
Start your free journey today — no credit card required.
Step 4 — Upload Files via WinSCP
- Open WinSCP and enter your FTP credentials to connect
- On the right panel (server side) navigate to httpdocs
- On the left panel (your PC) navigate to your extracted backup folder
- Upload these items:
- wp-content folder ← most important
- wp-admin folder
- wp-includes folder
- All .php files and .htaccess
- Skip wp-config.php for now
- Choose Yes to All when asked about overwriting
The wp-content folder can be over 1GB so give it time.
Quick FTP verification tip: After uploading, create a small test.txt file on the server, visit yourdomain.com/test.txt in your browser. If it shows — FTP is working. Delete it after.
Step 5 — Import Your Database (The Most Important Step)
This is where most people get stuck — including me. WA does not show phpMyAdmin directly in the dashboard. Here is the workaround:
Install the WP phpMyAdmin plugin:
- Log into WordPress at yourdomain.com/wp-admin using the WA credentials from Step 3
- Go to Plugins → Add New
- Search for "WP phpMyAdmin" by Puvox Software
- Install and Activate
Fix the IP restriction error:
When you click "Enter local phpMyAdmin" you will likely see an IP not allowed error. Don't panic — easy fix:
- Go to WP-phpMyAdmin in the left WordPress menu
- Uncheck "Restrict access only to current IP"
- Save, then click "Enter local phpMyAdmin" again
Re-enable this checkbox after you're done for security!
Drop the empty tables:
- In phpMyAdmin click your database name in the left sidebar
- Check All tables → With selected → Drop → Confirm
This is safe — WA's tables are empty placeholders. Your real data is in APP-DATA.SQL.
Import your database:
- Click the Import tab
- Choose your APP-DATA.SQL file
- Click Go
- Wait for the green success message ✅
Step 6 — Verify Your Site URLs
- In phpMyAdmin click wp_options → Browse
- Find siteurl and home rows
- Both should show your correct domain with https://
- If not, click Edit and update them
Step 7 — Update Nameservers in GoDaddy
- Log into GoDaddy → My Domains → your domain → DNS
- Change nameservers to:
- Save and wait 24-48 hours for DNS propagation
Step 8 — Test and Clean Up
Once your site loads:
- Check all pages, images, and forms work
- If links are broken install Better Search Replace plugin to update old URLs
- Delete APP-DATA.SQL from your server via WinSCP — it should never be publicly accessible
- Go to WA Site Manager → Details → Clear Cache
- Re-enable IP restriction in WP-phpMyAdmin and consider uninstalling the plugin
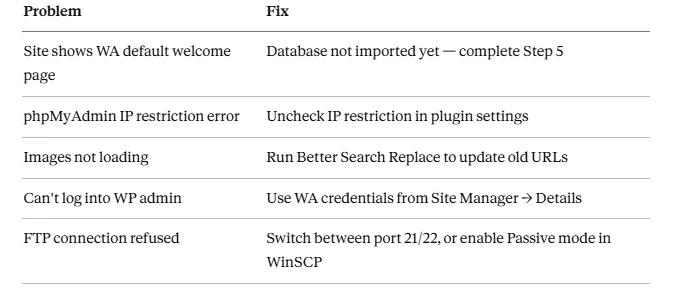
Common Issues and Fixes
Quick Checklist
- Extract GoDaddy backup
- Add domain to WA Site Manager
- Get FTP credentials from Details page
- Upload files via WinSCP to httpdocs
- Install WP phpMyAdmin plugin
- Disable IP restriction temporarily
- Drop empty WA database tables
- Import APP-DATA.SQL
- Verify siteurl and home in wp_options
- Update nameservers in GoDaddy11Test site and clean up
Final Thoughts
Once I had the right guidance this migration was actually straightforward. The frustration came from not knowing the WA-specific quirks — httpdocs instead of public_html, no direct phpMyAdmin access, the IP restriction issue. Now you know all of them before you start.
A huge thank you to Claude AI at claude.ai — it reviewed my screenshots in real time, caught my mistakes instantly, and explained every step in plain language. If you get stuck at any point during your migration I highly recommend opening a chat with Claude. It's like having a patient tech expert available any time, completely free.
You've got this. Good luck! 🙌
Written from real experience migrating a WordPress site from GoDaddy to Wealthy Affiliate hosting, May 2026.
Share this insight
This conversation is happening inside the community.
Join free to continue it.The Internet Changed. Now It Is Time to Build Differently.
If this article resonated, the next step is learning how to apply it. Inside Wealthy Affiliate, we break this down into practical steps you can use to build a real online business.
No credit card. Instant access.