How to Setup an Email List & Pop-Up Subscriber Box


Published on October 21, 2015
Published on Wealthy Affiliate — a platform for building real online businesses with modern training and AI.

So one of the things that can really set your site apart from the others is setting up an email subscriber form. Not only does this add value and trust in the eyes of your viewer but it is also a chance to get their email by giving them some sort of free bonus for subscribing.
This process gets really interesting when you begin to build a significant email list... you then can begin to send out emails about product deals, new posts, and other things related to your niche. This gives you an awesome opportunity to make money through affiliate marketing.
I mean, im sure you have heard the many stories of people who have built an email subscriber list who make tons of money marketing products to their niche lists. The main thing stopping other people from building an email list, is that the process of creating a way for people to sign up to a list can seem daunting.
But im here to show you that isn't as hard as you think, so without further a due here is my guide about How to Setup an Email List & Pop-Up Subscriber Box...
Part 1: The 4 Steps to Create an Email Sign-Up List
Step 1: Download MailChimp Plugin
The first step is to go to your plugins menu, click on the "Add New Plugin" button. Search for a plugin called MailChimp and download the one called MailChimp for WP.
After downloading and installing the plugin, its time to setup your free account with MailChimp. Head to google, then search and go to the MailChimp site. Once on the site, go through the simple process of creating your free MailChimp account.
Step 2: Linking to Wordpress
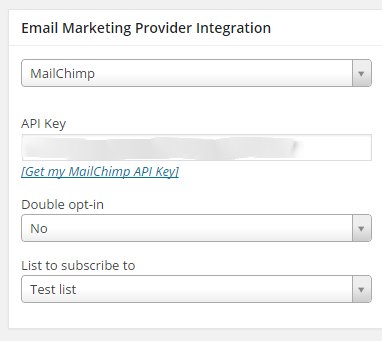
Now that you have created your free MailChimp account, head back over to your Wordpress dashboard. From there click on the MailChimp for WP menu, in the side bar with the red icon. Right away you will see a section where you will need to place an API key.
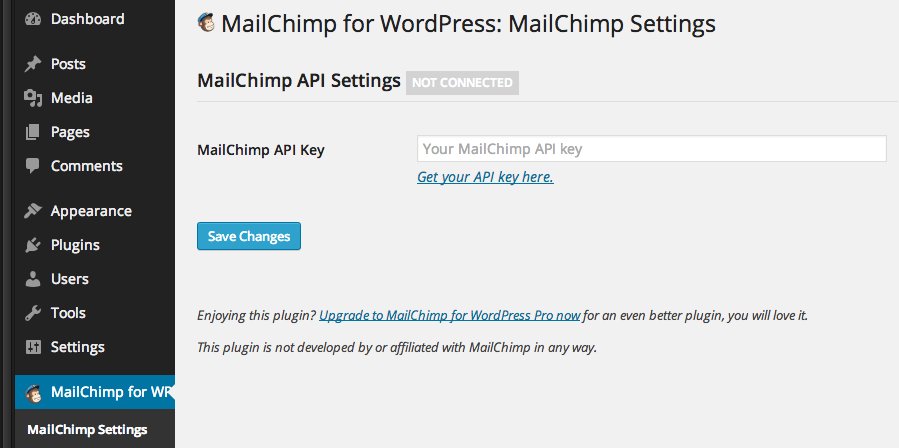
To get your MailChimp API key, click on the "get your API key here" link right below the box where you would put the API key. This will take you to the MailChimp login page. After signing in click on the button that says "Create A Key." Copy the key then head back to your Wordpress dashboard and paste the key in the API key box.
Ready to put this into action?
Start your free journey today — no credit card required.
Step 3: Creating A List
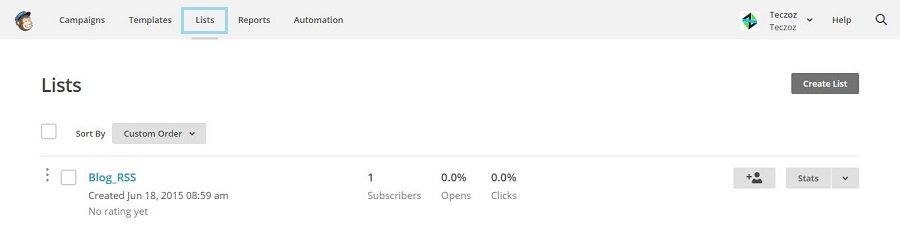
For this next step we will be creating the email list on MailChimp. This way when people sign up to your email list... all of their emails gather in one place and from there you can send out messages to all of your subscribers.
So head over to your MailChimp account. and click on the "Lists" section. Now click on the button "Create List" and go through the process of filling out the information for your list.
Step 4: Setup Sidebar Signup
Now that we have those steps out of the way, its time to begin adding a way for people to subscribe. After all that's what your looking for right? Well head over to your MailChimp for WP menu and click on the forms section. Now under the "Load form styles" section, select the option "Yes, load basic form styles."
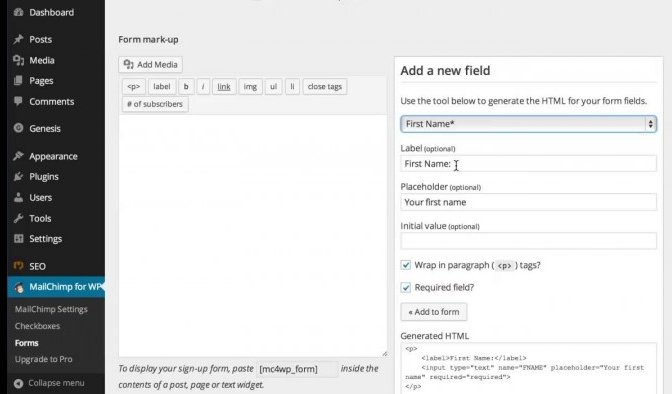
At this point start adding the fields that you want such as first name, email address, and a submit button. Make sure you don't forget to include the the submit button though. Once you add the fields you want, head to the bottom and click save.
Step 4: Adding to Your Site
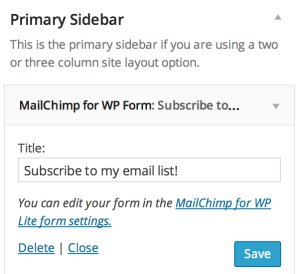
Congratulations! You have now setup a way for people to subscribe to your content! Now its time to really set your self apart from others.
Part 2: The 3 Steps to Add a Pop-Up Subscriber Form
Step 1: Download OptinCat Plugin

Step 2: Creating the Pop-Up Form
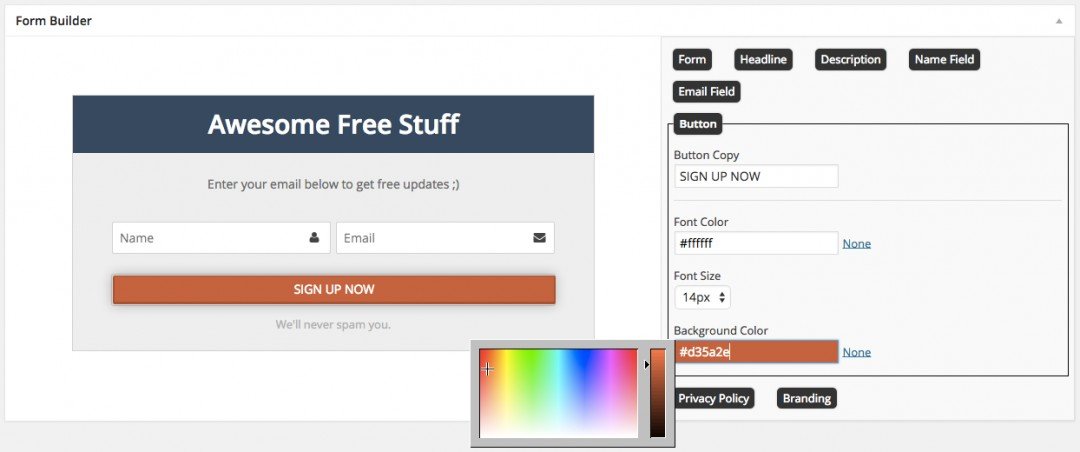
Congratulations! You have now setup an awesome pop-up form on your site.
Final Thoughts...
If you have any questions about how to create an email list, then just leave a comment and I will get back to you as soon as I can!
Share this insight
This conversation is happening inside the community.
Join free to continue it.The Internet Changed. Now It Is Time to Build Differently.
If this article resonated, the next step is learning how to apply it. Inside Wealthy Affiliate, we break this down into practical steps you can use to build a real online business.
No credit card. Instant access.