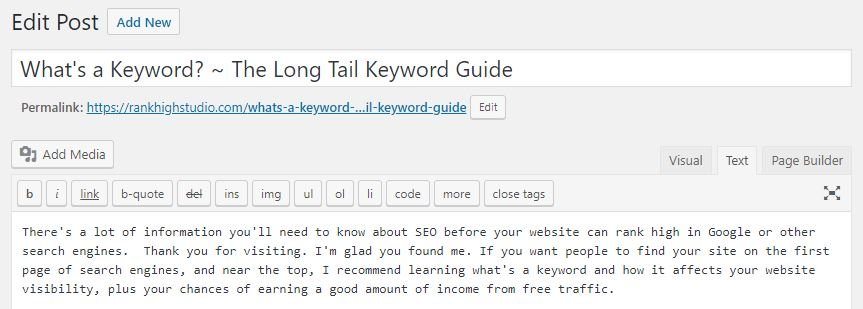
- Create your post. When you want to add your image, click on the "Add Media" button. (located near the top left in WordPress) See above image.
- On the Add Media page, click on the Upload File tab.
- Now click on the select file to choose your image.
- Locate the folder where you are saving your images.
- Locate the image you wish to add to the post.
- The image is now uploaded to your website media library.
- On the right sidebar in your image library; Use the keyword in the title.
- On the right sidebar in the image library; Use the keyword in the Alt Text.
- On the right sidebar in the image library; Align, link, and pick your image size.
- Post your post.
I hope this tutorial has help you to understand how to optimize your images for your website. If you have any questions, please ask me in the comment section below.
Did you like the course? If so, please click on the green like button, share it with someone, and leave comments.
How can I make this tutorial better? Share your thoughts.
Join the Discussion

Harrysastar2
Premium
Hi, LeNard, just a couple of points you may consider that may improve your tutorial.
Choosing the image size doesn't actually compress it, you need a plugin or image compression tool such as Tinypng, which I prefer. as it saves installing another plugin. I did some training on Tinypng which may interest you. Compressing Images Using Tinypng Reducing the size of the image to what you require before compressing is always a good idea. You can also ensure that your image remains the size you have chosen.
By going to your Dashboard>Setting>Media and entering a 0 digit in all three sizes: Thumbnail, Medium, and Large, and checking the box Crop Thumbnails, your image will remain the size exactly as chosen without the need to change it in the image size drop down menu.
If you do need to change the size you can edit it in the visual editor.
JPEG is fine if you're using images "as is",but if your using layers to build an image you need PNG, as JPEG doesn't support transparencies..
There are differences of opinion on using keywords in the title and alt text. Some believe Google may class it as "Keyword Stuffing".
I always aim to keep keywords at no more than three percent in the content, this allows me to use the keywords in the alt text and still remain within the recommended maximum of five percent. Yoast SEO will give you an indication of percentage of keywords in your content.
Hope this helps. Best wishes.


XavierPerez1
Premium
Thanks for the examples for each of these. I sort of knew about them but not totally. I really appreciate the descriptions. Thanks again.
Xav.
Xav.