I’ve created a couple of dummy posts. I want to jump from the post with the title “Page Jump Test” to the third sub-heading on the post with the title “Page Jump Tutorial”. To do that, I have to set the target ID in the post I want to jump to (post with the title “Page Jump Tutorial).
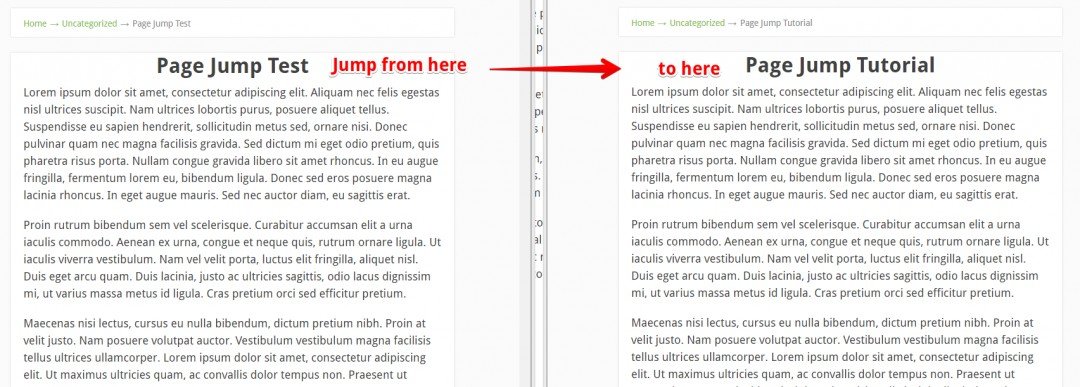
I want it to jump slightly above the sub-heading, so when the reader jumps to it, the title “Third Sub-Heading” is visible. To set the target, we need to customize the target code from page 1.
I replace “unique-name” with the following ID. Since it’s jumping to the third sub-heading, I give it the ID “sub3”. You can name the ID anything you want, but for better association, I recommend you choose something you can best identify. For example, using the feature list in a product review, it could be features, featurelist or prodfeature. You get the idea.
The finished code looks like this:

If you’ve read my other tutorial on how to create a page jump on the same post/page, you’ll notice that instead of “name” I’m using “id” in the target code. Using “name” works fine within the same page but WordPress can’t follow it when you “jump away” if you use “name”.
It would get stuck in a loop to scan the same post/page and the page jump wouldn’t work. Using “id” helps WordPress to scan other post/pages you jump to.
If you haven’t already, you need to write the code into a text file or notepad. This makes it easy to copy and paste it when needed.
And that’s how it’s added to the post/page.
1) Log into WordPress and go to the post or page you want to page jump from. Click “Edit” to get to the WP Editor.
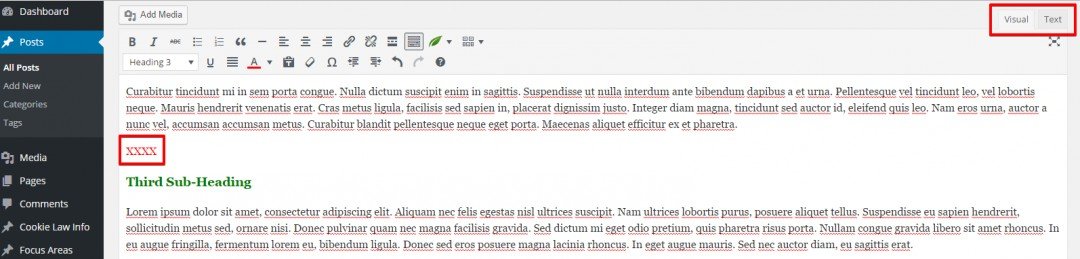
2) Click on the “Text” tab to switch into HTML mode. Now the Chinese upside down part begins. If you have a hard time locating the spot you want to put the target ID code, simply go back to the “Visual” tab and add a few XXXX at the page jump landing spot. This will help you find the right spot in the code salad.
3) Copy your code from the notepad or any text file you typed it in. Highlight the code snippet, right mouse click and then “copy”.
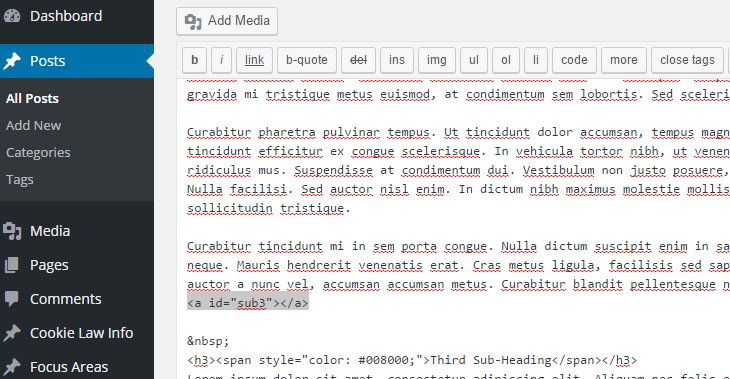
Find the spot (look for XXXX if you added those), highlight XXXX. Right click on the highlighted text and click “paste”. This adds the code exactly where you want the page jump to land.
Before pasting:

After pasting:
4) Click “Save Draft” or “Update”, if the post/page is already published.
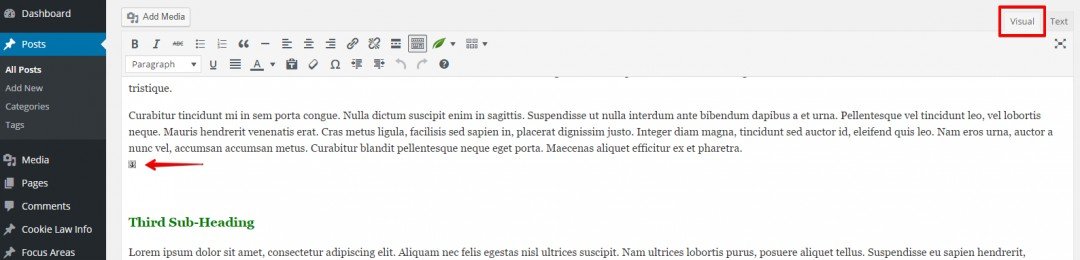
5)Go back to “Visual” to check if the code has been placed correctly. You should now see a little grey square box with an anchor symbol. Don’t worry, only you are seeing this and it lets you know that you’ve added an anchor/target ID/page jump spot there.
6) Delete “XXXX” or any other stuff you’ve added to help you find the right spot. It’s not needed anymore. Click “Save Draft” or “Update” again.
The first part of the page jump is done. Now we need to set the link in the other post and point it to this spot. We’re going to do this on the next page.