In Gutenberg - Parts 1, 2, and 3, we built a page using a combination of the various block and editing modes: Visual Editor, Code Editor, Classic Paragraph, and Paragraph.
In Gutenberg - Part 4, we'll use only the Visual Editor and Custom HTML block, which is very much like the Text Editor in pre-Gutenberg, allowing us to use a minimal amount of HTML, and formatting the page using mainly CSS, This lets us dispense with all the other various block, apart from the Image block, which we'll come to at the end of this tutorial,
Purely for illustration purposes, and to help those with little, or any, knowledge of HTML and CSS, this is an exercise in using both. All the HTML and CSS code can be copied and pasted, and the attributes changed to suit your requirements and help show how each one can be used to improve the appearance of your posts and pages.
Due to image size restrictions and space, it is not feasible to show the full page as we format each individual block, as you can see in the image below: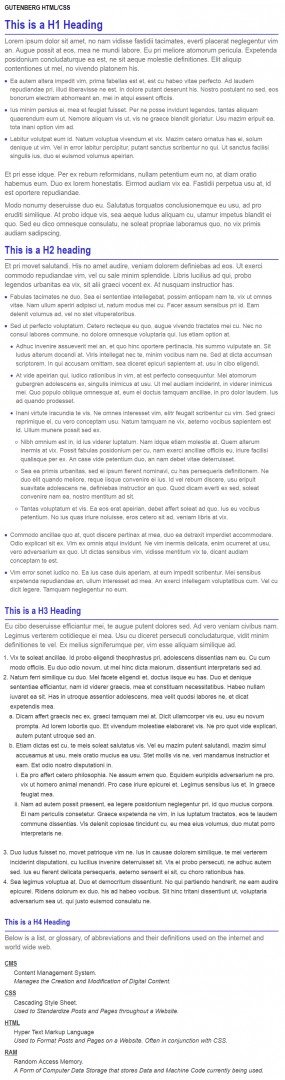
As you can see, it doesn't show very clearly the changes that have been made to the original page as per my theme's stylesheet using CSS, so I will illustrate each block, as it appears, both pre and post formatted.
Want to give it a try? Then let's get started.